


Step 1: Deploy the OVF file
You must first use Citrix XenCenter to convert the open virtualization format (OVF) package to a format that can be used with Citrix XenServer, and to deploy the fortiadc-vm-xen.ovf template package.
To deploy the virtual appliance:
- On your management computer, start Citrix XenCenter.
- In the pane on the left side, double-click the name of the XenServer to display the authentication dialog.
- Specify the Citrix XenServer server IP address or FQDN, username, and password to log in.
- Go to File > Import.
- Click the Browse button to select the fortiadc-vm-xen.ovf template package, then click Next.
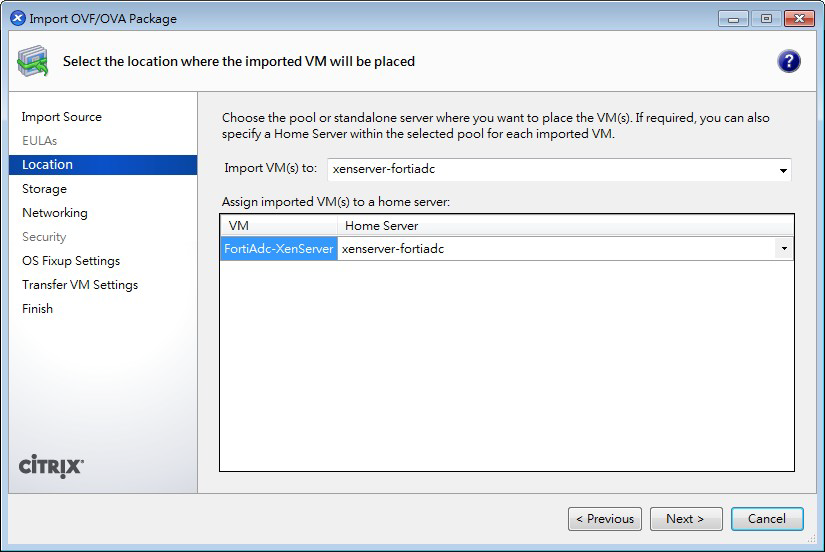
- Confirm the XenServer where you want to deploy FortiADC-VM, then click Next.
- If you have multiple storage repositories, such as if you have an NFS or Windows (CIFS) share, select where the vDisks will be physically stored, then click Next.
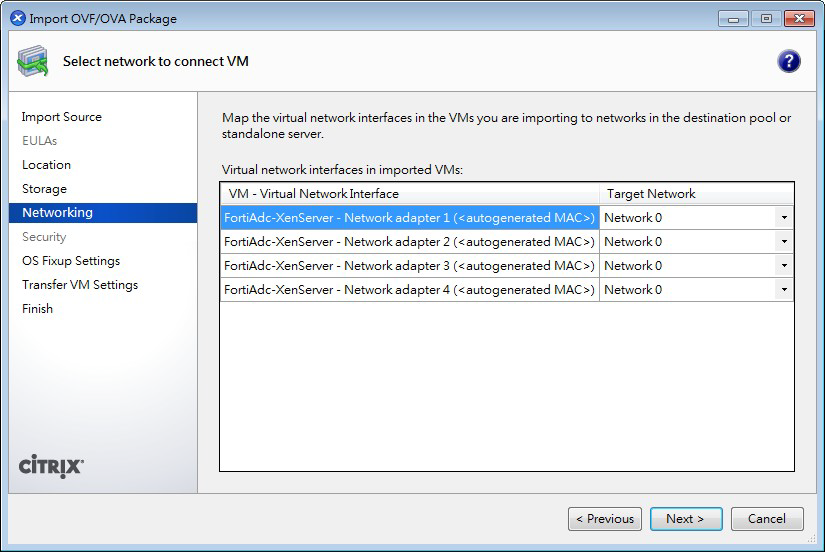
- Configure how each vNIC (virtual network adapter) in FortiADC-VM will be mapped to each vNetwork on that XenServer, then click Next.
- Click Next to skip OS fixup.
- Configure temporary network settings that XenServer can use to download FortiADC-VM, then click Next.
- Click Finish to send the FortiADC-VM image and its VM settings to XenServer.


An import wizard will appear.


When complete, the deployment appears in the list of deployed VMs for that XenServer, in the pane on the left side of XenCenter.
|
|
Do not power on the virtual appliance until you have completed the following steps:
These settings must be configured in the VM environment, not the FortiADC OS. |