


Configuring Azure
- Login to the Azure portal. If you do not yet have a directory or need to create a new one, go to Azure AD and click Create a tenant.
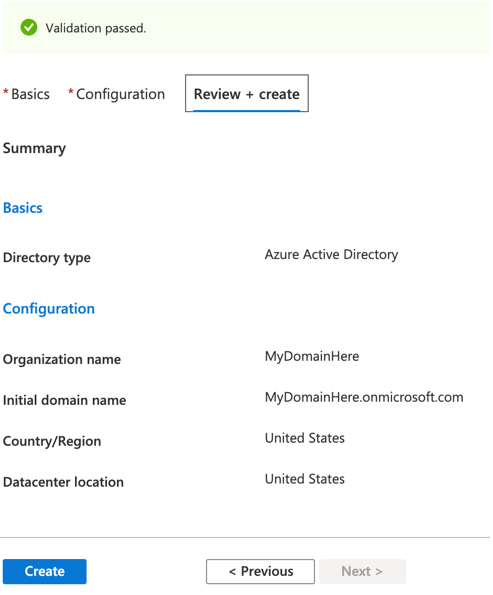
Configure the directory with the following settings:- Select a directory type: Azure Active Directory.
- Organization name: Enter a name for the organization.
- Initial domain name: Enter the domain name.
- Country/Region: Select the relevant country or region.
- Click Create. The directory will be created after a few minutes. When finished, select the directory in the top-right corner of Azure.
- Go to Enterprise Applications, and select Create your own application. Enter a name for your application, for example:
Azure_fac_as_idpproxy.

- Go to the Single Sign-on section, select SAML, and edit the basic SAML configuration.
Here you will include information obtained from FortiAuthenticator. In this example, the FortiAuthenticator FQDN is fac.fortilab.local, and the name of the server is defined as Azure_fac_as_idpproxy. You should adjust these settings to match your FortiAuthenticator's configuration.
- Edit the User Attributes & Claims section to insert any attributes required for the SAML assertion. In this example, only user groups have been included.
Click the edit icon, and then click Add a group claim. Select All groups.

- Download the certificate file. It will be used later when configuring FortiAuthenticator.

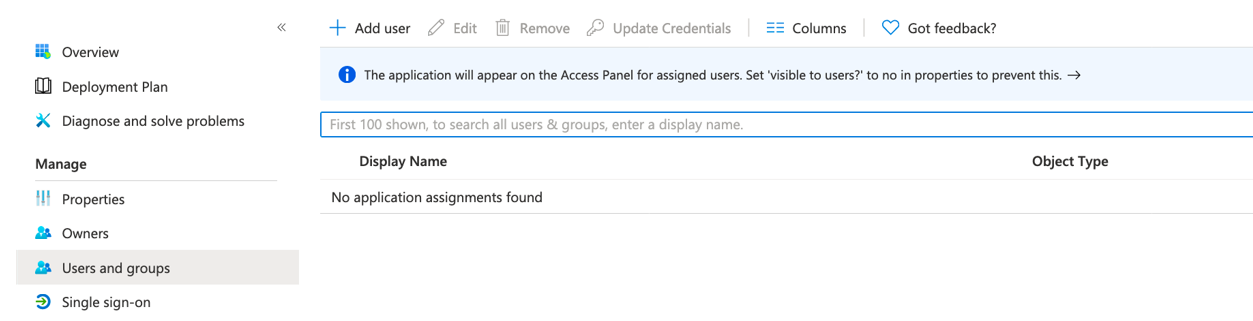
- Go to Users and Groups, and click Add user. Include all users that will be able to authenticate using this application.
- Go to Properties and get the Application ID. This will be required later.

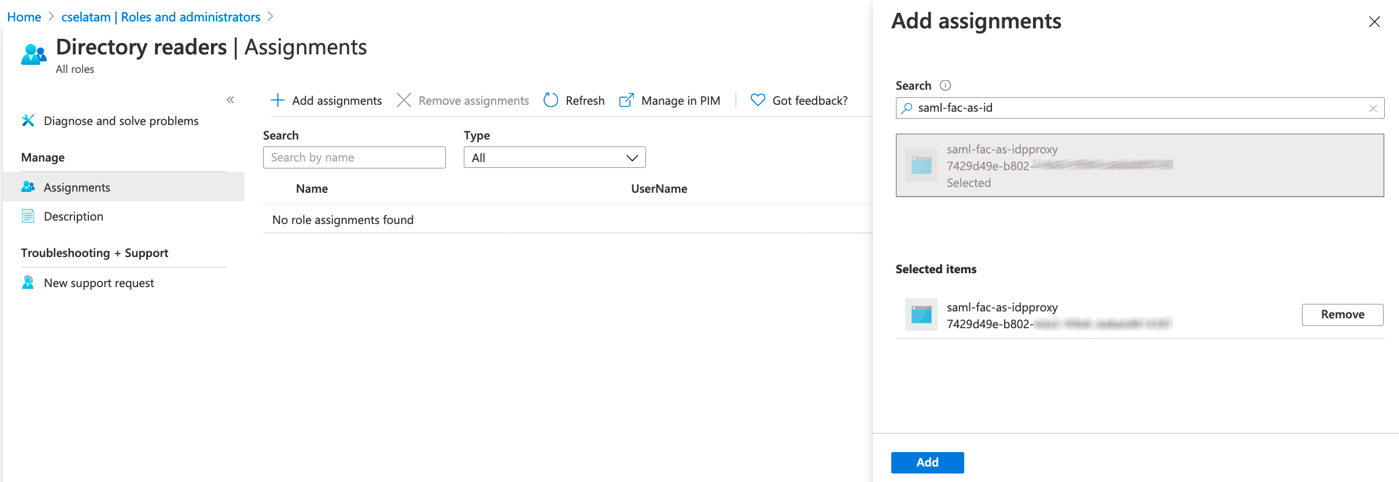
- From the directory home, select Roles and Administrators > Directory Readers, and click Add assignments. Search for your application name, then select and add it.
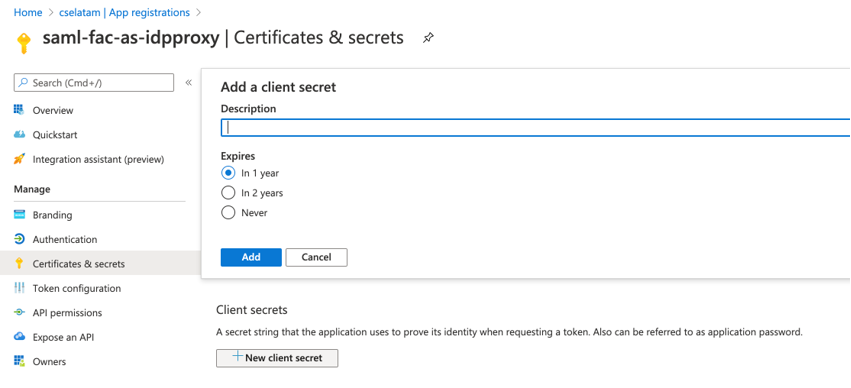
- Finally, create your authentication key. Go to App Registrations, click Certificates & Secrets, and create a new key.
|
|
Before proceeding, make sure to copy the key value. The key is presented only after its creation, and you cannot get this information again later. |