Configuring the Okta developer account IdP application
Configuring the Okta developer account IdP application
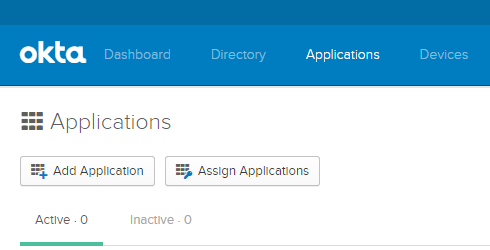
- Open a browser, go to the Applications tab and select Add Application.
- Select Create New App and create a new application using the SAML 2.0 sign on method.

- Enter a custom app name, and select Next. You may upload an app logo if you wish.
The name entered here is the name of the portal that users will log into.

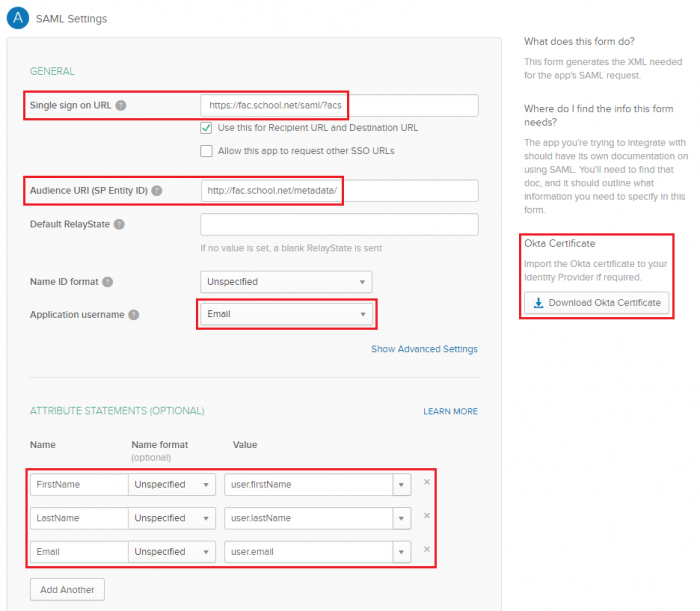
- Under A - SAML Settings, set Single sign on URL and Audience URL (SP Entity ID) to the ACS and Entity URLs (respectively) from FortiAuthenticator.
Users will be required to provide their email address as their username, and their first and last names (as seen in the example).
Before continuing, select Download Okta Certificate. This will be imported to the FortiAuthenticator later.
In the section below, configure a Group attribute to match on FortiAuthenticator. The word Group (case-sensitive) must be entered in Text-based list under Obtain Group Membership from: SAML assertions inside the remote SAML setup configuration on FortiAuthenticator. Regex matching is the most flexible option for group matching. The below example matches all groups of a single user.

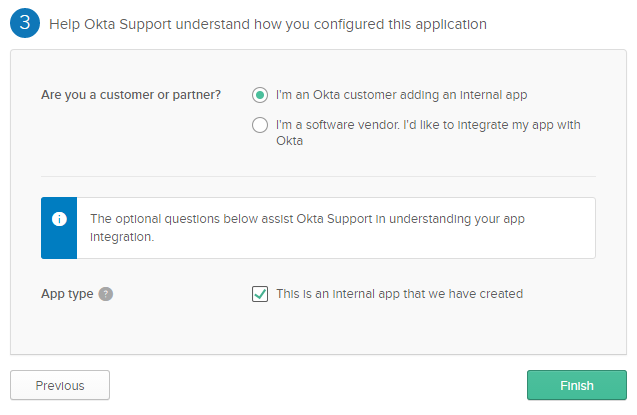
- In the last step, confirm that you are an Okta customer, and set the App type to an internal app. Select Finish.
- Once created, open the Sign On tab and download the Identity Provider metadata.

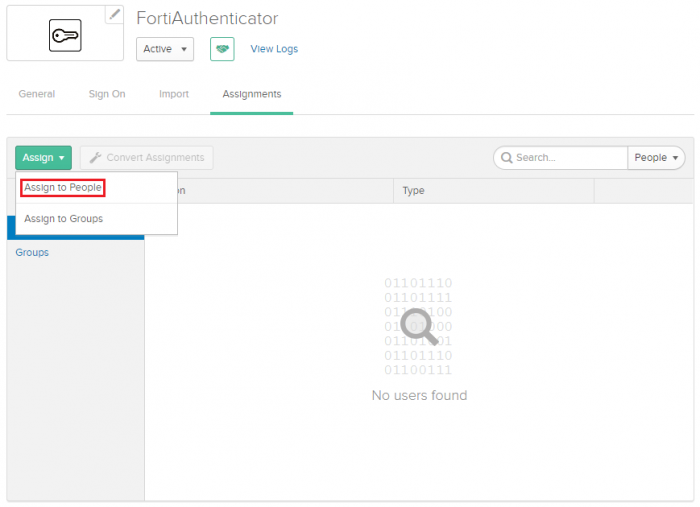
- Finally, open the Assignments tab and select Assign > Assign to people.
Assign the users you wish to add to the application. This will permit the user to log in to the application's portal. Save your changes, and select Done.
Configuring the Okta developer account IdP application
- Open a browser, go to the Applications tab and select Add Application.
- Select Create New App and create a new application using the SAML 2.0 sign on method.
- Enter a custom app name, and select Next. You may upload an app logo if you wish.
The name entered here is the name of the portal that users will log into.
- Under A - SAML Settings, set Single sign on URL and Audience URL (SP Entity ID) to the ACS and Entity URLs (respectively) from FortiAuthenticator.
Users will be required to provide their email address as their username, and their first and last names (as seen in the example).
Before continuing, select Download Okta Certificate. This will be imported to the FortiAuthenticator later.
In the section below, configure a Group attribute to match on FortiAuthenticator. The word Group (case-sensitive) must be entered in Text-based list under Obtain Group Membership from: SAML assertions inside the remote SAML setup configuration on FortiAuthenticator. Regex matching is the most flexible option for group matching. The below example matches all groups of a single user.
- In the last step, confirm that you are an Okta customer, and set the App type to an internal app. Select Finish.
- Once created, open the Sign On tab and download the Identity Provider metadata.
- Finally, open the Assignments tab and select Assign > Assign to people.
Assign the users you wish to add to the application. This will permit the user to log in to the application's portal. Save your changes, and select Done.


