


Separate endpoint profiles 7.0.3
FortiClient EMS 7.0.3 introduces separate endpoint profiles to allow for a simpler and modular approach to endpoint profile management. You now configure separate Remote Access profiles, ZTNA Connection Rules profiles, Web Filter profiles, and so on. You then configure different profile combinations as part of an endpoint policy to deploy to endpoints.
For example, consider that you have two endpoint groups: Groups A and B. You want Group A and Group B to share identical FortiClient settings, except that Group A's antivirus scheduled scan is on a weekly basis, while Group B's is on a monthly basis. In 7.0.2 and earlier versions, you would need to create two endpoint profiles with the desired scan schedules on the Malware Protection tabs. All other settings on the profile's other tabs are identical between the two profiles. You would configure two endpoint policies that are configured with the two profiles. At a later point in time, if you wanted to configure a new VPN tunnel for both groups, you would need to configure the VPN tunnel on both endpoint profiles.
To accommodate this configuration in 7.0.3 and later versions, you would configure two Malware Protection profiles with the desired scan schedules to apply to the two groups, as well as two endpoint policies that are configured with the two profiles. Since all other FortiClient settings are identical across the two groups, you would configure the same Remote Access profile, Web Filter profile, Vulnerability Scan profile, and so on, for both policies. At a later point in time, if you wanted to configure a VPN tunnel for both groups, you would only need to do so in the shared Remote Access profile, rather than redundantly modifying multiple profiles.
You can view the new separate profiles in Endpoint Profiles. You can edit, clone, and delete profiles without affecting other profile types.

To import a profile:
- Go to Endpoint Profiles.
- Select the desired profile type.
- Click Import from File.
- In the Name field, enter the desired name.
- In the XML field, browse to and upload the desired profile.
- Do one of the following:
- To import all profile components, enable Import All Components.
- To import selected components, select the desired components from the Components dropdown list.
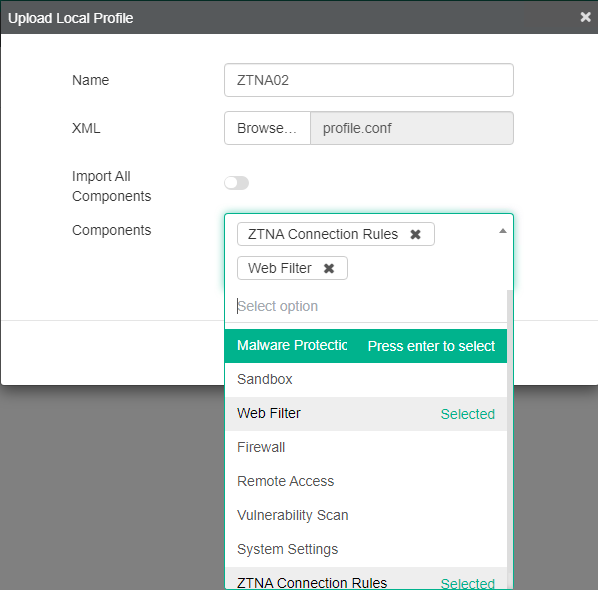
- Click Upload.
To assign endpoint profiles to a policy:
- Go to Endpoint Policy & Components > Manage Policies.
- Create a new policy or edit an existing policy.
- If desired, enable Profile (Off-Fabric).
- Configure the desired profiles for the desired features.
- You can use the Profile XML and Off-Fabric Profile XML buttons to download on- and off-net profiles in XML format.

- Click Save. You can view each policy's assigned profiles for each feature under Profile Components and Off Net Profile Components.

For a Chromebook policy, you can only assign Web Filter and System Settings profiles.