


WiFi with WSSO using FortiAuthenticator RADIUS and Attributes
This is an example of wireless single sign-on (WSSO) with a FortiGate and FortiAuthenticator. The WiFi users are teachers and students at a school. These users each belong to a user group, either teachers (smaguire) or students (whunting). The FortiAuthenticator performs user authentication and passes the user group name to the FortiGate so that the appropriate security policy is applied.
This recipe assumes that an SSID and a FortiAP are configured on the FortiGate unit. In this configuration, you will be changing the existing SSID’s WiFi settings so authentication is provided by the RADIUS server. To learn more about configuring FortiAP, see Setting up WiFi with a FortiAP.
For this example, the student security policy applies a more restrictive web filter.

1. Registering the FortiGate as a RADIUS client on the FortiAuthenticator
On the FortiAuthenticator, go to Authentication > RADIUS Service > Clients and create a new account.
Enter a Name, the Internet-facing IP address of the FortiGate in Client name/IP, and enter a Secret.
Select the Password-only authentication method, select the Local users realm, and enable all EAP types.

2. Creating users on the FortiAuthenticator
Go to Authentication > User Management > Local Users and select Create New.
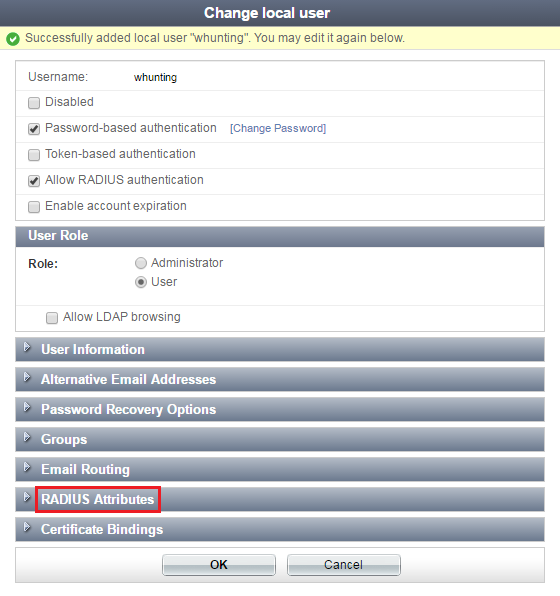
Create one teacher user (smaguire) and another student user (whunting).

Note that, after you create a user, RADIUS Attributes appears as an option.
If your configuration involves multiple users, it is more efficient to add RADIUS attributes in their respective user groups, in the next step.
3. Creating user groups on the FortiAuthenticator
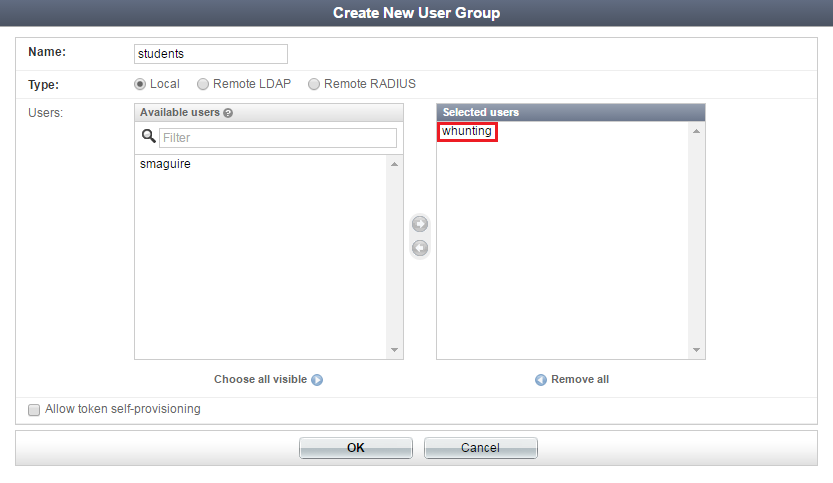
Go to Authentication > User Management > User Groups and create two user groups: teachers and students.
Add the users to their respective groups.
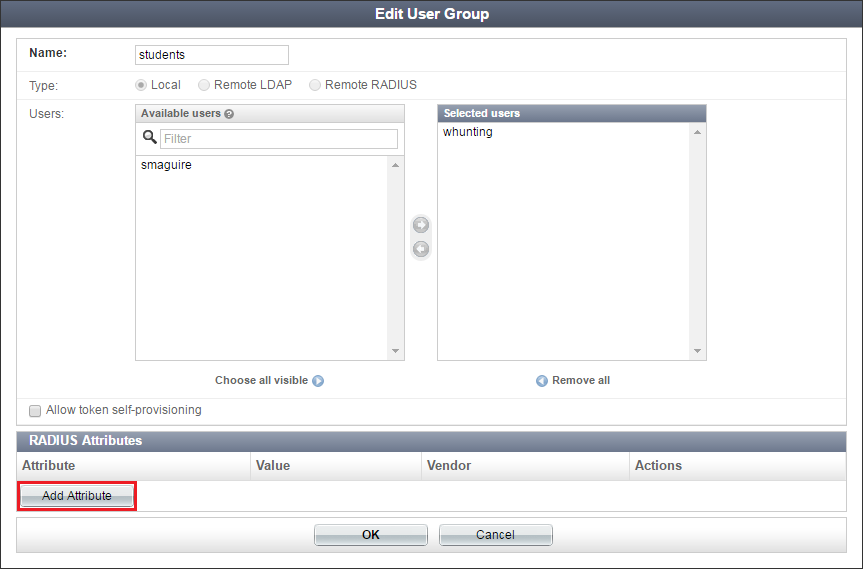
Once created, edit both user groups—RADIUS Attributes becomes available.
Select Add Attribute.
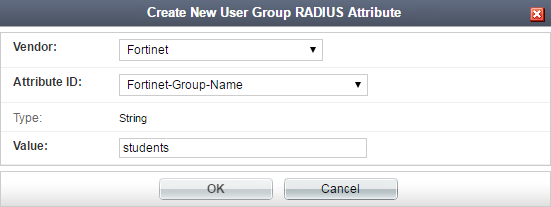
Add the Fortinet-Group-Name RADIUS attribute to each group, which specifies the user group name to be sent to the FortiGate.
4. Configuring FortiGate to use FortiAuthenticator as the RADIUS server
On the FortiGate, go to User & Device > RADIUS Servers and select Create New.
Enter a Name, the Internet-facing IP address of the FortiAuthenticator in Primary Server IP/Name, and enter the same Primary Server Secret as you entered on the FortiAuthenticator.
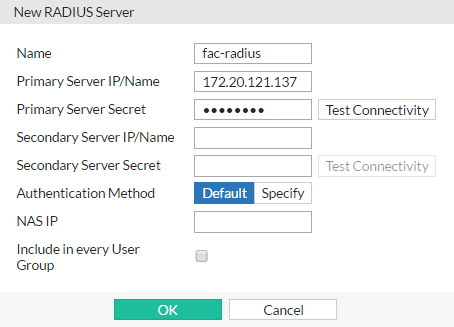
You can optionally select Test Connectivity. Enter a RADIUS user’s name and password. The result should be Successful.
5. Configuring user groups on the FortiGate
Go to User & Device > User Groups and create two groups named the same as the ones created on the FortiAuthenticator.
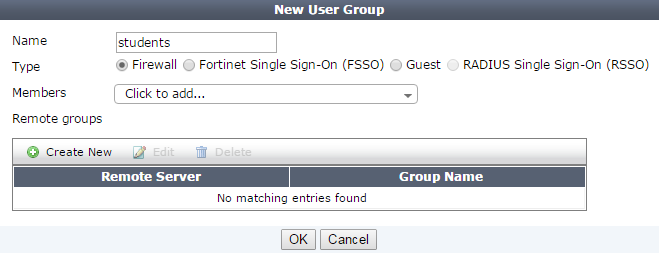
Do not add any members to either group.
6. Creating security policies
Go to Policy & Objects > IPV4 Policy and select Create New.
Create two policies with WiFi-to-Internet access: one policy with Source set to the students user group, and the other set to teachers. Make sure to add the SSID address (example-wifi) to both policies also.
The student policy has a more restrictive Web Filter enabled.

7. Configuring the SSID to RADIUS authentication
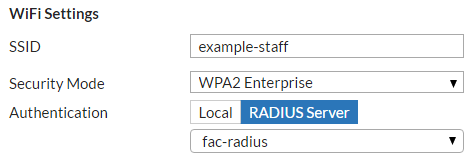
Go to WiFi & Switch Controller > SSID and edit your pre-existing SSID interface.
Under WiFi Settings, set Security Mode to WPA2 Enterprise, set Authentication to RADIUS Server, and add the RADIUS server configured on the FortiGate earlier from the dropdown menu.
8. Results
Connect to the WiFi network as a student.

Then on the FortiGate go to Monitor > Firewall User Monitor. From here you can verify the user, the user group, and that the WSSO authentication method was used.

You can also go to FortiView > Policies to verify that the appropriate security policy was applied.
