


Integrating a FortiGate with FortiClient EMS
In this recipe, you will learn how to integrate a FortiGate with FortiClient Enterprise Management Server (EMS) and your Active Directory server to protect the devices or endpoints on your network. Using this Internal Segmentation Firewall (ISFW) configuration you can relatively easily deploy and manage FortiClient to protect all of the endpoints on your network.
FortiClient EMS supports ISFW by simplifying FortiClient deployment and by providing endpoint management from a single console. FortiClient EMS helps to provide real-time control and visibility into your endpoints when they are both on and off corporate networks.
In FortiGate Integrated mode, FortiClient EMS deploys the endpoint clients while an integrated FortiGate running FortiOS 5.4 handles Network Access Control (NAC) and policy enforcement.
For more information on FortiClient EMS, please refer to the FortiClient EMS Administration Guide.

1. Configuring FortiClient EMS
In the FortiClient EMS Dashboard, go to Endpoints > Domains and select the Add a new domain button.
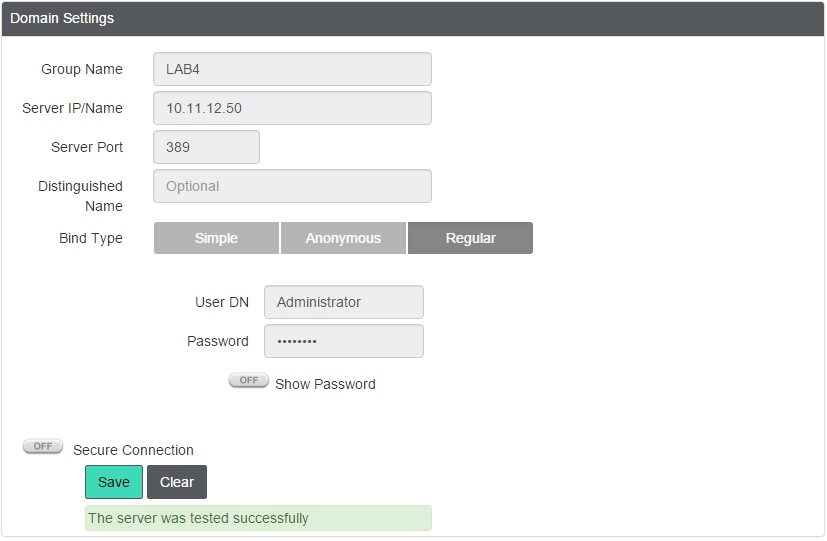
In the Domain Settings window, enter the Active Directory server information.
Test the connection, and then select Save.
Select the new domain in the Domains list to view the Client Details and FortiClient Information.

Go to View > Settings.
Enter and confirm a FortiHeartBeat Connection Key and enable Scan Local Workgroups. Make note of the FortiHeartBeat Connection Key. This key will be required for the FortiClient endpoint to register.
Also note the FortiClient Download URL.
Save your changes.

2. (Optional) Importing Endpoint Profiles into FortiClient EMS
If you have previously configured Endpoint Profiles on a FortiGate and you wish to import them into FortiClient EMS, follow the instructions below.
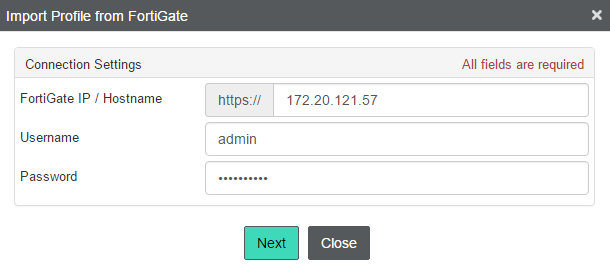
Navigate to the Endpoint Profiles list on the left pane and click on the Import profile from FortiGate icon.

Enter the FortiGate IP/Hostname and valid administrator credentials and click Next.
You can assign a profile to a Domain or Workgroup by right-clicking on it and selecting Assign profile.

3. Enabling and enforcing FortiHeartBeat on the FortiGate
On the FortiGate, go to Network > Interfaces and edit the internal interface.
Under Restrict Access, enable FortiHeartBeat.

Scroll down to Admission Control and enable Enforce FortiHeartBeat for all FortiClients. You can also Exempt Sources (such as non-FortiClient supported devices—routers, printers, Linux devices) and/or Exempt Destinations/Services (such as the EMS server itself, if necessary). When you exempt a source or destination, it does not require FortiClient registration to access network services or the internet.

4. (Optional) FortiClient installer configuration
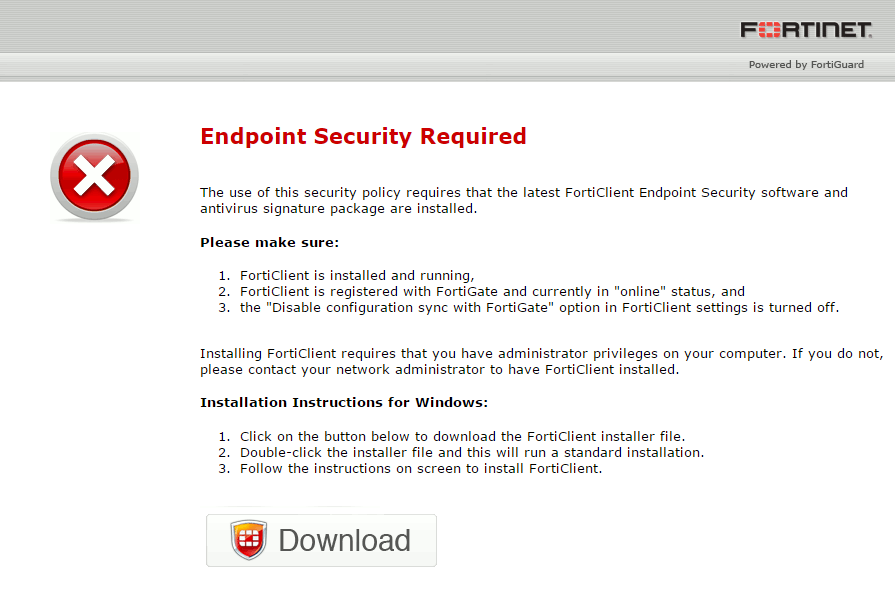
With the above configuration, devices on the internal network that aren’t registered with FortiClient are presented with an Endpoint Security Required page that includes a download link to the FortiClient application on the FortiGate. You can customize the FortiClient download installer link to use the EMS installer link instead.
On the FortiGate, go to System > Replacement Messages, switch to the Extended View, and edit the Endpoint Control replacement message for the appropriate endpoints.

You can also customize the installer itself in FortiClient EMS.
Go to View > Software Manager and +Add a custom installer.
Configure the installer as desired, then select Save.

5. Results
When a device on the internal network that isn’t registered with FortiClient attempts to connect to the Internet, or access other services behind the FortiGate, the user of that device is presented with an Endpoint Security Required page that includes a download link to the FortiClient application.
When the user downloads and installs FortiClient, they are prompted for registration.
Enter the Registration Key and select Accept.
Note that the Registration Key matches the FortiHeartBeat Connection Key entered in Step 1.

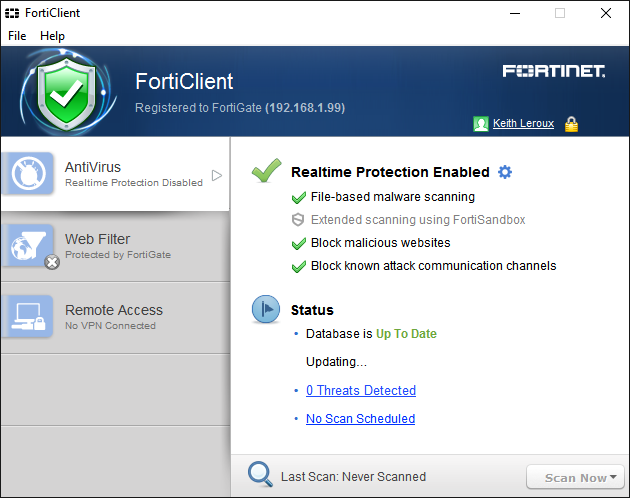
The FortiClient then registers to the FortiGate (or FortiClient EMS, depending on the installation) and downloads a configuration update from FortiClient EMS.

The registered endpoint now has access to the Internet and network services as defined by NAC and policy enforcement on the FortiGate.
The registration information and FortiClient profile configuration can be verified in the FortiClient window.
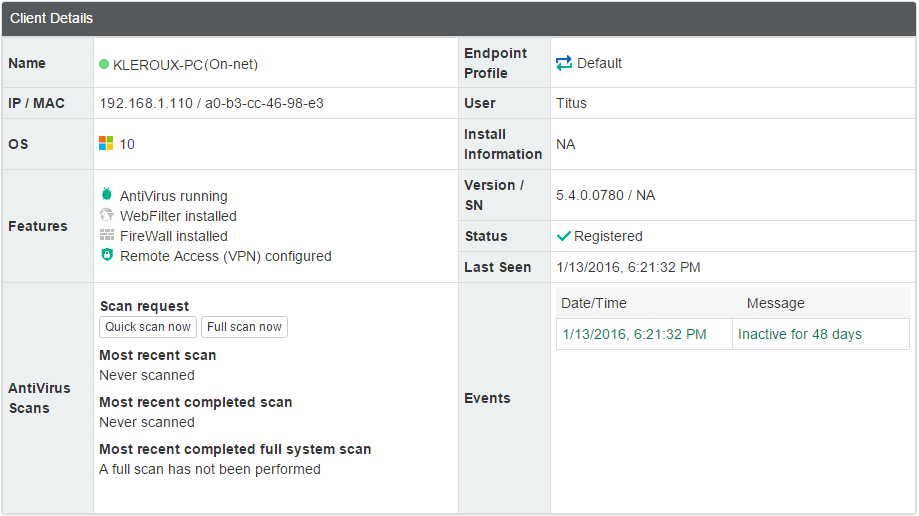
To view the details of registered endpoints on FortiClient EMS, select Endpoints from the left pane.
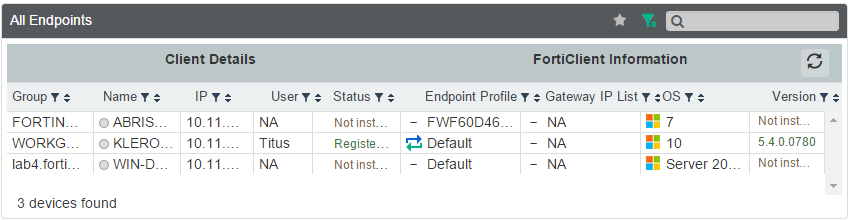
Highlight one of the endpoints in the All Endpoints list to view Client Details.
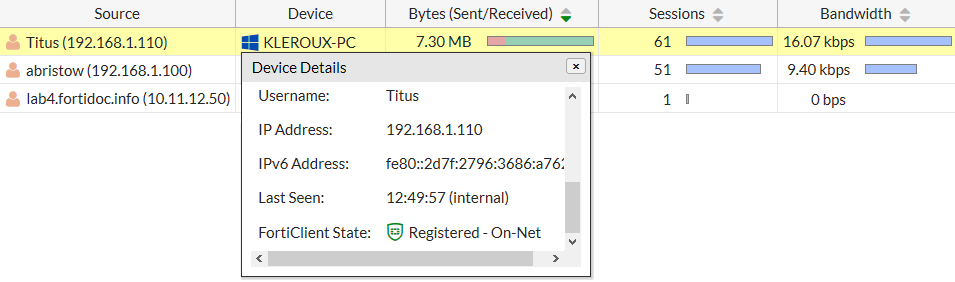
To view the details of registered endpoints on the FortiGate, go to one of the following:
FortiView > Sources (Double-click the item in the list to drill down to greater detail).
User & Device > Device List

Monitor > FortiClient Monitor
