


IPsec VPN with native Mac OS X client
In this recipe, you will learn how to create an IPsec VPN on a FortiGate, and connect to it using the default Mac OS X client.
This configuration allows Mac users to securely access an internal network and browse the Internet through the VPN tunnel. This recipe assumes that a user group (mac-users) has already been created.
This recipe was tested using Mac OS X El Capitan version 10.11.5.

1. Configuring the IPsec VPN using the Wizard
Go to VPN > IPsec Wizard.
Name the VPN connection, set Template Type to Remote Access, select the Cisco Client remote device type, and select Next. You must select Cisco Client because the native Mac OS client is a Cisco client. If you require an IPsec VPN created for Mac mobile devices (such as iPhones and iPads), select the iOS Native remote device type.
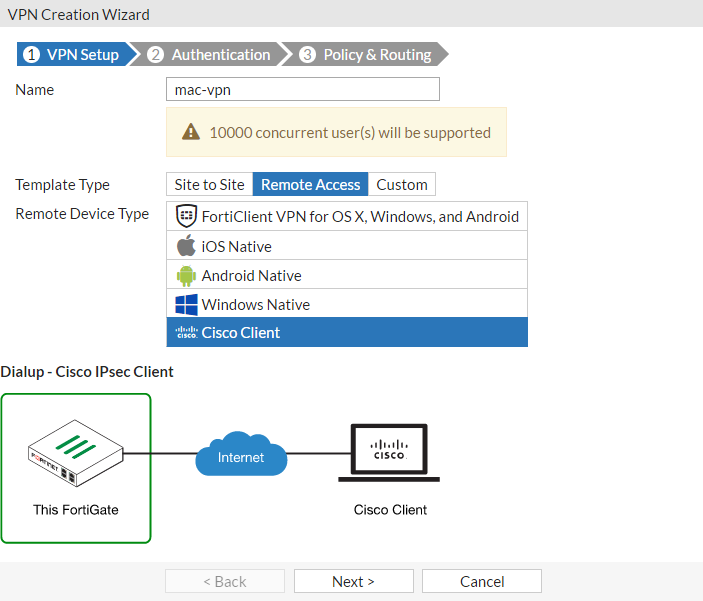
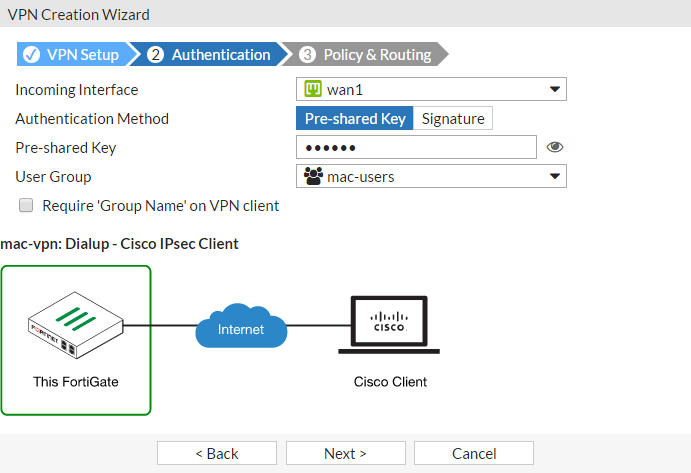
Set Incoming Interface to the Internet-facing interface.
Select the Pre-shared Key authentication method and enter a pre-shared key.
Apply the appropriate User Group and select Next.
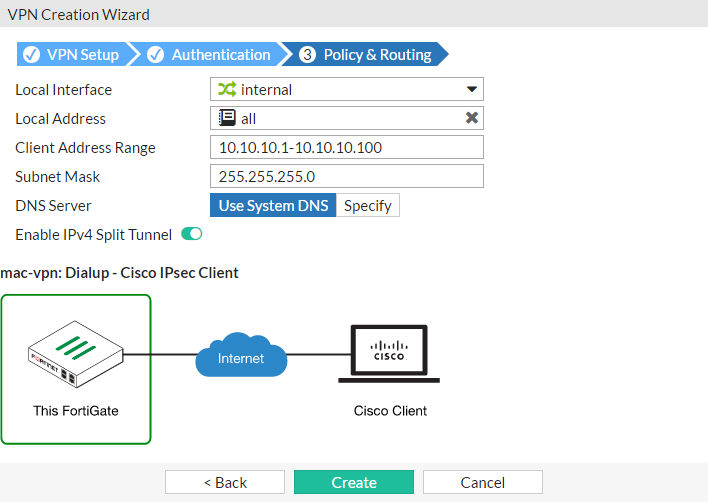
Set Local Interface to the internal interface and set Local Address to all.
Enter a Client Address Range for VPN users and select Create.
Disable split tunneling if you want all traffic (Internet and internal) to go through the IPsec VPN tunnel.
The VPN Creation Wizard provides a summary of created objects.

2. Creating a security policy for remote access to the Internet
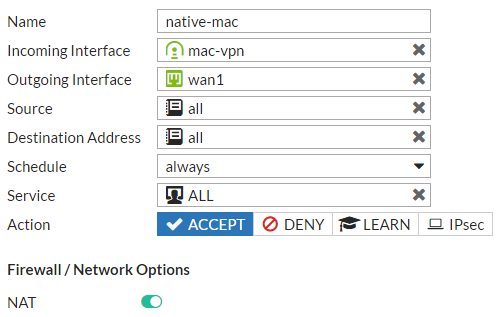
Go to Policy & Objects > IPv4 Policy and create a new policy that allows remote users to securely access the Internet.
Set Incoming Interface to the newly created tunnel interface and set Outgoing Interface to the Internet-facing interface.
Set Source to all, Destination Address to all, Schedule to always, and Service to ALL.
Enable NAT and select OK.
3. Results
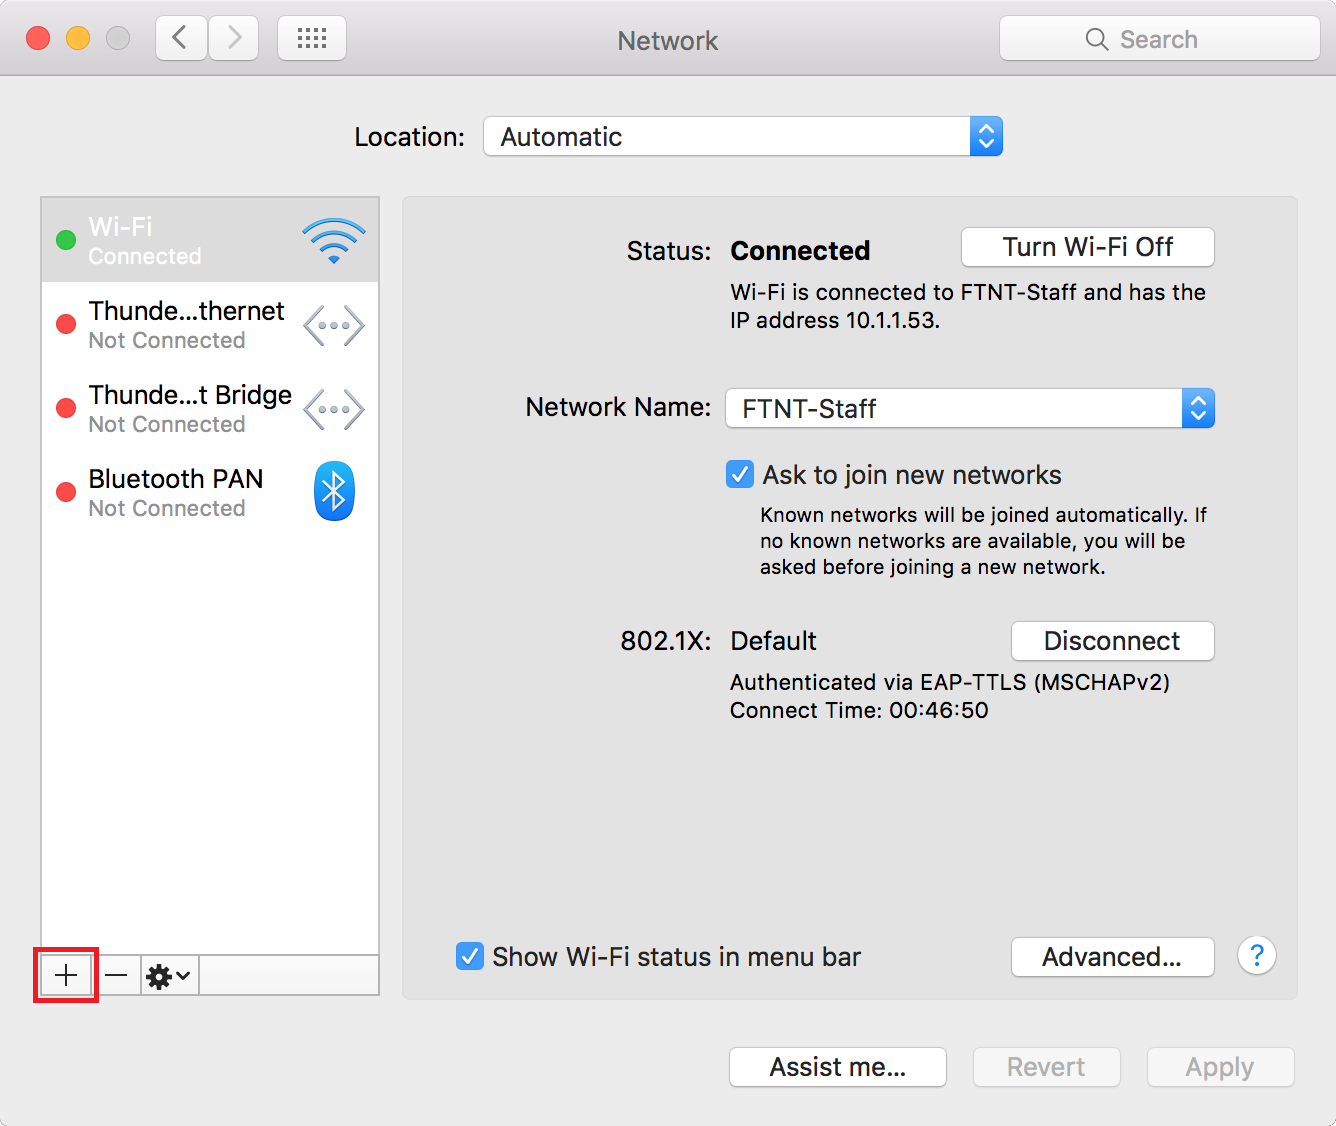
On the Mac, go to System Preferences > Network and select the Plus (+) button.
Set Interface to VPN, set VPN Type to Cisco IPsec, and select Create.

Set Server Address to the IP address of the FortiGate, enter the network account details for the user, and open Authentication Settings.
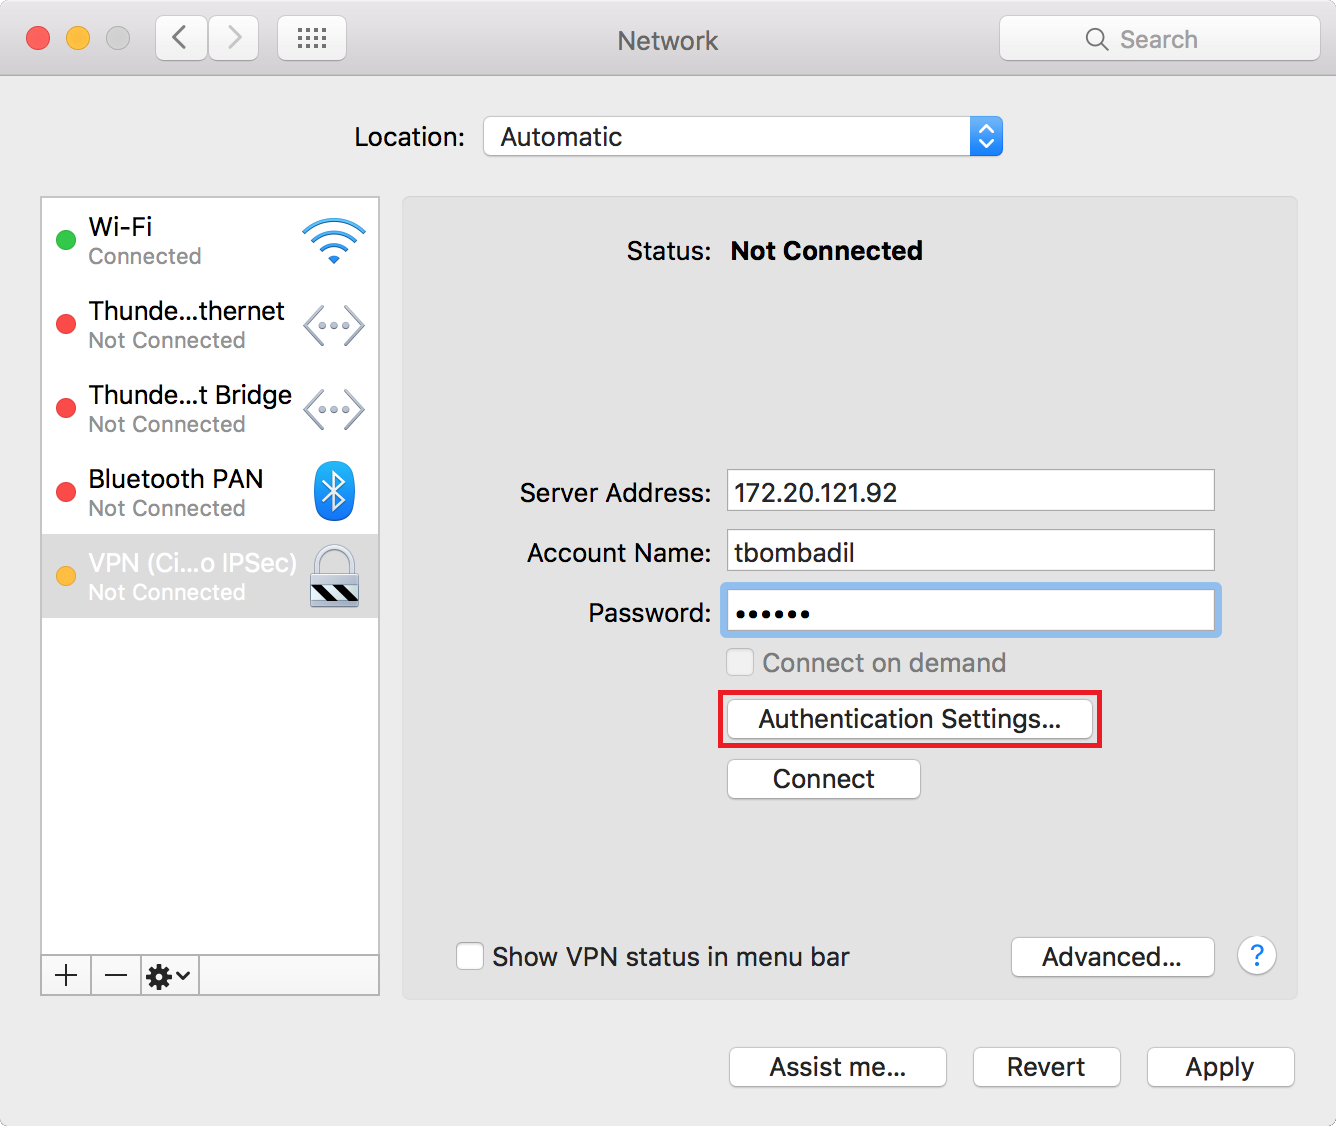
Select the Shared Secret authentication and enter the same pre-shared key that was entered in the IPsec VPN Wizard, then select OK.
Be sure to Apply your network configuration.

In the Network window on the Mac, select the VPN and select Connect.
You should now be able to browse the Internet and have access to the internal network.

On the FortiGate, go to Monitor > IPsec Monitor and confirm that the tunnel Status is Up.
