Configuring IPsec VPN on Branch
Configuring IPsec VPN on Branch
- To create the tunnel on Branch, connect to Branch, and go to VPN > IPsec Tunnels and create a new tunnel.
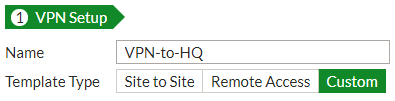
- In the VPN Setup step, set Template Type to Custom and enter VPN-to-HQ for the Name.
- Enter HQ’s public IP address (in the example, 172.25.176.142) for the IP Address, and select Branch’s WAN interface for Interface (in the example, wan1).

- Enter a matching secure key for the Pre-shared Key.

- Type the new address ranges selected in the "Planning the new addressing scheme" section for Branch and HQ’s LAN in the Local Address and Remote Address fields (in the example, 10.2.2.0/24 and 10.1.1.0/24, respectively). The Local and Remote Address fields are the reverse of what you created in the "Configuring the IPsec VPN on HQ" section.

- Optionally, expand Advanced and enable Auto-negotiate.

Configuring IPsec VPN on Branch
- To create the tunnel on Branch, connect to Branch, and go to VPN > IPsec Tunnels and create a new tunnel.
- In the VPN Setup step, set Template Type to Custom and enter VPN-to-HQ for the Name.
- Enter HQ’s public IP address (in the example, 172.25.176.142) for the IP Address, and select Branch’s WAN interface for Interface (in the example, wan1).
- Enter a matching secure key for the Pre-shared Key.
- Type the new address ranges selected in the "Planning the new addressing scheme" section for Branch and HQ’s LAN in the Local Address and Remote Address fields (in the example, 10.2.2.0/24 and 10.1.1.0/24, respectively). The Local and Remote Address fields are the reverse of what you created in the "Configuring the IPsec VPN on HQ" section.
- Optionally, expand Advanced and enable Auto-negotiate.


