
Target Upgrade Version
Check here to choose the appropriate target FortiSIEM upgrade version based on your current running version.
Upgrades may fail if you decide to upgrade to an unlisted version.
If your system has been patched by Fortinet Support, then contact Fortinet Support before upgrading.
Upgrade Paths
Please follow the proceeding upgrade paths to upgrade existing FortiSIEM installs to the latest 7.5.0 release.

This applies for all environments.
Upgrade Supervisors and Workers
Upgrade method depends on
-
FortiSIEM Version being upgraded from
-
Whether High Availability (HA) is deployed
Note that FortiSIEM has released 3 versions of Supervisor HA:
-
HA V1: released in FortiSIEM 6.7.0. In this version, manual operations are needed to failover to another Supervisor.
-
HA V2: released in FortiSIEM 7.3.0. This version enables automated HA using Virtual IP (VIP) or DNS.
-
HA V3: released in FortiSIEM 7.4.1. This version further improves HA V2 and does not need VIP or DNS Configuration.
|
HA Configured? |
DR Configured? |
Upgrade Method |
|
|---|---|---|---|
|
7.3.1-7.4.x |
Yes (HA V2 or HA V3) |
Does not matter |
Highly Recommended: Use Cluster Upgrade script (see Case 1 below) to upgrade all nodes. Manual upgrade (see Case 2 below) can be error prone, and nodes have to be upgraded in a specific order. |
|
|
No |
Does not matter |
Recommended: Use Cluster Upgrade script (see Case 1 below) or Manual Upgrade (see Case 2 below). |
|
7.3.0 |
Yes (HA V2) |
Does not matter |
Highly Recommended: Use Cluster Upgrade script (see Case 1 below) to upgrade all Supervisor nodes. Then upgrade Worker nodes manually (See Case 2 - Step 3. Upgrade Supervisor and Worker Nodes) for steps. Fully Manual upgrade (see Case 2 below) can be error prone, and nodes have to be upgraded in a specific order. |
|
|
No |
Does not matter |
Recommended: Use Cluster Upgrade script (see Case 1 below). Manual Upgrade (see Case 2 below) can be followed. |
|
6.7.0-7.2.x |
Yes (HA V1) |
Does not matter |
Remove HA V1 by deleting the Followers from the Leader, upgrade manually (Case 2 below) and finally, re-do the HA V3 Configuration. When one of three appliances is in a different data center, DR functionality is provided by HA. |
|
|
No |
Does not matter |
Upgrade manually. See Case 2 below. |
|
6.3.0-6.6.x |
N/A |
N/A |
Upgrade manually. See Case 2 below. |
Pre-Upgrade Checklist
To perform an upgrade, the following prerequisites must be met.
-
Make sure the FortiSIEM license is not expired.
-
Carefully consider the known issues, if any, in the Release Notes.
-
Make sure the Supervisor processes are all up, Cloud Health is Normal and that you can login to the FortiSIEM GUI and successfully discover your devices.
-
Before upgrading the ClickHouse Data Nodes, make sure that none of them are in read-only mode. Follow Advanced Operations - Recovering from Read-Only Mode to detect and then recover from read-only mode. Upgrade will fail if a node is in read-only mode.
-
Make sure the Supervisor can connect to the Internet on port 443 to the Rocky Linux 8 OS repositories (
os-pkgs-cdn.fortisiem.fortinet.comandos-pkgs-r8.fortisiem.fortinet.com) hosted by Fortinet, to get the latest OS packages. Connectivity can be either directly or via a proxy. For proxy based upgrades, see Upgrade via Proxy. If Internet connectivity is not available, then follow the Offline Installation and Upgrade Guide. -
If you have a VM based deployment, then take a snapshot of the running FortiSIEM instance.
Case 1: Cluster Upgrade
This section describes steps to upgrade a FortiSIEM deployment. The same procedures work whether it is an all-in-one deployment or a cluster with Supervisors and Workers.
Step 1. Check Licensed Supervisor Node's Public Keys
During cluster upgrade, Licensed Supervisor will need to SSH to Worker and other Supervisor nodes. To do this, Licensed Supervisor node's Public SSH Key needs to be defined in the GUI. Licensed Supervisor will push its Public SSH Key to other nodes, which will enable it to securely communicate to the other nodes. Follow these steps to make sure SSH Keys are defined.
-
Login to Licensed Supervisor via GUI.
-
Go to Admin > License > Nodes, select the Licensed Supervisor entry and click Edit.
-
Check if the Admin SSH Public Key and HA User SSH Public Key are defined.
-
If the two keys are defined, then proceed to Step 2.
-
Otherwise generate the two keys as follows:
-
SSH to Licensed Supervisor.
-
Get admin user's SSH Public Key by running:
cat /opt/phoenix/bin/.ssh/id_rsa.pub
-
If key not present, then generate it as follows
su - admin
ssh-keygen -t rsa -b 4096
-
Get pghauser's SSH Public Key by running:
cat /home/pghauser/.ssh/id_rsa.pub
-
If key not present, then generate it as follows:
su - pghauser
ssh-keygen -t rsa -b 4096
-
-
Go to Admin > License > Nodes, select the Licensed Supervisor entry and click Edit. Enter the two SSH Keys from Step 5.
-
Click Save.
-
Wait a few minutes for the keys to propagate to the other nodes.
Step 2. Remove DR if your Environment has DR Configured
-
Login to the Primary Licensed Supervisor node.
-
Go to Admin > License > Nodes.
-
Select Secondary DR node.
-
Click Delete.
Step 3. Stop App Servers on Non-Licensed Supervisor Nodes
If you are running HA, then you must stop the App Servers on all nodes other than the Licensed Supervisor node, to prevent accidental updates to PostgreSQL database while the database schema is being upgraded. Take the following steps.
-
Login to GUI and determine the Licensed Supervisor node.
-
Login as root to every non-Licensed Supervisor node and repeat these steps:
-
Run the following commands:
systemctl stop phxctl
killall -9 java
-
Make sure App Server is staying down.
Follow these steps.
- Login to the Licensed Supervisor via SSH.
- Create the path
/opt/upgrade.mkdir -p /opt/upgrade - Download the upgrade zip package
FSM_Upgrade_All_7.5.0_build0590.zip, then upload it to the Supervisor node under the/opt/upgrade/folder.
Example (From Linux CLI):scp FSM_Upgrade_All_7.5.0_build0590.zip root@10.10.10.15:/opt/upgrade/ - Go to
/opt/upgrade.cd /opt/upgrade - Use 7za to extract the upgrade zip package.
Note: 7za replaces unzip for FortiSIEM 7.1.0 and later to avert unzip security vulnerabilities.7za x FSM_Upgrade_All_7.5.0_build0590.zip - Go to the FSM_Upgrade_All_7.5.0_build0590 directory.
cd FSM_Upgrade_All_7.5.0_build0590 - Run a screen.
screen -S upgrade
Note: This is intended for situations where network connectivity is less than favorable. If there is any connection loss, log back into the SSH console and return to the virtual screen by using the following command.screen -r -
If you are running 7.3.0 or higher, then run the following cluster upgrade script from Licensed Supervisor node:
python fsm_cluster_upgrade.pyand proceed to step 9.
If you are upgrading from a version earlier than 7.3.0, then run the following command to perform the upgrade:
sh upgrade.sh
After the process is completed, perform a basic health check by running the following command.phstatusAll processes should be up and running.
- Upgrade Status of various nodes can be found in this file on the Licensed Supervisor node.
/var/tmp/upgrade_status_management.json - Upgrade logs can be found in this file on the Licensed Supervisor node.
/var/log/fsm_cluster_upgrade.logFor additional troubleshooting, you can also review the following files.
/var/log/screen_*.log - After upgrade is complete, check Cloud Health.
- The upgrade logs are stored in compressed format in this location.
/var/log/*fsm_cluster_upgrade.log.xz
Case 2: Manual Upgrade
Upgrade Notes
-
Upgrade Order: In manual mode, FortiSIEM nodes must be upgraded in the following order. This ensures that ClickHouse Cluster remains up and running during the upgrade.
-
All Nodes running PostgreSQL Database
-
All Supervisor Nodes without PostgreSQL Database
-
Worker Nodes (ClickHouse Data Nodes)
-
All Worker nodes in ClickHouse Keeper Cluster
-
-
Upgrade each ClickHouse Keeper node one by one to maintain quorum. This ensures that the ClickHouse Data Cluster will not become read only.
-
You can upgrade ClickHouse Data Nodes in parallel, but do not upgrade two Workers from the same shard in parallel, since that would render the shard ineffective for both read and write.
As an example, suppose the ClickHouse Cluster consists of
-
Keeper Cluster – nodes K1, K2, K3
-
Data Cluster
-
Shard1 – W1, W2
-
Shard 2 – W3, W4
-
Shard 3 – W5, W6
Then the Worker upgrade order is
(W1, W3, W5) -> (W2, W4, W6) -> K1-> K2-> K3
The nodes within the parentheses () can be upgraded in parallel.
-
Step 1. Remove DR if your Environment has DR Configured
-
Login to the Primary Licensed Supervisor node.
-
Go to Admin > License > Nodes.
-
Select Secondary DR node.
-
Click Delete.
Step 2. Stop App Servers on Non-Licensed Supervisor Nodes
If you are running HA, then you must stop the App Servers on all nodes other than the Licensed Supervisor node, to prevent accidental updates to PostgreSQL database while the database schema is being upgraded. Take the following steps.
-
Login to GUI and determine the Licensed Supervisor node.
-
Login as root to every non-Licensed Supervisor node and repeat these steps:
-
Run the following commands:
systemctl stop phxctl
killall -9 java
-
Make sure App Server is staying down.
Step 3. Upgrade Supervisor and Worker Nodes
Upgrade the Supervisor and Worker nodes in the correct order following the Upgrade Notes.
The steps to upgrade the Supervisor and Worker are identical. Follow these steps.
- Login to the node via SSH.
- Create the path
/opt/upgrade.mkdir -p /opt/upgrade - Download the upgrade zip package
FSM_Upgrade_All_7.5.0_build0590.zip, then upload it to the node under the/opt/upgrade/folder.
Example (From Linux CLI):scp FSM_Upgrade_All_7.5.0_build0590.zip root@10.10.10.15:/opt/upgrade/ - Go to
/opt/upgrade.cd /opt/upgrade - Use 7za to extract the upgrade zip package.
Note: 7za replaces unzip for FortiSIEM 7.1.0 and later to avert unzip security vulnerabilities.7za x FSM_Upgrade_All_7.5.0_build0590.zip - Go to the FSM_Upgrade_All_7.5.0_build0590 directory.
cd FSM_Upgrade_All_7.5.0_build0590- Run a screen.
screen -S upgradeNote: This is intended for situations where network connectivity is less than favorable. If there is any connection loss, log back into the SSH console and return to the virtual screen by using the following command.
screen -r
- Run a screen.
- Start the upgrade process by entering the following.
sh upgrade.sh -
After the process is completed, perform a basic health check by running the following command.
phstatusAll processes should be up and running.
Upgrade Collectors
Main Upgrade Steps
Step 1: Download the Correct Collector Image
Download the Collector image from the Fortinet Support site. As an example, Collector 6.4.0 image file name is FSM_Upgrade_All_6.4.0_build1412.zip and matches the hash in the support site to the locally computed hash. This ensures that the file has not been corrupted in transit.
Step 2: Upload the Image to the Supervisor Node
Note: In this step, you will upload the image to the Supervisor, which will then internally create a URL for the Collectors to download the image. It is critical to set the host name in the URL correctly so that a Collector can resolve the host name. Otherwise, the image download in Step 3 will fail.
There are two solutions.
| Solution 1 |
By default, the Supervisor's host name in Admin > License > Nodes is used to create the URL. If the host name is a Fully Qualified domain name and is resolvable by the Collectors, then no further action is necessary. /etc/hosts file in the following format: <ip> <host name>For example: 10.0.1.21 2-52-35-20-68.us-west-2.compute |
| Solution 2 |
If there is a load balancer in front of the Supervisors, or you want to override the Supervisor host name in the default image download URL, then you can enter the appropriate host name or IP after going to Admin > Settings > System > Image Server > Custom Update and then clicking Save. If you have entered a host name here, make sure that it is a Fully Qualified domain name and is resolvable by Collectors. Do this step first before proceeding to the remaining of Step 2. Note that if you create an entry in Custom Update, then it applies to ALL Collectors and Agents. This means that every Collector and Agent will get the URL with the Custom Update entry. |
- Go to Admin > Settings > System > Image Server.
- Under Collector, in the Version field, enter the version you downloaded in Step 1. The format is #.#.#. Example: 6.4.0.
- Under Collector, click Select File and select the Collector upgrade image you downloaded in Step 1.
- Under Collector, click Upload File to upload the Collector upgrade image to the Supervisor. This may take a while depending on the network connection between your workstation and Supervisor node. FortiSIEM will validate the image hash and upload the image to Supervisor if the hash matches.
Note: If you do not want a FortiSIEM to perform a hash check, from the Hash Check drop-down, select Disabled. - Run the following SQL and make sure ImageSetup task is completed.
# psql phoenixdb phoenix -c "select type, progress from ph_task where type = 'ImageSetup'"
    type | progress
------------+----------
 ImageSetup | 100
 ImageSetup | 100
 ImageSetup | 100
(3 rows)
Step 3: Download the Image to the Collector
- Go to Admin > Health > Collector Health.
- From the Columns drop-down list, ensure Download Status is selected. If not, select it so the Download Status column is displayed.
- Select the Collector(s) you wish to download the image to.
- From the Actions drop-down list (
 ), select Download Image.
 - Check that the Download Status column shows finished to confirm that the download has been completed for the selected Collectors.
Step 4: Upgrade the Collectors
- Go to Admin > Health > Collector Health.
- From the Columns drop-down list, ensure Version is selected. If not, select it so the Version column is displayed.
- Select the Collector(s) you wish to upgrade.
- From the Actions drop-down list (), select Install Image.
- Check that the Version column shows the correct version number to confirm that the Collector(s) have upgraded successfully.
Post Upgrade Health Check
Note: If any of the checks fail, then the upgrade might have failed. In this case, contact Fortinet Support.
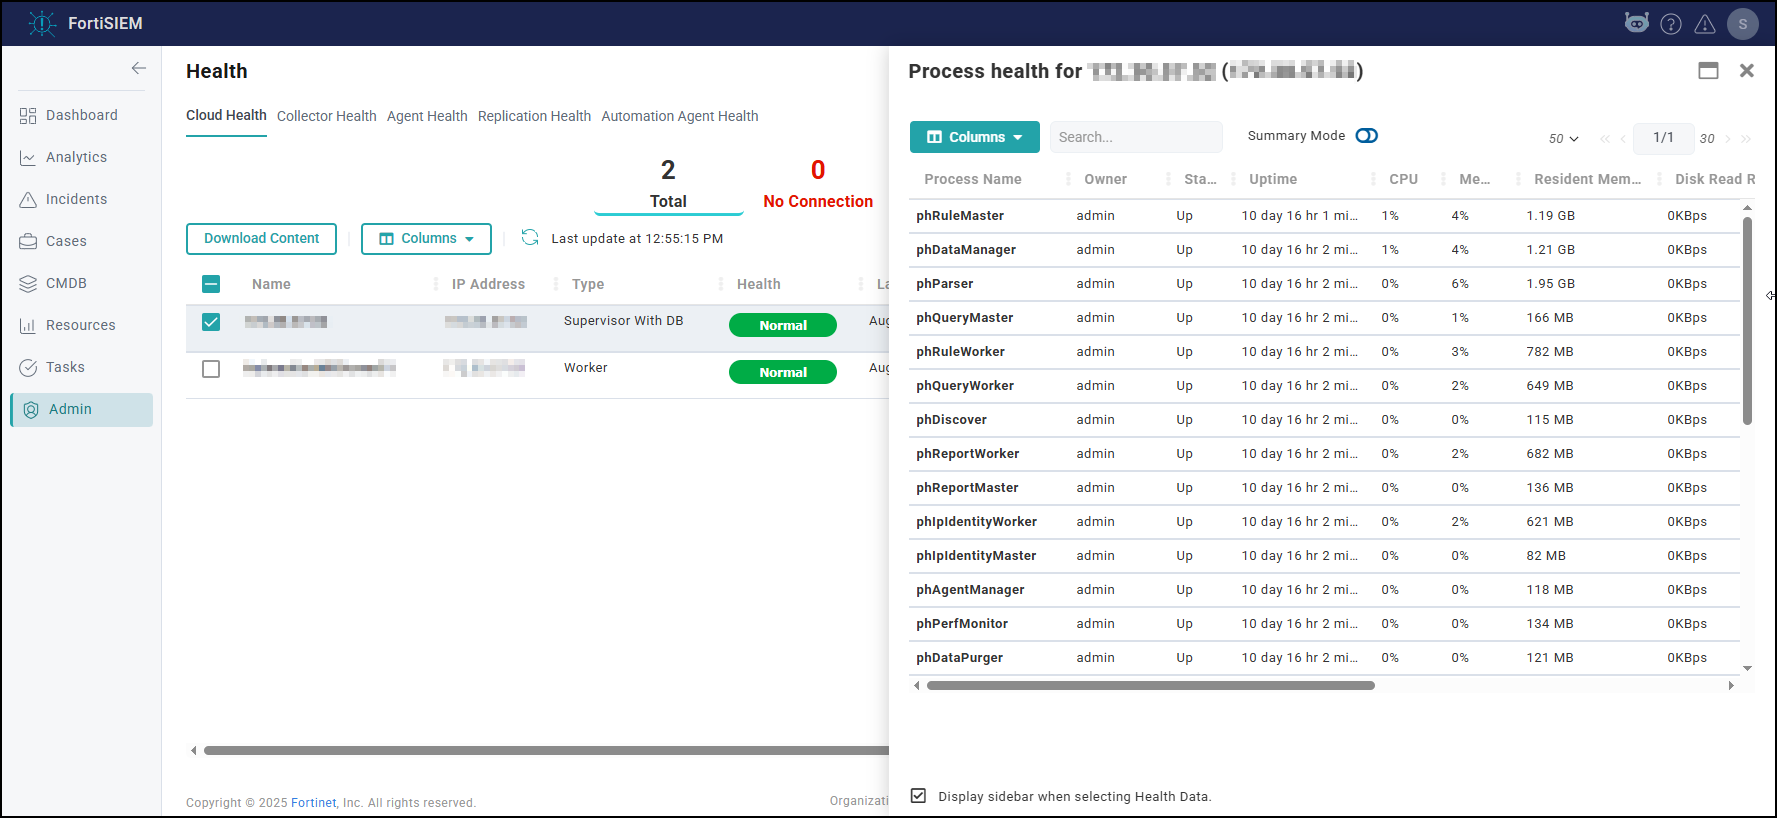
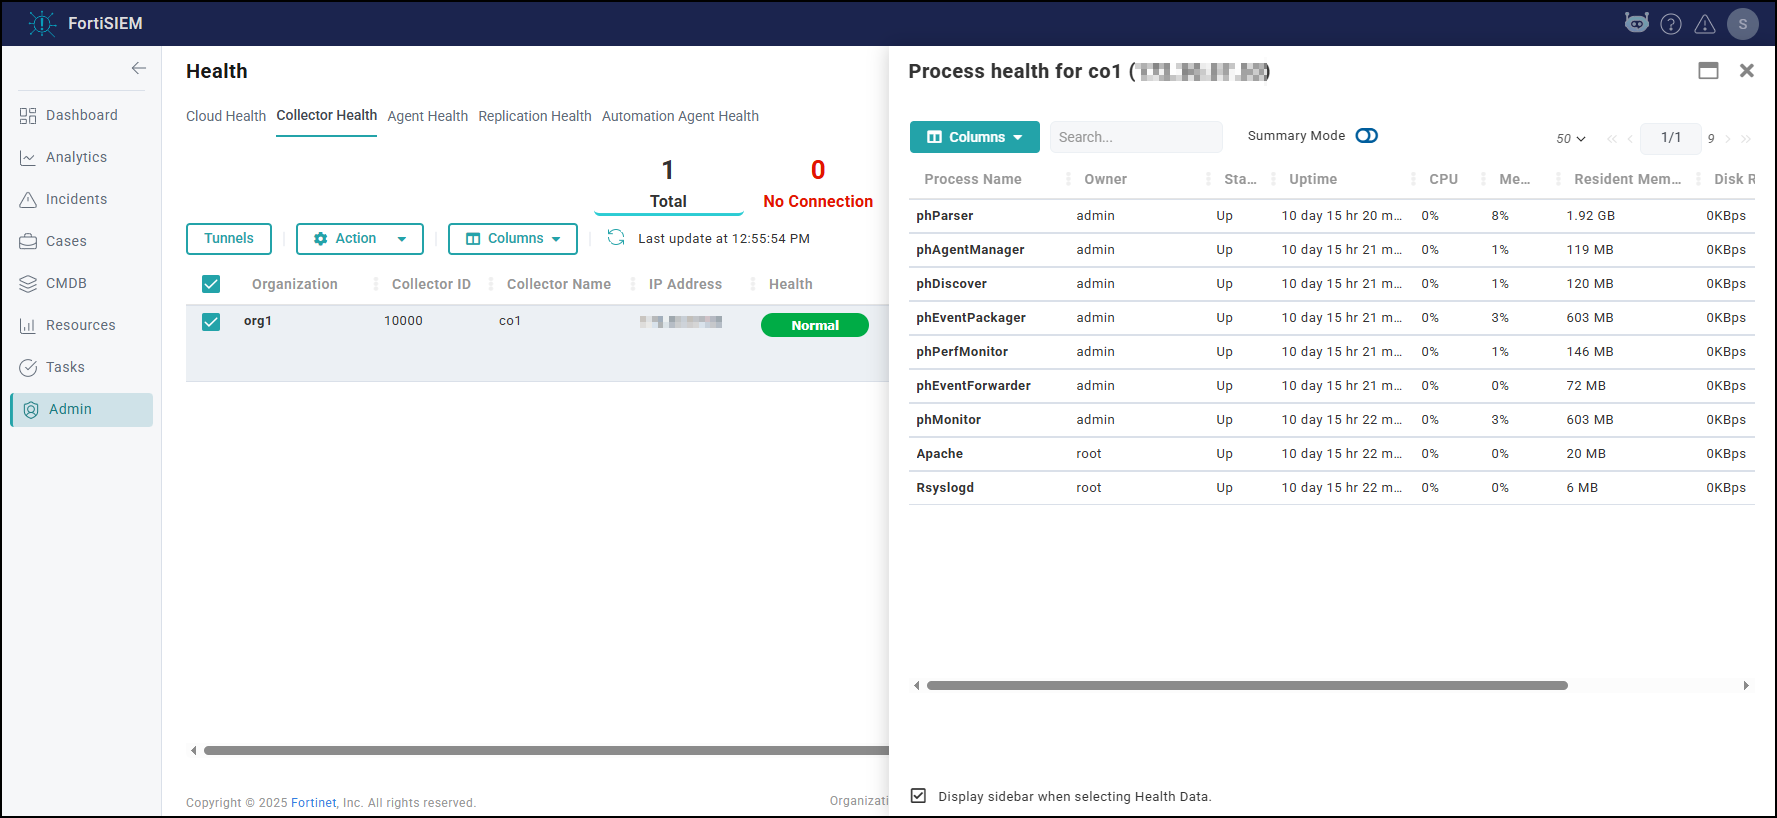
- Check Cloud health and Collector health from the FortiSIEM GUI:
- Versions display correctly.
- All processes are up and running.
- Resource usage is within limits.
- Check that the Redis passwords match on the Supervisor and Workers:
- Supervisor: run the command
phLicenseTool --showRedisPassword - Worker: run the command
grep -i auth /opt/node-rest-service/ecosystem.config.js
- Supervisor: run the command
- Check that the database passwords
match on the Supervisor and Workers:
- Supervisor: run the command
phLicenseTool --showDatabasePassword - Worker: run the command
phLicenseTool --showDatabasePassword
- Supervisor: run the command
- Elasticsearch case: check the Elasticsearch health
Note: Status should be Normal, not Warning as illustrated here.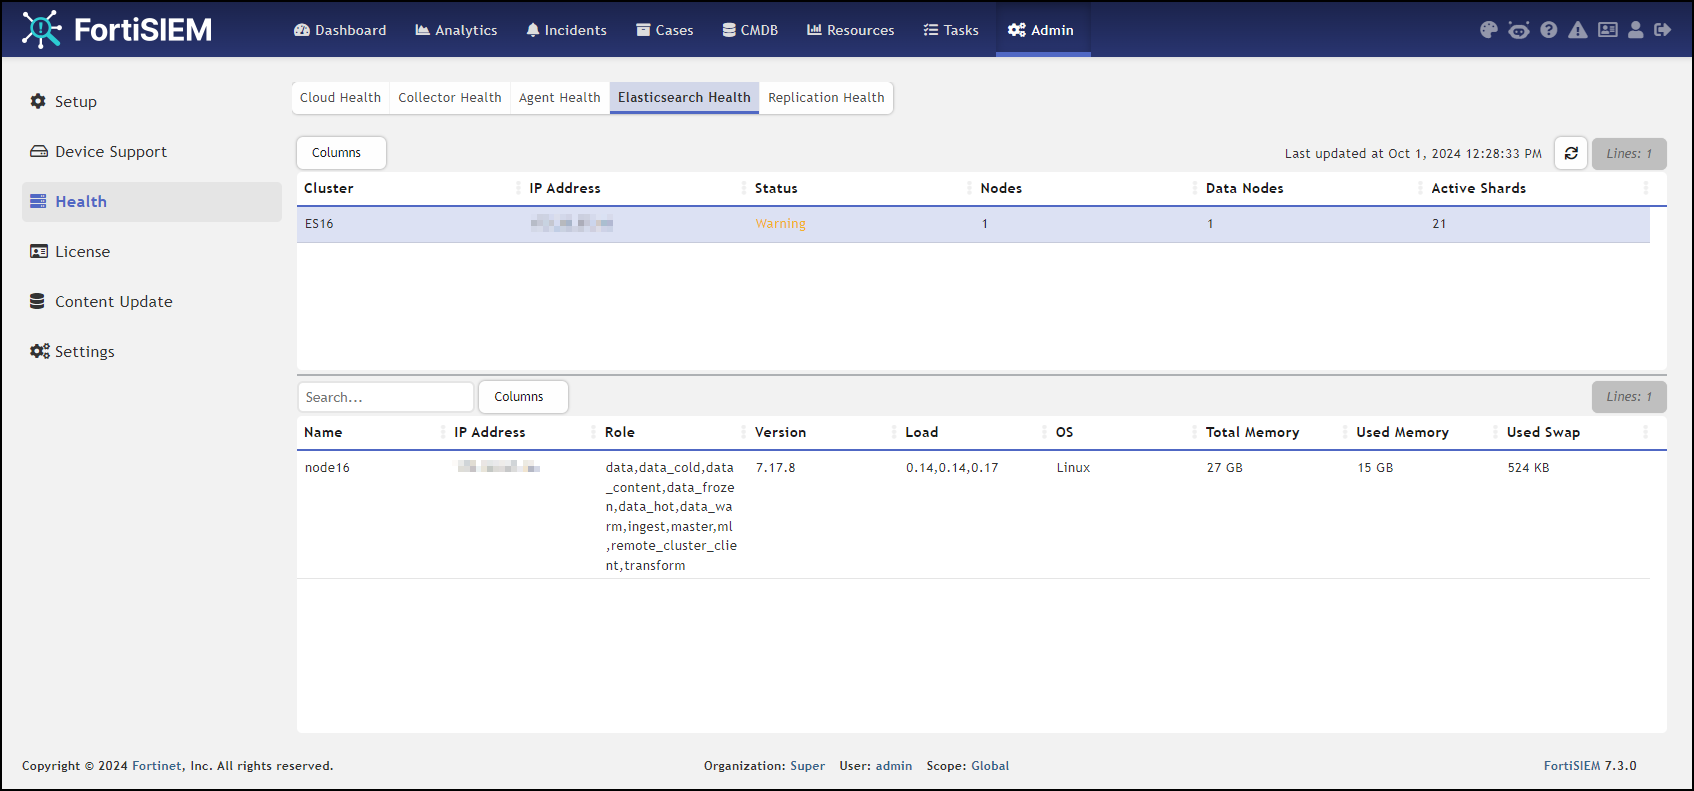
- Check that events are
received correctly:
- Search All Events in last 10 minutes and make sure there is data.

- Search for events from Collector and Agents and
make sure there is data. Both old and new collectors and agents must work.
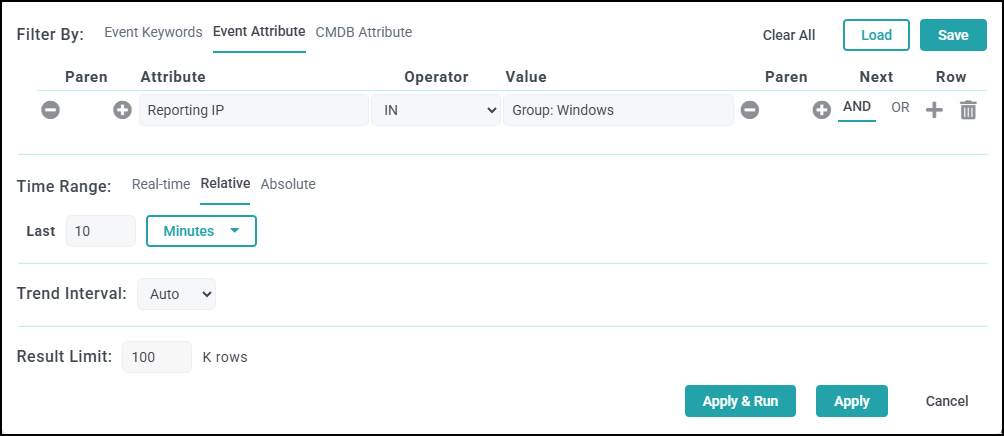
- Search for events using CMDB Groups (Windows, Linux, Firewalls, etc.)
and make sure there is data.
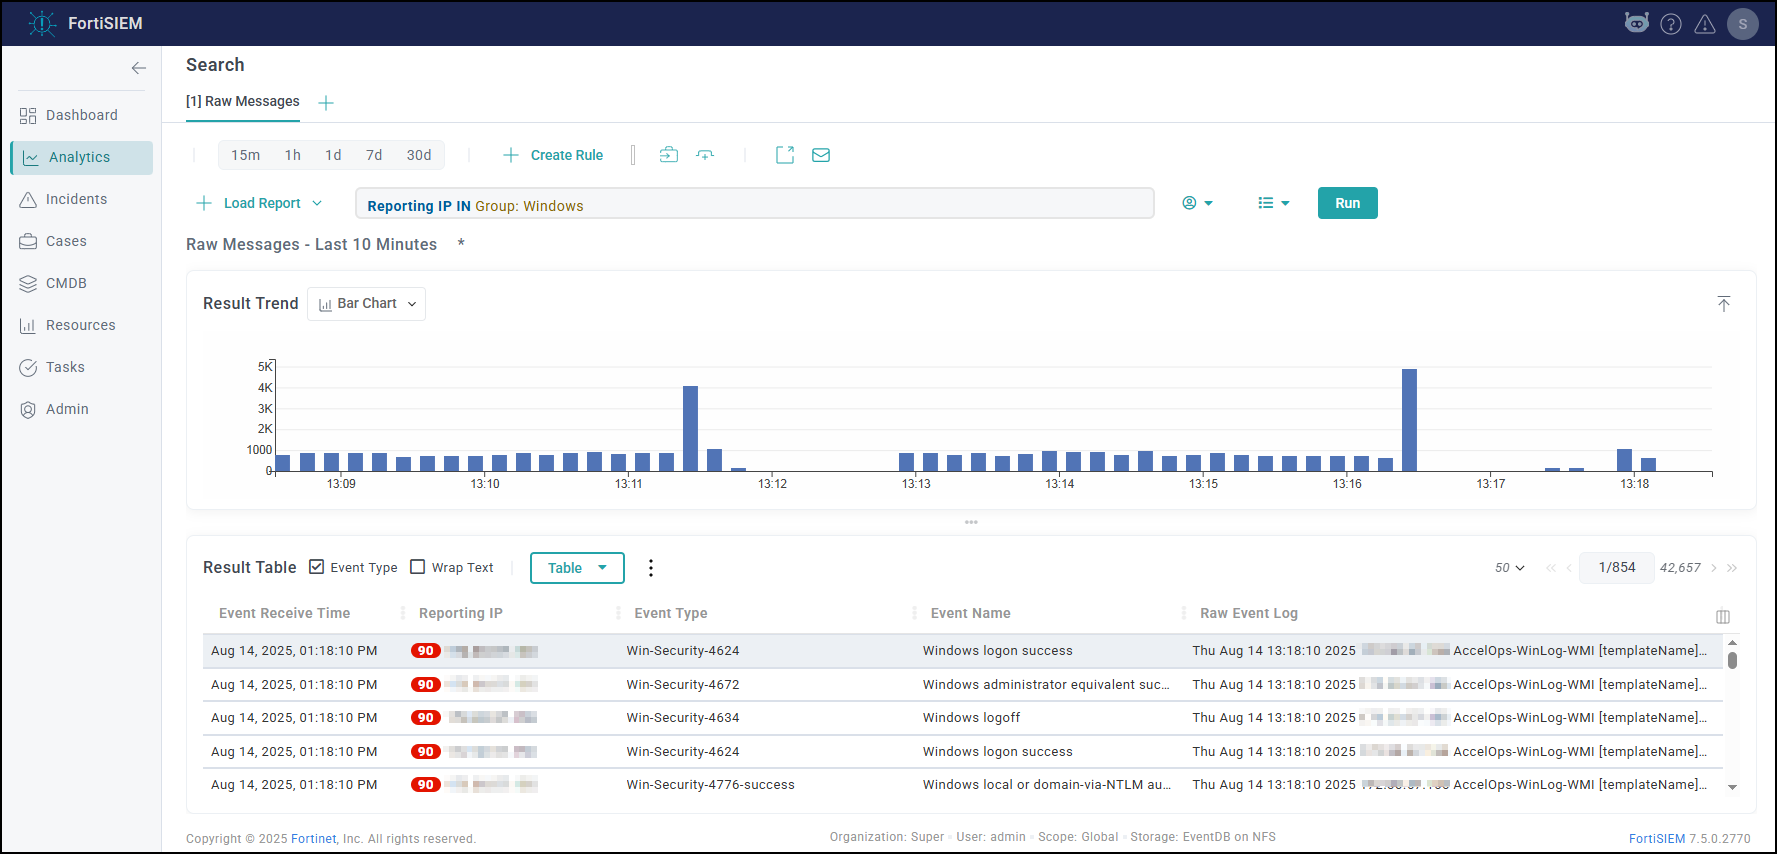
- Search All Events in last 10 minutes and make sure there is data.
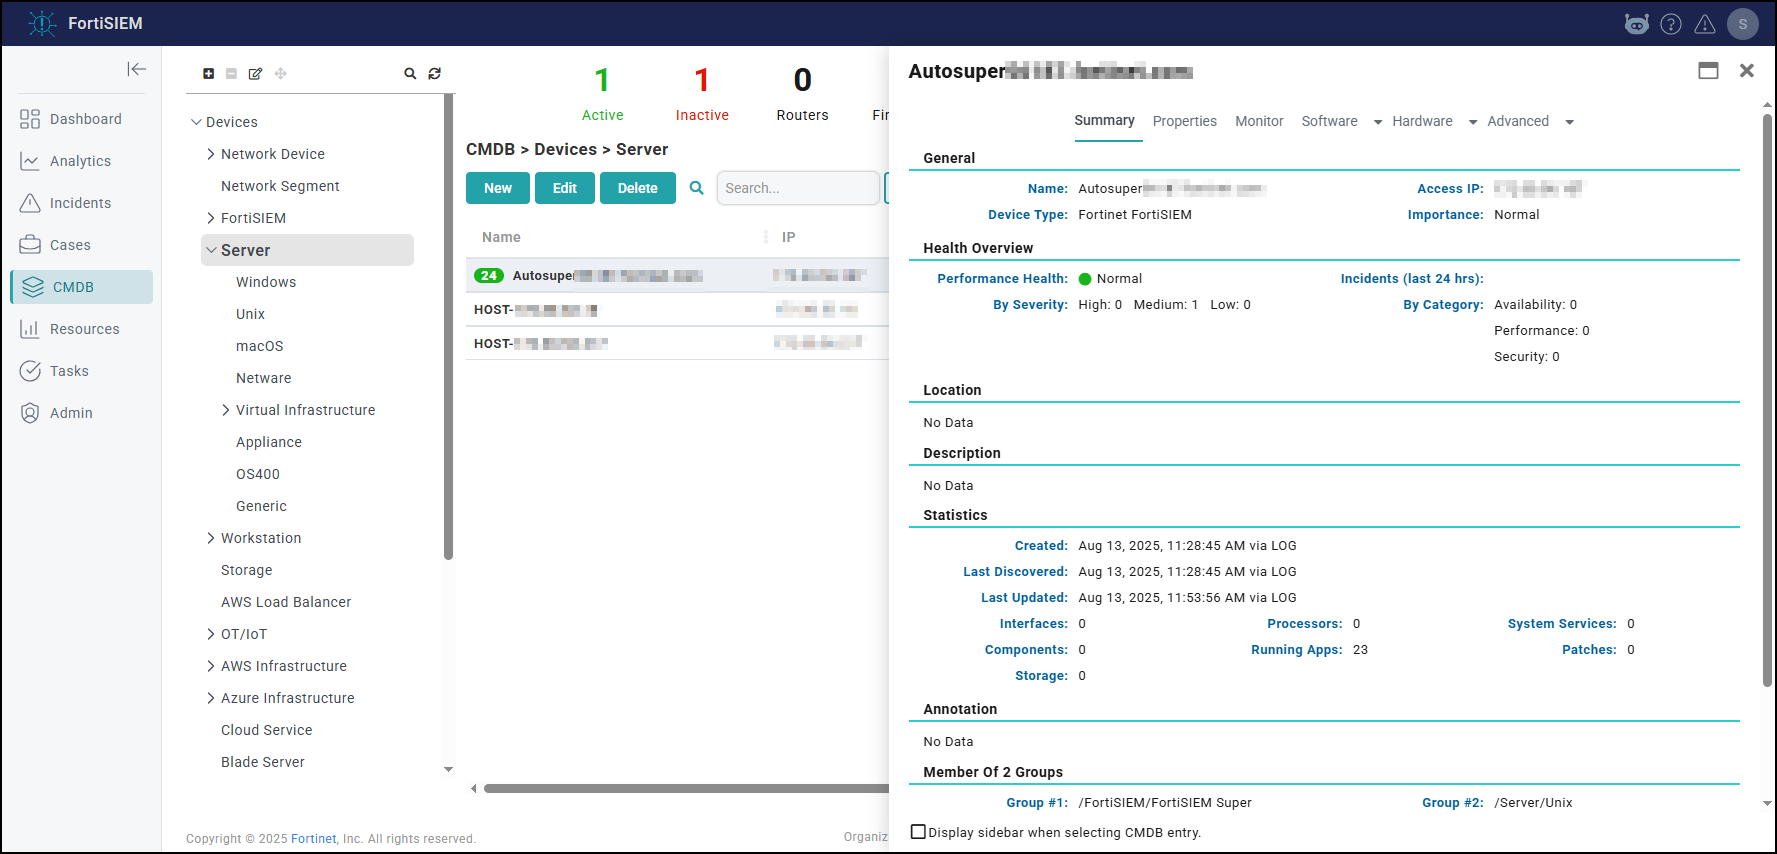
- Make sure there are no SVN authentication errors in CMDB when you click any device name.
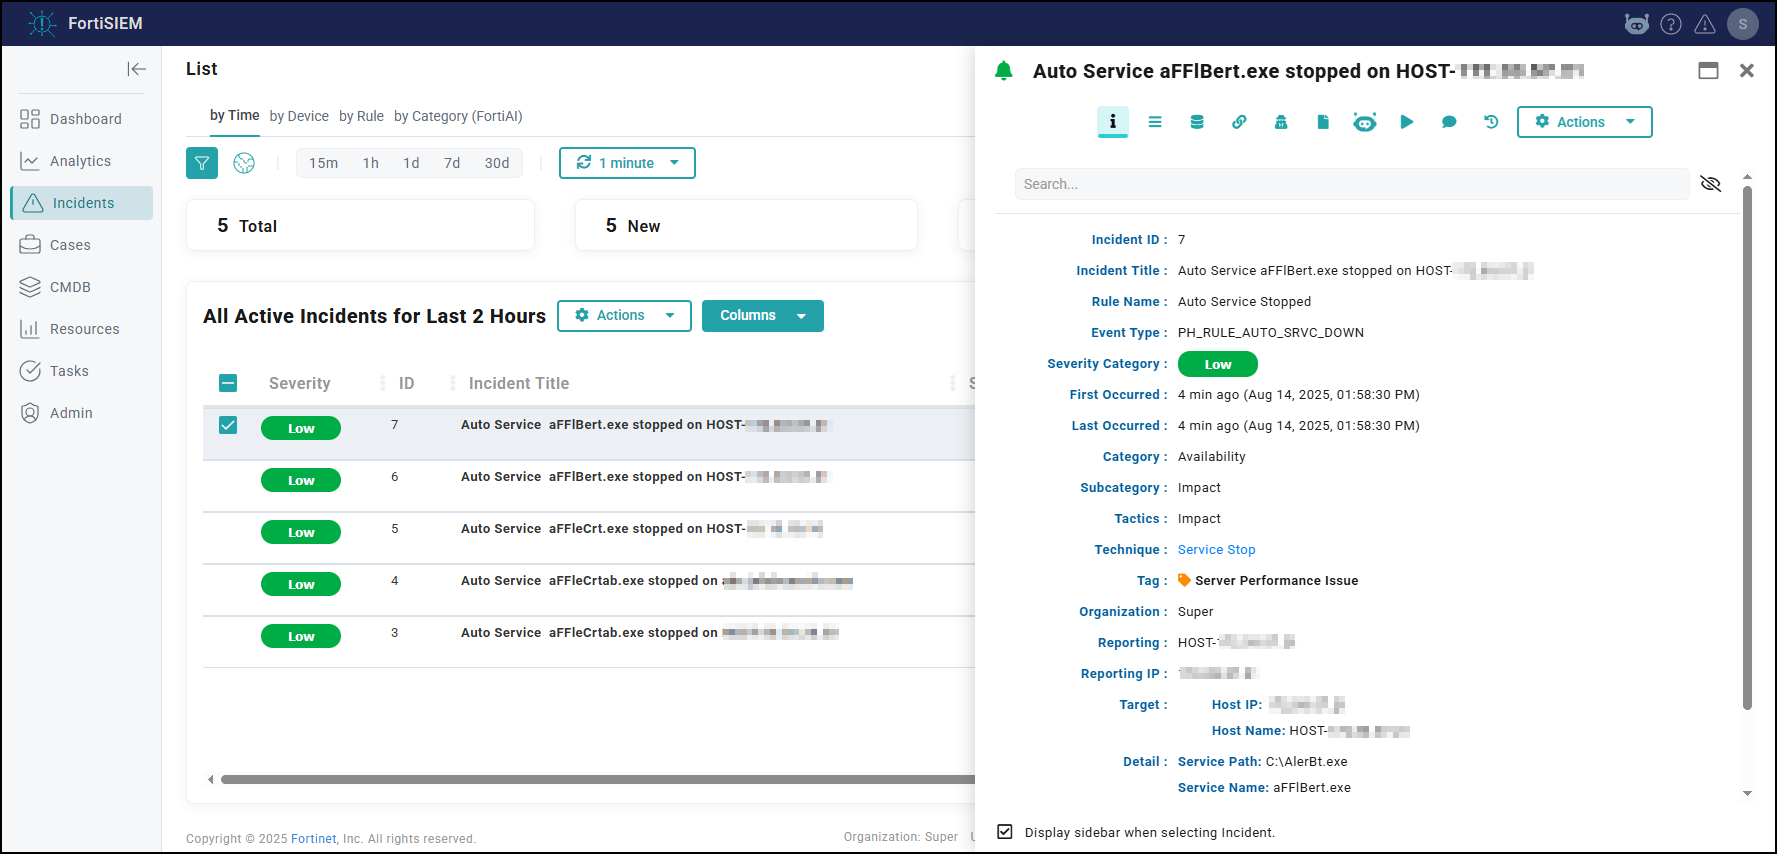
- Make
sure recent Incidents and their triggering events are displayed.
- Check Worker for Collector Credentials by running the following command:
cat /etc/httpd/accounts/passwds
This validates that all workers contain collector credentials to log in and upload logs. - Run the following script on the Supervisor.
get-fsm-health.py --local
Your output should appear similar to the example output in Post Upgrade Health Check get-fsm-health.py --local Example Output.
Upgrading with FortiSIEM Manager
If you have FortiSIEM and FortiSIEM Manager deployed in your environment, then take the following steps.
-
Upgrade the FortiSIEM Manager.
-
After the FortiSIEM Manager is fully upgraded, then upgrade each FortiSIEM Cluster.
Upgrade via Proxy
During upgrade, the FortiSIEM Supervisor, Worker, or Hardware appliances (FSM-2000F, 2000G, 2200G, 3500F, 3500G, or 3600G) must be able to communicate with the Rocky Linux 8 OS repositories (os-pkgs-cdn.fortisiem.fortinet.com and os-pkgs-r8.fortisiem.fortinet.com) hosted by Fortinet, to get the latest OS packages. Follow these steps to set up this communication via proxy, before initiating the upgrade.
-
SSH to the node.
-
Create this file
etc/profile.d/proxy.shwith the following content and then save the file.PROXY_URL="<proxy-ip-or-hostname>:<proxy-port>" export http_proxy="$PROXY_URL" export https_proxy="$PROXY_URL" export ftp_proxy="$PROXY_URL" export no_proxy="127.0.0.1,localhost"
-
Run
source /etc/profile.d/proxy.sh. -
Test that you can use the proxy to successfully communicate with the two sites here:
os-pkgs-cdn.fortisiem.fortinet.comos-pkgs.fortisiem.fortinet.com. -
Begin the upgrade.
Restoring Hardware from Backup After a Failed Upgrade
Background Information
Introduced in 6.3.1, when upgrading a FortiSIEM system on hardware (500F, 500G, 2000F, 2000G, 2200G, 3500F, 3500G, 3600G) to a later version, the upgrade automatically creates a system backup of root disk, boot disk, opt disk, and for the Supervisor, also CMDB disk, and SVN disks.
This backup is stored in /opt/hwbackup if the /opt partition has 300GB or more free space. Once the backup pre-upgrade task is complete, the logs are stored at /opt/phoenix/log/backup-upg.stdout.log and /opt/phoenix/log/backup-upg.stderr.log.
The actual backup may be much smaller depending on the size of your CMDB and SVN partitions. Backups are also compressed using XZ compression. The partition itself is 500GB in size, so in most installations, you will have this much available space.
In case you do not have 300GB free space in /opt, the upgrade will abort quickly. In this case, you can also externally store the backup. For this, you will need to mount an external disk and create a symlink like this:
ln -s <external-disk-mount-point> /opt/hwbackup
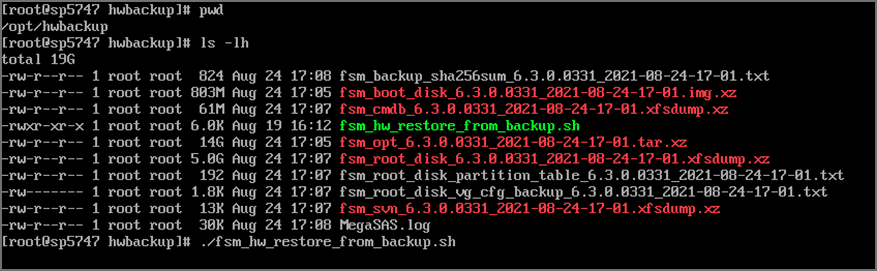
Here is a sample listing of /opt/hwbackup:
If there was a previous attempt at an upgrade, then there will already be a /opt/hwbackup directory. A new attempt will rename /opt/hwbackup to /opt/hwbackup.1 and continue the new backup and upgrade. This means that the system will keep at most 2 backups. For instance, if you upgrade from 6.3.0 to 6.3.1 and in the future to 6.3.2, then you will have a backup of both the 6.3.0 system as well as 6.3.1 system. If you perform a hardware restore after upgrading to 7.5.0, the appliance will reboot twice during the restoration process.
Restoring from Backup
Restoring from backup will restore the root disk, boot disk, opt disk, and for the Supervisor, also CMDB disk, and SVN disks. The event data is not modified as part of an upgrade and therefore requires no restoration.
To restore from a backup, take the following steps:
-
Switch the running system to rescue mode. You will need to do the following on the VGA or serial console of the hardware.
-
Switch to rescue mode as follows after logging into the system as the 'root' user.
systemctl isolate rescue.target
-
You will be prompted to type the root administrator password as shown here.

-
If the backup is stored on
/opt/hwbackup, you canchdirto this. If the backup is stored on an external disk, mount the disk and symlink it again to/opt/hwbackup. -
Run the restore command:
cd /opt/hwbackup./fsm_hw_restore_from_backup.shNote: If you run the restore program in normal multi-user mode, the script exits with an error like this:

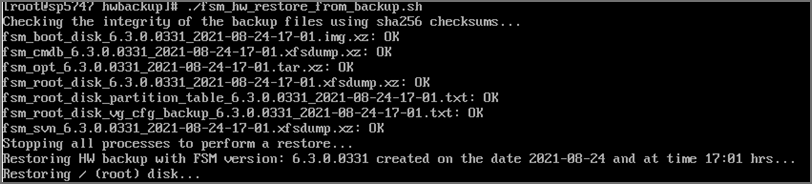
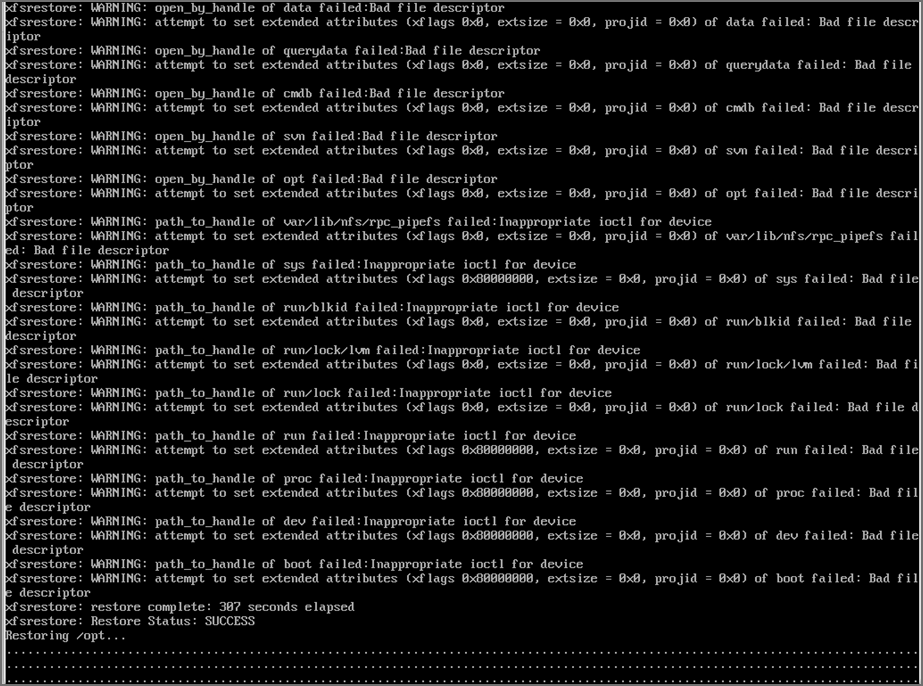
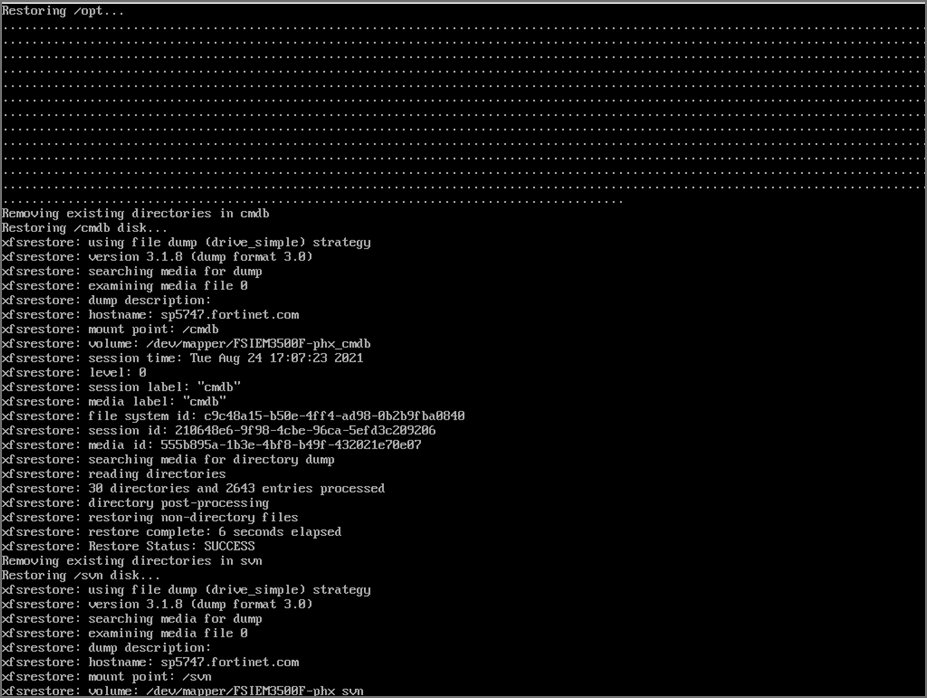
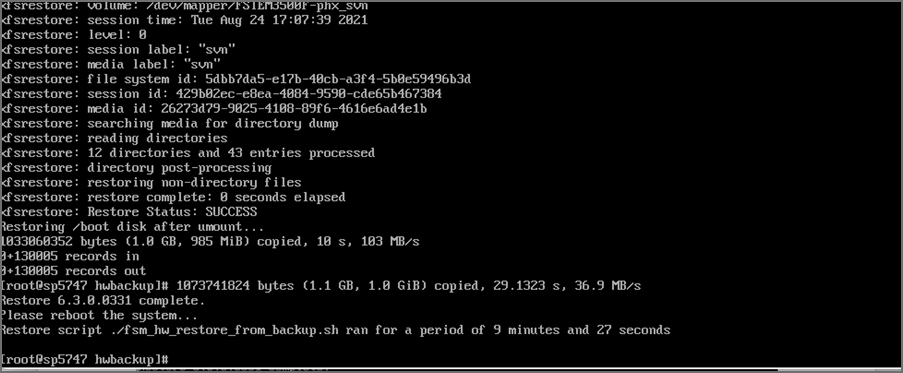
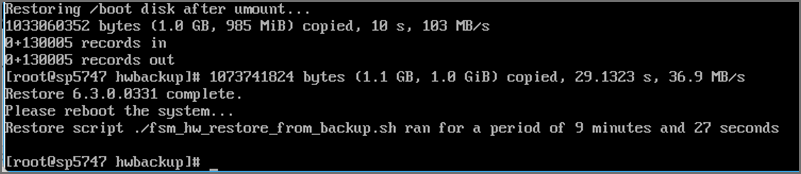
The whole restore may take anywhere from 15 minutes to more than an hour depending on how large the CMDB/SVN partitions are. The restore script will make sure that the SHA 256 checksums for the backup files match and only then, will it proceed. If this fails, then it will stop the restore process immediately. Here are screenshots for a sample Supervisor restore from 6.3.1 to 6.3.0.0331:
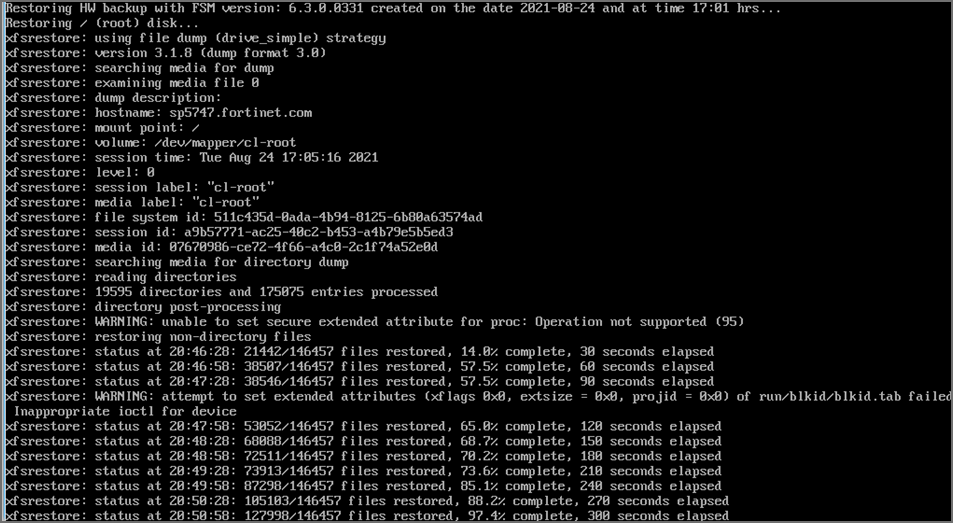
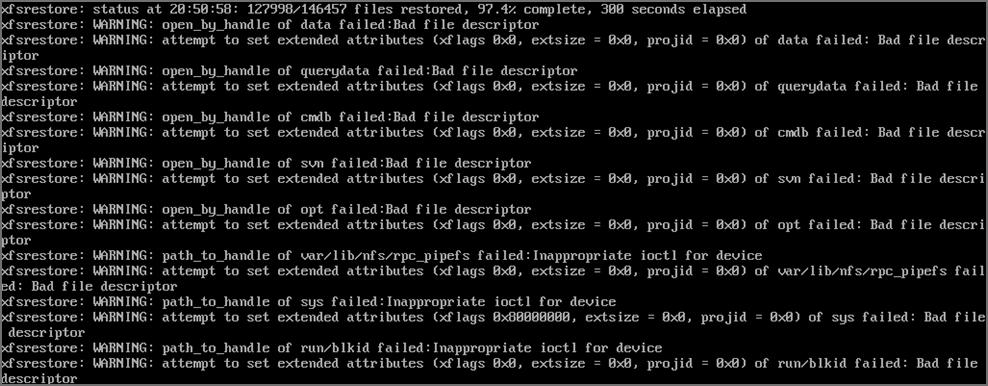
Note: These WARNING messages can be ignored. These are likely to be temporary system files at the Linux level when the backup was taken. At the time of backup, all FSM services are stopped.
-
Once the restore is complete, it will print how long the restore took and will ask you to reboot the system. Run the command to reboot your system:
rebootThe system should now come up with your pre-upgrade version. Wait at least 15 minutes for all processes to come up.
If you are using 3500F, 2000F, 2000G, 2200G, 3500G or 3600G as a worker node, or 500F, 500G as a collector node, then the restore of CMDB and SVN is skipped.
The restore logs are stored in this location
/opt/hwbackup/fsm-hw-restore-<date>-<hour-minute>.logIf the restore fails for any reason or if processes do not come up after reboot, then please contact technical support.
Upgrade Log
The 7.5.0.0590 Upgrade ansible log file is located here: /usr/local/upgrade/logs/ansible.log.
Errors can be found at the end of the file.
Important Notes for Upgrading from Older Versions
Upgrading from 6.5.0 Running ClickHouse Event Database
-
This applies only if you are upgrading from 6.5.0 and using ClickHouse. FortiSIEM 6.5.0 ran ClickHouse on a single node and used the Merge Tree engine. FortiSIEM 6.6.0 onwards runs Replicated Merge Tree engine, even if Replication is not turned on. So after upgrading to FortiSIEM 6.6.0, you will need to do the following steps to migrate the event data previously stored in Merge Tree to Replicated Merge Tree. Without these steps, old events in 6.5.0 will not be searchable in 6.6.0. Once you are on post 6.5.0 release, you will not need to do this procedure again.
After upgrading your FortiSIEM from 6.5.0 to 6.6.0 or later, take the following steps.
-
Navigate to Admin >Settings > Database > ClickHouse Config.
-
Click Test, then click Deploy to enable the ClickHouse Keeper service which is new in 6.6.0.
-
Migrate the event data in 6.5.0 to 6.6.0 by running the script
/opt/phoenix/phscripts/clickhouse/clickhouse-migrate-650.sh.
-
-
This applies only if you are upgrading from 6.5.0 and using ClickHouse. Go to Storage > Online Settings and click Test, it will fail. Fortinet introduced a new disk attribute called "Mounted On" to facilitate disk addition/deletion that was not present in 6.5.0. Follow these steps to fix the problem.
-
Go to Admin > Setup > Storage > Online. ClickHouse should be the selected database.
-
For Hot tier and for every configured disk within the tier, do the following:
-
The existing disk should have empty Mounted On.
-
Click + to add a disk. For the new disk, Disk Path should be empty and Mounted On set to /data-clickhouse-hot-1.
-
Copy the Disk Path from the existing disk into this newly disk. The new disk should have the proper Disk Path and Mounted On fields.
-
Delete the first disk with empty Mounted On.
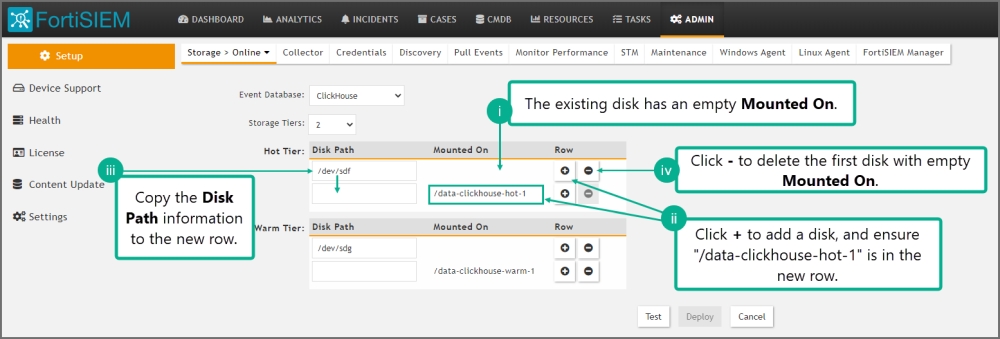
Do this for all disks you have configured in 6.5.0. After your changes, the disks should be ordered /data-clickhouse-hot-1, /data-clickhouse-hot-2, /data-clickhouse-hot-3 from top to bottom.
-
-
Repeat the same steps for the Warm tier (if one was configured in 6.5.0), except that the Mounted On fields should be /data-clickhouse-warm-1, /data-clickhouse-warm-2, /data-clickhouse-warm-3 from top to bottom.
-
When done, click Test, then click Deploy.
-
General Upgrade Notes
These notes apply to all upgrades in general.
-
Remember to remove the browser cache after logging on to the 7.5.0 GUI and before doing any operations.
-
Make sure to follow the listed upgrade order.
-
Upgrade the Supervisor first. It must be upgraded prior to upgrading any Workers or Collectors.
-
Upgrade all existing Workers next, after upgrading the Supervisor. The Supervisor and Workers must be on the same version.
-
Older Collectors will work with the upgraded Supervisor and Workers. You can decide to upgrade Collectors to get the full feature set in 7.5.0 after you have upgraded all Workers.
-
Reference
Steps for Expanding /opt Disk
-
Go to the Hypervisor and increase the size of
/optdisk or the size of/svndisk -
# ssh into the supervisor as
root -
# lsblk
NAME MAJ:MIN RM SIZE RO TYPE MOUNTPOINT ... sdb 8:16 0 100G 0 disk << old size ├─sdb1 8:17 0 22.4G 0 part [SWAP] └─sdb2 8:18 0 68.9G 0 part /opt ... -
# yum -y install cloud-utils-growpart gdisk -
# growpart /dev/sdb 2CHANGED: partition=2 start=50782208 old: size=144529408 end=195311616 new: size=473505759 end=524287967 -
# lsblkChanged the size to 250GB for example: #lsblk NAME MAJ:MIN RM SIZE RO TYPE MOUNTPOINT ... sdb 8:16 0 250G 0 disk <<< NOTE the new size for the disk in /opt ├─sdb1 8:17 0 22.4G 0 part [SWAP] └─sdb2 8:18 0 68.9G 0 part /opt ... -
# xfs_growfs /dev/sdb2meta-data=/dev/sdb2 isize=512 agcount=4, agsize=4516544 blks = sectsz=512 attr=2, projid32bit=1 = crc=1 finobt=1, sparse=1, rmapbt=0 = reflink=1 data = bsize=4096 blocks=18066176, imaxpct=25 = sunit=0 swidth=0 blks naming =version 2 bsize=4096 ascii-ci=0, ftype=1 log =internal log bsize=4096 blocks=8821, version=2 = sectsz=512 sunit=0 blks, lazy-count=1 realtime =none extsz=4096 blocks=0, rtextents=0 data blocks changed from 18066176 to 59188219 -
# df -hzFilesystem Size Used Avail Use% Mounted on ... /dev/sdb2 226G 6.1G 220G 3% / << NOTE the new disk size
Post Upgrade Health Check get-fsm-health.py --local Example Output
Here is an example of a successful output when running get-fsm-health.py --local.
                        Health Check
============================================================
Wed Jul 07 17:35:26 PDT 2021
--------------------
Fetching Information from Local.
- Host Info ........................................ succeeded.
- FortiSIEM Version ................................ succeeded.
- FortiSIEM License Info ........................... succeeded.
- Configuration .................................... succeeded.
- CMDB Info ........................................ succeeded.
- Largest CMDB Tables .............................. succeeded.
- EPS Info ......................................... succeeded.
- Worker Upload Event Queue Info ................... succeeded.
- Inline Report Queue .............................. succeeded.
- Active Queries ................................... succeeded.
- Load Average ..................................... succeeded.
- CPU Usage Details ................................ succeeded.
- Top 5 Processes by CPU ........................... succeeded.
- Memory Usage ..................................... succeeded.
- Swap Usage ....................................... succeeded.
- Top 5 Processes by Resident Memory ............... succeeded.
- Disk Usage ....................................... succeeded.
- IOStat ........................................... succeeded.
- Top 5 Processes by IO ............................ succeeded.
- NFSIOStat ........................................ succeeded.
- NFS Disk Operations Time (second) ................ succeeded.
- Top 10 Slow EventDB Queries ( > 1 min) Today ..... succeeded.
- Top 5 Rule with Large Memory Today ............... succeeded.
- FortiSIEM Process Uptime Less Than 1 day ......... succeeded.
- Top 5 log files in /var/log  ..................... succeeded.
- FortiSIEM Shared Store Status .................... succeeded.
- App Server Exceptions Today ...................... succeeded.
- Backend Errors Today ............................. succeeded.
- Backend Segfaults Today .......................... succeeded.
- Patched files .................................... succeeded.
- Outstanding Discovery Jobs ....................... succeeded.
- FortiSIEM Log File Size .......................... succeeded.
- FortiSIEM Fall Behind Jobs ....................... succeeded.
- FortiSIEM Jobs Distribution ...................... succeeded.


------------------------------------------------------------
                      Data Collection
============================================================
All data was collected.


------------------------------------------------------------
                     Health Assessment
============================================================
Overall health: **Critical**

CPU Utilization: Normal
  - 15 min Load average: 1.05
  - System CPU: 4.5%
Memory Utilization: Normal
  - Memory utilization: 48%
  - Swap space utilization: 0.0%
  - Swap in rate: 0B/s
  - Swap out rate: 0B/s
I/O Utilization: Normal
  - CPU Idle Wait: 0.0%
  - Local disk IO util: 0.2%
  - NFS latency (/data): 2.2ms
Disk Utilization: Normal
  - Disk Utilization: 33%
Event Ingestion: Normal
  - Worker event upload queue: 1
  - Shared store status: Nobody is falling behind
Event Analysis: Normal
  - Inline report queue: 4
  - Active query queue: 0
System Errors: Normal
  - Process down. See details.
  - App server errors: 0
  - Backend error: 2
Performance Monitoring: **Critical**
  - 1250 jobs are falling behind. (Super)  *****


------------------------------------------------------------
                          Details
============================================================

#######################  Host Info  ########################
NodeType   Host Name                      IP Address

Super      sp156                          172.30.56.156


###################  FortiSIEM Version  ####################
NodeType   Version         Commit Hash          Built On

Super      6.3.0.0331      6e29f46b382          Thu Jul 01 15:58:02 PDT 2021


#################  FortiSIEM License Info  #################
License Information:
Attribute                               Value                                   Expiration Date
Serial Number                           FSMTEST8888888888
Hardware ID                             88888888-8888-8888-8888-888888888888
License Type                            Service Provider
Devices                                 1000                                    Dec 31, 2021
Endpoint Devices                        1000                                    Dec 31, 2021
Additional EPS                          10000                                   Dec 31, 2021
Total EPS                               22000                                   Dec 31, 2021
Agents                                  2000                                    Dec 31, 2021
UEBA Telemetry License                  1000                                    Dec 31, 2021
IOC Service                             Valid                                   Dec 31, 2021
Maintenance and Support                 Valid                                   Dec 31, 2021

……