Grouping nearby cameras
You can group cameras that are physically near to each other so that you can quickly switch between locations, such as when you need to follow someone who goes from one room to another.
- Click the Settings button in the top right corner.

- Go to Settings > Cameras.
- Drag the selection icon
 next to each camera to the Nearby Camera List column.
 - If you want to change the order of cameras in the list, select its name and then click the up or down arrow button.
- In the field under the Name column, enter a unique name for the group of cameras.
- In the dropdown list under the Parent Recorder column, select the FortiRecorder that these cameras are connected to.
-
Click the OK button.
The group of nearby cameras appears in the Devices panel, under the FortiRecorder associated with those cameras.
To switch between displays of nearby cameras
-
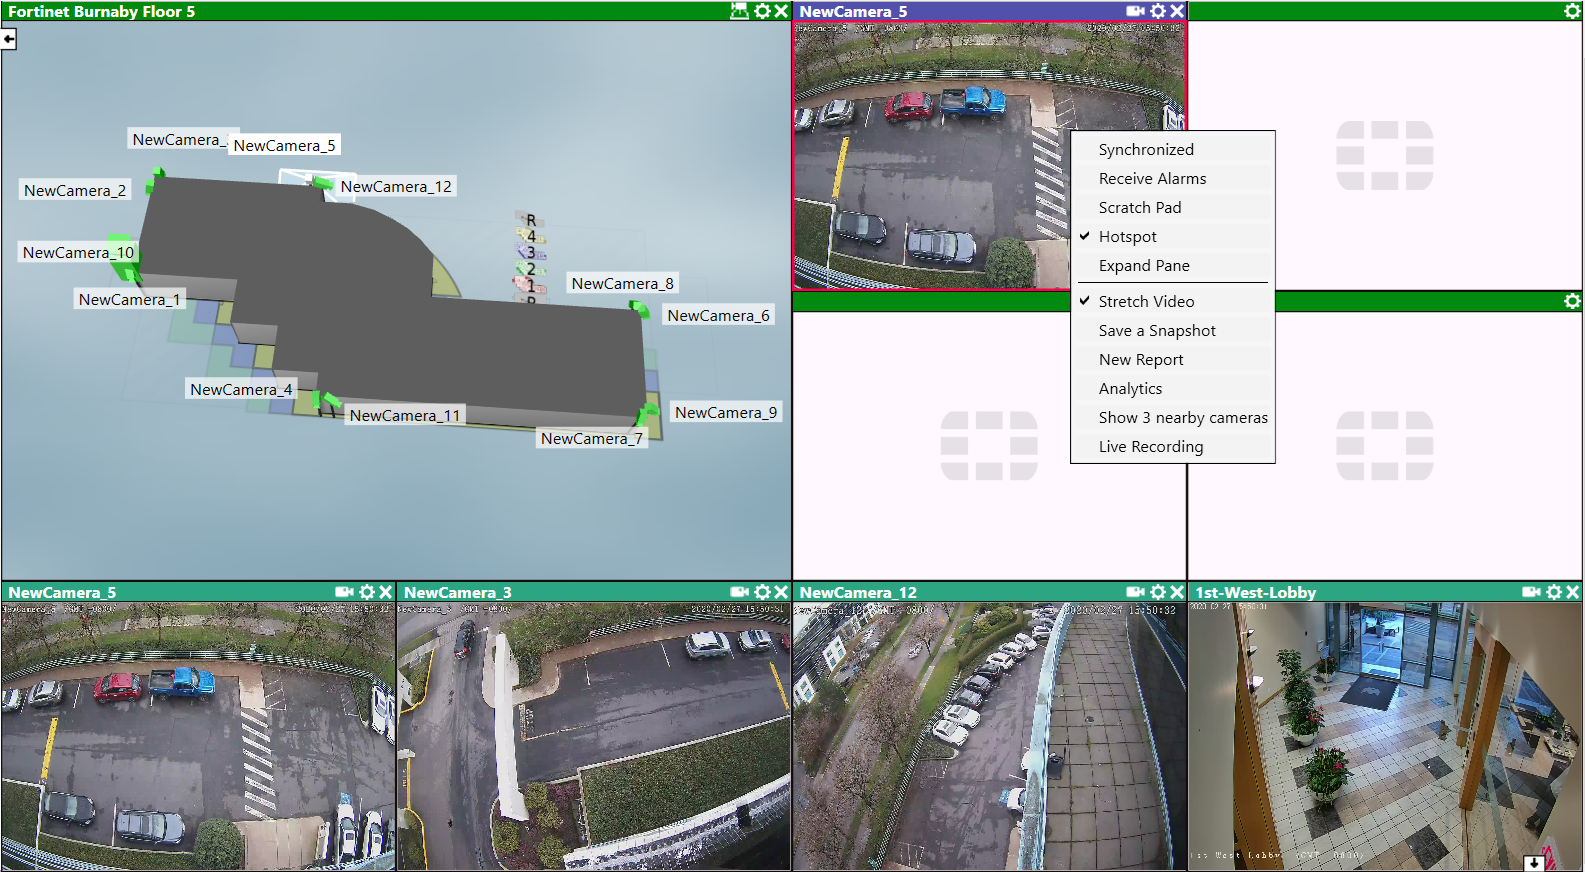
In the view pane area, right-click some view panes and select Scratch Pad.
This indicates where to display video from nearby cameras. Otherwise, nearby cameras will be displayed in empty view panes (if any). If there are not enough scratch pad or empty view panes when you use a group of nearby cameras, an error message will appear in the Info Messages panel.

If you often use nearby cameras, you can save time by adding this set of view panes to your layout and saving it as the default view when you log in. -
Drag a camera (either a live stream or a previously recorded video) to an empty view pane.
Alternatively, you can display nearby cameras by using 3D map sectors.
-
Right-click on the view pane and go to Show nearby cameras.
The image below illustrates a group of nearby cameras in the bottom row.