


External IDP Authentication
FortiDAST supports integration of third-party Identity Provider (IDP) services to log-in and manage networks. This feature is useful for enterprises that need to secure their user credentials and hence provision FortiDAST access through their own Identity Provider. The external IDP initiated Security Assertion Markup Language (SAML) assertion consisting of specific IDP attributes is used by FortiCloud/FortiDAST to verify the user account details and grant required access.
External IDP authentication is offered in conjunction with FortiCare and FortiAuthenticator. Contact the Fortinet Customer Support team to enable external IDP support and raise an enrollment request with the appropriate FortiCare accounts. After the enrollment is complete follow these setup procedures.
Note: Support for SAML 2.0 and IDP initiated assertion response is required.
- Create an IDP with SAML Service Provider Metadata. The following is an example where company is the unique name of your organization.
SP Entity ID http://customersso1.fortinet.com/saml-idp/proxy/{company}/metadata/SP Login URL https://customersso1.fortinet.com/saml-idp/proxy/{company}/saml/?acsRelay State https://customersso1.fortinet.com/saml-idp/proxy/{company}/login/ - Configure the SAML assertions with the username and role attributes for permission control in FortiCloud.
- Provide specific information to Fortinet, such as, the SAML Metadata file, company name, contact information, and the Fortinet master account that the IDP requires to connect to.
- Configure external IDP roles in FortiCloud to allow the required access to FortiDAST. See Adding External IDP Roles.
After successful authentication on your Identity Provider, you are re-directed to the FortiCloud portal from where you access FortiDAST based on the configured roles.
Adding External IDP Roles
Access the Identity & Access Management (IAM) service from the FortiCloud portal
- Navigate to Users > Add New > ADD IDP User and click Add IDP Role.
- Enter a unique Role Name and Description (optional).
Note: The role name must exactly match the role attribute in the SAML assertion. For FortiDAST the role attributes defined are: Admin,IDP_ReadOnlyAll and IDP_ReadWriteAll. - Select an asset group from the Asset Permissions list.
-
Select the Permission profile. See, Adding Permission Profiles.
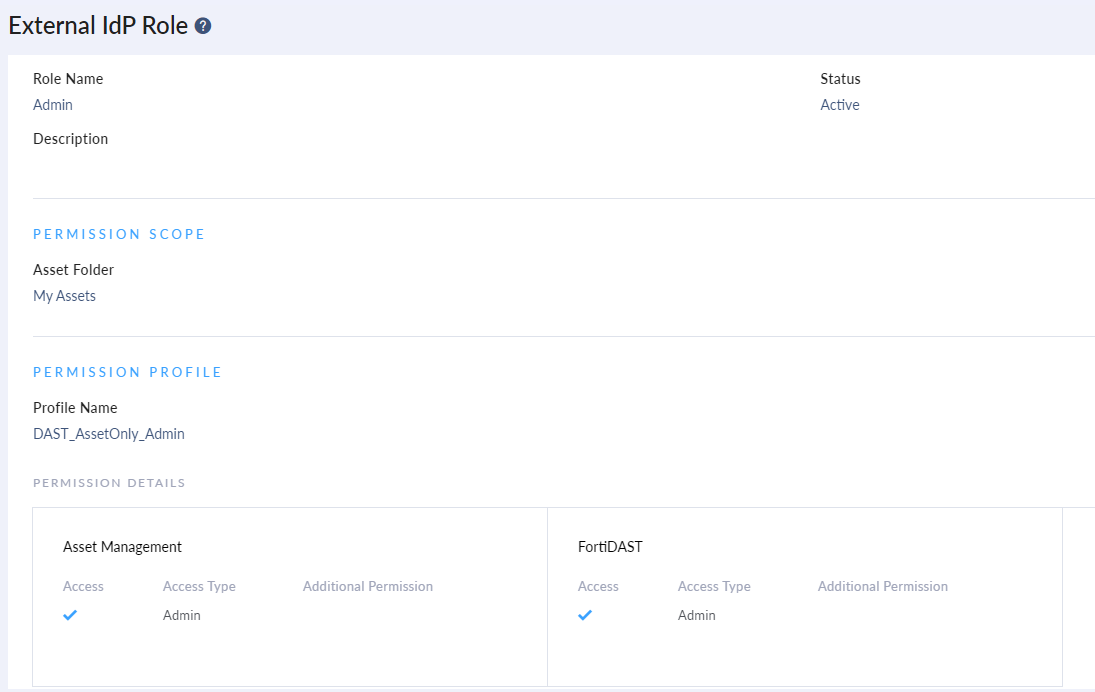
- Click Add Role.
After the role is created, it is listed on the on the Manage External IdP Roles page. You can enable/disable or delete a created role. Select the role and click on the required option.
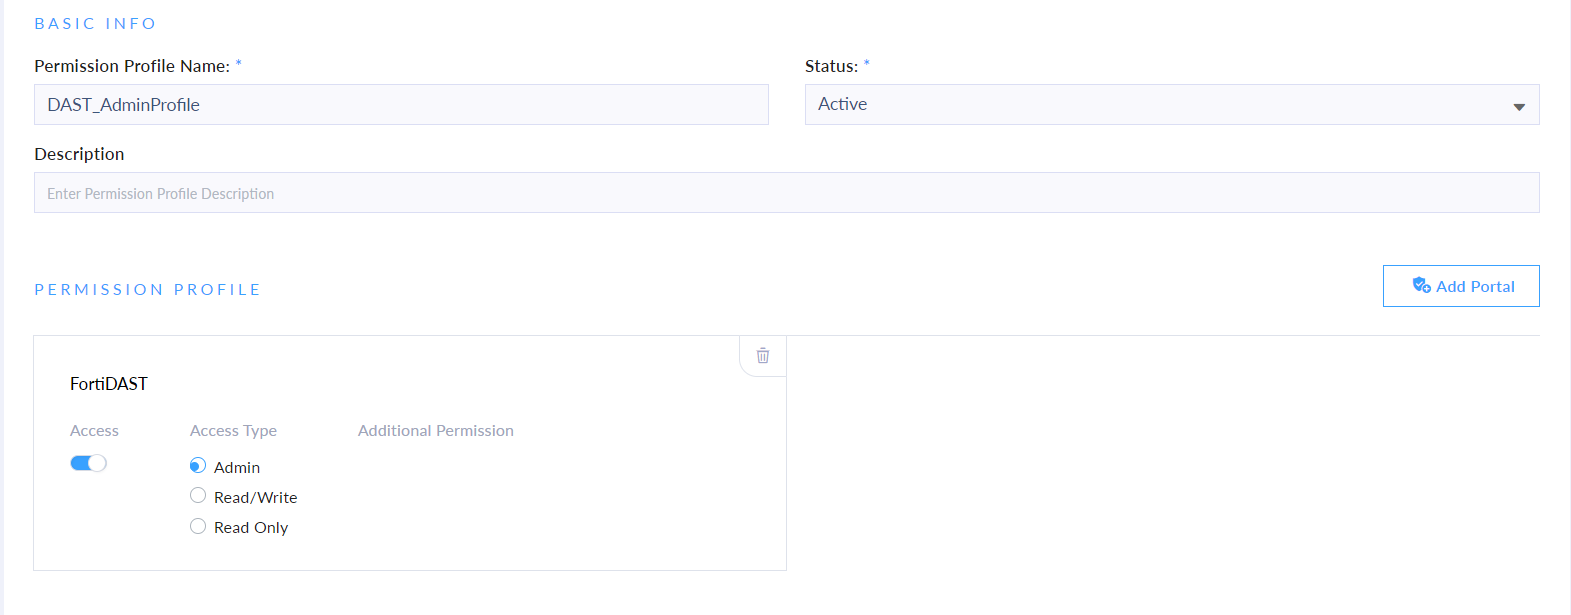
Adding Permission Profiles
Access the Identity & Access Management (IAM) service from the FortiCloud portal. Configure the Cloud Management & Services permissions to enable access to FortiDAST Cloud.
-
Navigate to Permission Profiles.
-
Click Add New.
-
Click Add Portal and select FortiDAST from the list and click Add.
-
Configure the required permissions for FortiDAST:
-
Toggle Access to allow access to FortiDAST.
-
Select the required Access Type: Admin, Read Write, or Read-Write.
-