Custom Decoy Image
For most deployments, the built-in decoys provided with FortiDeceptor are sufficient and easy to deploy. However, you also have the option to create a decoy from your gold image using the custom decoy feature available with the subscription license.
FortiDeceptor v6.2.1 supports the following OS types:
|
OS |
OS version |
||||||||||||
|---|---|---|---|---|---|---|---|---|---|---|---|---|---|
| Windows |
|
||||||||||||
| Windows Server |
|
||||||||||||
| RedHat Enterprise Linux |
|
||||||||||||
|
Ubuntu |
|
Overview of implementing Decoy Customization:
- Order the FortiDeceptor Custom Decoy Subscription for FortiDeceptor hardware appliance only.
The Decoy Customization subscription is for FortiDeceptor hardware appliances only. This subscription license is already included in the FortiDeceptor VM bundle.
- Install FortiDeceptor.
After installing FortiDeceptor with the Decoy Customization subscription, the Help menu in the toolbar will display an option for the Custom Decoy Image Cookbook.
- Follow the instructions in the Customization Cookbook. The high-level instructions are:
- Upload an ISO image.
- Install ARAE engine on image.
- Use the Deployment Wizard to install the customized decoy.
Customize the deception base OS image
Overview of customizing the deception base OS image:
Import Windows ISO image
|
|
Only legacy models FDC-VM and FDC1KF with a perpetual license require a FortiDeceptor Custom Decoy Subscription. Current models FDC1KG, FDR1HG, and VMS include this feature as part of the VLAN bundle subscription. Customers who choose to activate a custom Windows installation must use a valid product key. They can bring their own Windows license or purchase Windows keys from Fortinet. Note that Fortinet sells keys for Windows 10 only. |
To import an ISO image using the Imported Images page:
- Go to Deception > Custom Decoy Image and click the Imported Images tab.

- Click Import New ISO Image.
- Click Choose a file or drag and drop an image file into that pane.
To import an ISO image using the Customized Images page:
- Go to Deception > Custom Decoy Image and click the Customized Images tab.

- Click Import Image and Customize.
- Click Choose a file or drag and drop an image file into that pane.
To delete an ISO image:
- Go to Deception > Custom Decoy Image and click the Imported Images tab.
- Select one or more images and then click Delete.
Customize VM image
To initialize the VM instance:
- Go to Deception > Custom Decoy Image and click the Customized Images tab.
- Click Import Image and Customize. The custom image wizard opens.
- In the Select an imported ISO image dropdown list, select an ISO image. Then click Next.
- In the Configuration step, specify the following and then click Next.
Name
Upper and lowercase letters and numbers totaling under 48 characters.
CPU Cores
1–4 cores.
Memory
1024–8192 MB.
Storage
25 GB or more
Deploy Network
Port1 Default PortX Select the deployment network.
Ensure the specified IP is not already in use and that the following settings align with the PortX configuration:
- IP/Mask
- Gateway
- DNS
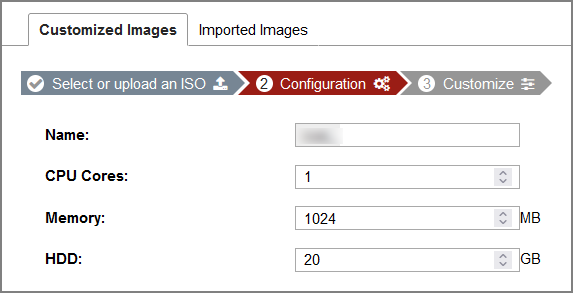

This configuration is applied to the VM instance for customizing the image, This configuration is not applied to decoys.
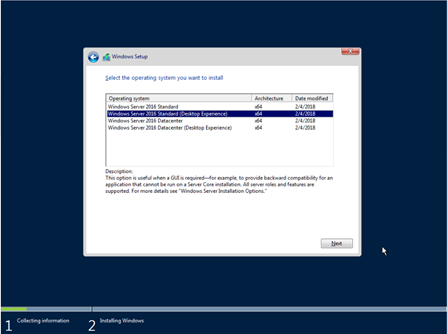
- In the Customize step, install the OS from the ISO image.
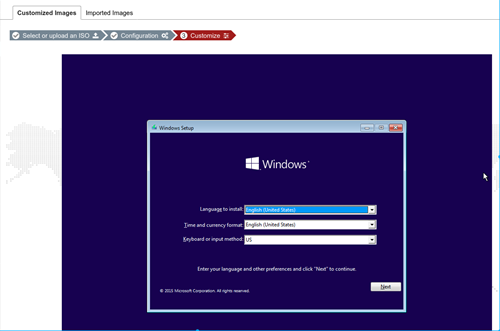
Follow the prompts until the installation is complete.
To customize the VM:
- Ensure the OS is installed and then log in with an admin account.
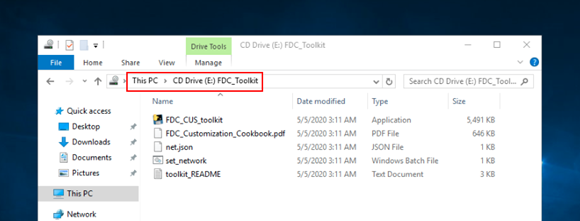
- In Windows Explorer, locate the FDC_Toolkit folder and read the instructions in toolkit_README.txt.
- Configure the network using one of the following options.
- Right-click set_network.bat and then click Run as Administrator.
- Follow the instructions in net.json to configure the IP address, gateway, and DNS in Windows Control Panel > Network and Internet > Network Connections.
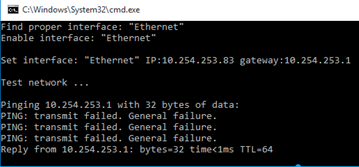
10.254.253.0/24 set by the script is the internal NAT IP address that is temporarily used by the customization VM to allow downloading files and accessing other network resources via the FortiDeceptor default route.
To customize the system for Windows 2016:
- Ensure your license is activated.
- If you are using Windows 2016, enter the following commands in the PowerShell window to prevent lure configuration failures in the Decoy Deployment wizard.
secedit /export /cfg c:\secpol.cfg
(gc C:\secpol.cfg).replace("PasswordComplexity = 1", "PasswordComplexity = 0") | Out-File C:\secpol.cfg
secedit /configure /db c:\windows\security\local.sdb /cfg c:\secpol.cfg /areas SECURITYPOLICY
rm -force c:\secpol.cfg -confirm:$false
To customize the system for standalone Windows Server 2016:
- Go to Server Manager > Tools > Local Security Policy. The Local Security Policy directory opens.
- In the Security Settings folder, go to Account Policies > Password Policy folder, and double-click Password must meet complexity requirements.
- Select Disabled and then click OK.
- Open a Command Prompt as an Administrator and type the following command to update the group policy:
gpupdate /force
You should get the following response:
C:Users\Administrator>gpupdate /force
Updating policy...
Computer policy update has completed successfully.
To customize the system for Server 2016 Domain Controller :
- In the Domain Controller, go to Server Manager > Tools > Group Policy Management.
- Right-click Default Domain Policy and click Edit. The Group Policy Management Editor opens.
- In the Computer Configuration folder, go to Policies > Windows Settings > Security Settings\Account Policies > Password Policy > Password must meet complexity requirements.
- Select Disabled and click OK.
- Open a Command Prompt as Administrator and type the following command to update the group policy:
gpupdate /force
Optional: Install the Microsoft SQL Server
The following SQL Server versions are supported.
- SQL Server 2016: https://www.microsoft.com/en-us/download/details.aspx?id=56840
- SQL Server 2017: https://www.microsoft.com/en-us/download/details.aspx?id=55994
- SQL Server 2019: https://www.microsoft.com/en-us/sql-server/sql-server-downloads
- QL Server 2022: https://www.microsoft.com/en-ca/sql-server/sql-server-downloads
- SQL Server Management Studio for SQL server management and customization. https://aka.ms/ssmsfullsetup
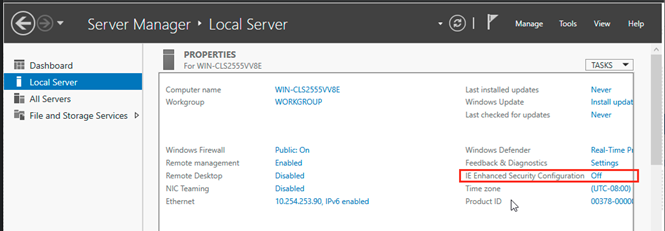
If you are downloading with Internet Explorer, it is recommended you disable IE Enhanced Security Configuration.
Since there is no desktop for Windows Server core OS, you must download the installation file on another computer and then use SMB to install the SQL Server.
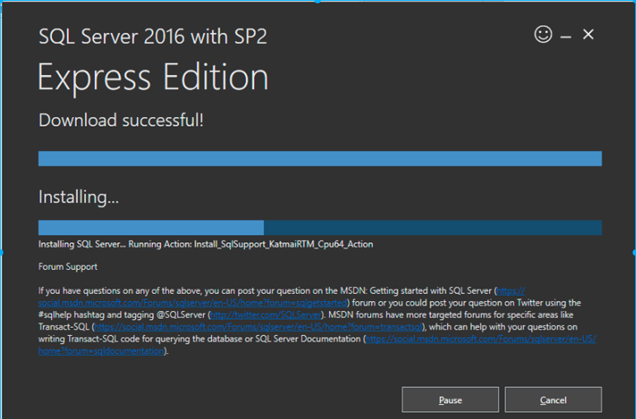
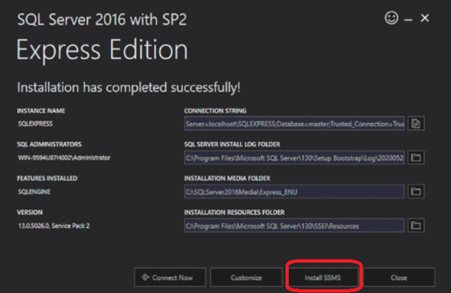
To install SQL server:
- Download and install the SQL server on another computer.
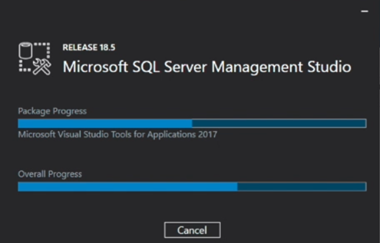
- When the SQL Server installation is complete, click Install SMSS to download and install the SQL Server Management Studio to manage and customize the SQL Server.
To further customize the SQL database:
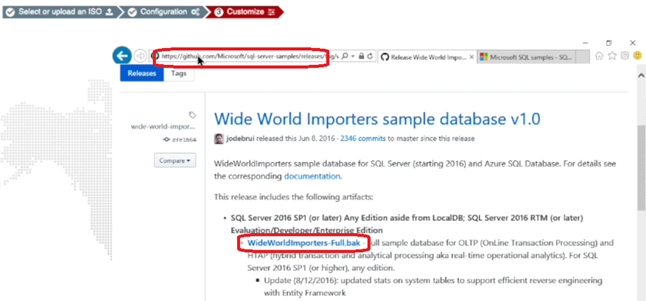
- Download a sample database from https://github.com/Microsoft/sql-server-samples/releases/download/wide-world-importers-v1.0/WideWorldImporters-Full.bak.
- In the FortiDeceptor Customize Decoy console, open SQL Server Management Studio.
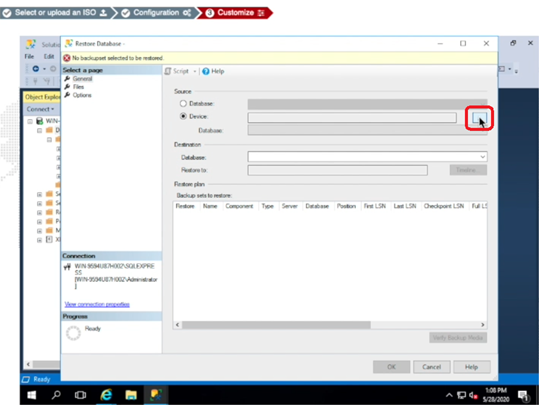
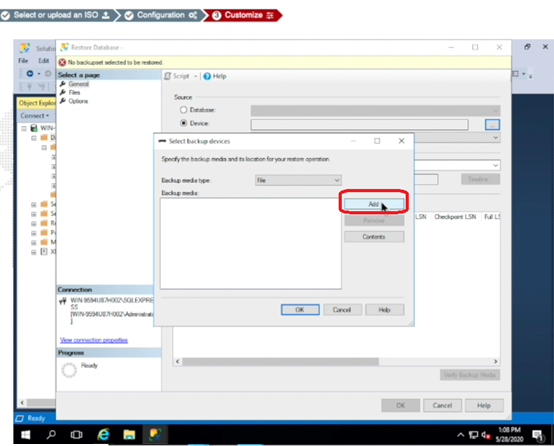
- Right-click the database object and select Restore Database.
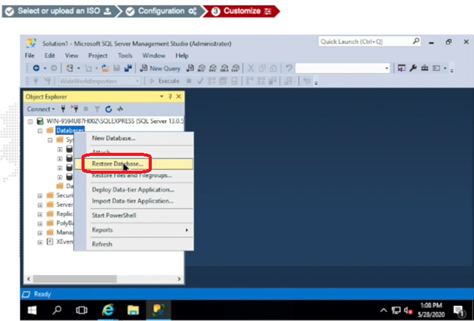
- Locate and add the sample DB you downloaded.
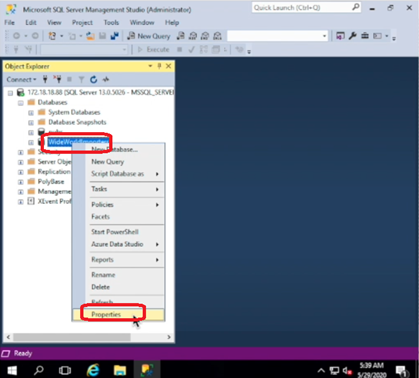
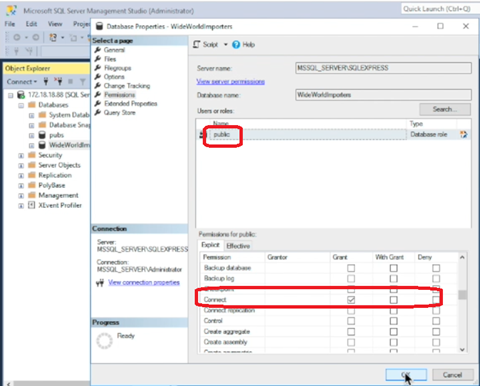
- When the sample DB is restored, right-click that DB and select Properties to change access permission to make the decoy DB more attractive to attackers.
- Give Grant permission to Select and Connect.
- Close SQL Server Management Studio.
- Verify that your DB is up using the command
netstat –an | findstr 1433. - The listening port on the SQL Express Database is disabled by default. To enable the port:
Click Start > Programs > Microsoft SQL Server 20XX and select SQL Server Configuration Manager.
Select SQL Server Network Configuration.
- Double-click Protocols for SQLEXPRESS
Right-click TCP/IP and select Properties. If necessary, first enable TCP/IP.
Scroll down to IPAll and verify TCP Dynamic Ports is blank and that TCP Port is set to 1433.
Click OK.
Optional: Install Internet Information Service (IIS)
IIS 10 is supported on Windows Server 2016/2019/2022.
To add the IIS role and service:
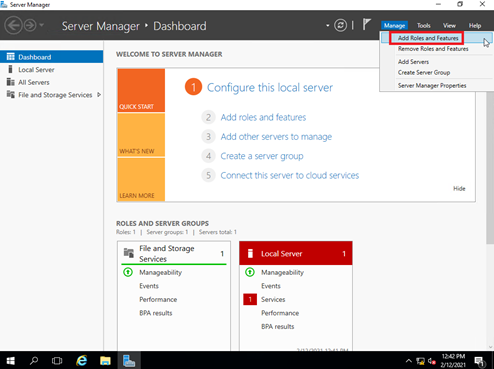
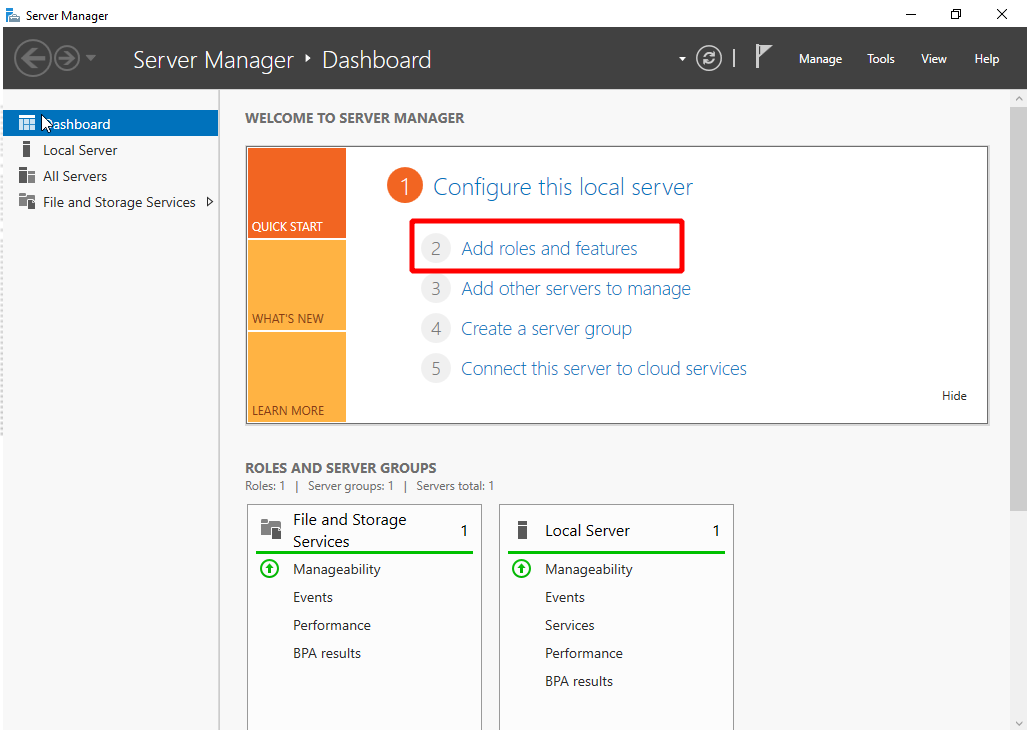
- Go to Server Manager >Dashboard.
- Click Manage > Add Roles and Features.
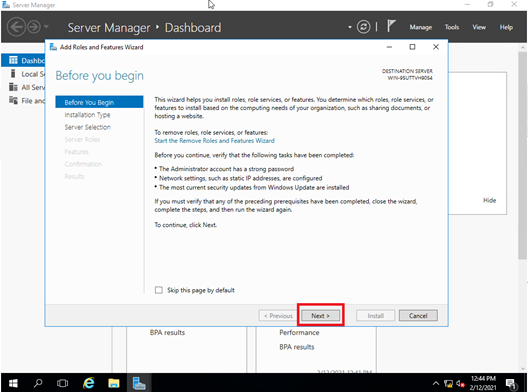
- On the Before you begin page, click Next.
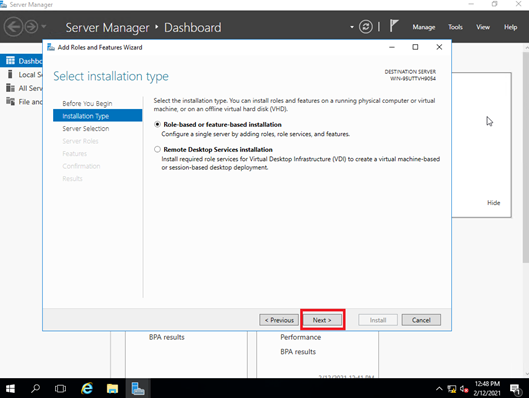
- On the Select installation type page, click Next.
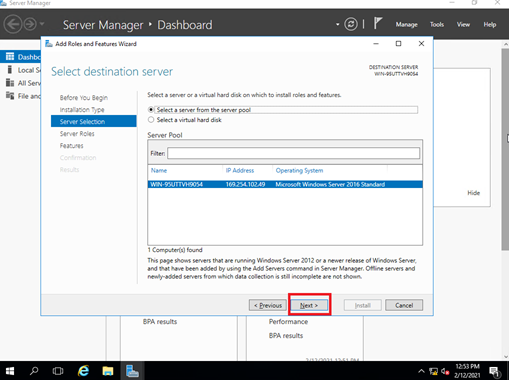
- On the Select destination server page, click Next.
- On the Select server roles page, click Web Server (IIS).
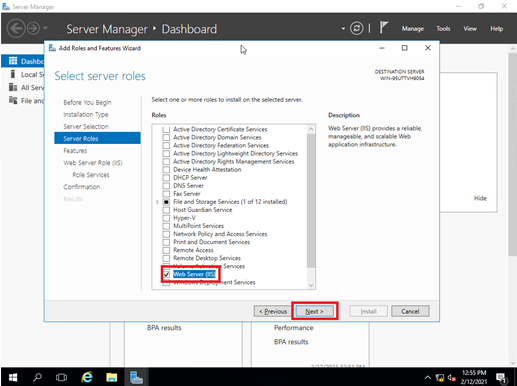
- In the pop-up dialog box, click Add Features.
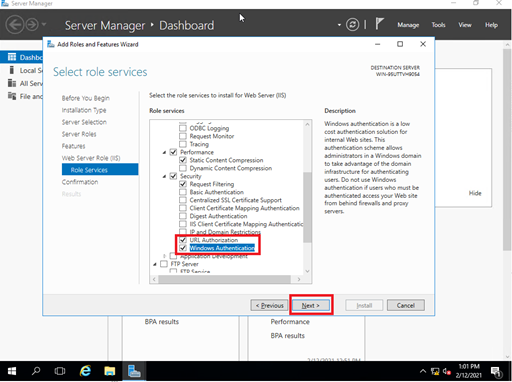
- On the Select features page, click Next.

- On the Web Server Role (IIS) page, click Next.

- On the Select role services page, enable URL Authorization and Windows Authentication, then click Next.
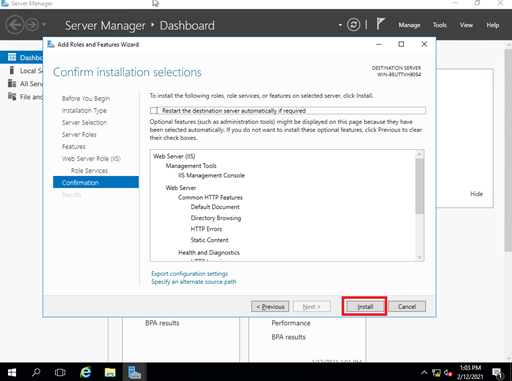
- On the Confirm installation selections page, click Install.
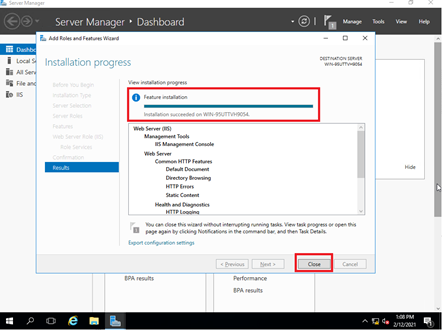
- Wait for the installation to finish, then check the results and click Close.
Optional: Turn on Active Directory (AD) controller
|
|
If an image is customized as an Active Directory (AD) controller and deployed as a decoy, any endpoint attempting to join this decoy domain will initiate an LDAP authentication request. This interaction will be detected and logged as an LDAP-related incident. |
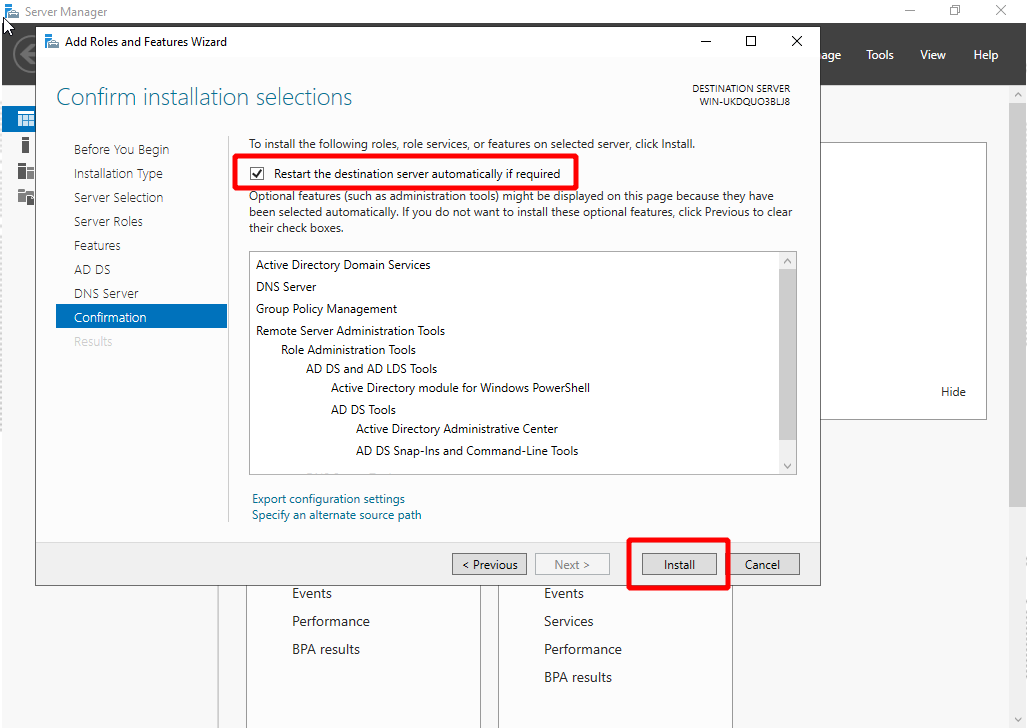
1. Setup the new domain controller for the new domain forest.
- Install Active Directory Domain Services and DNS Servers
- Open the Server Manager go to Dashboard > Roles Summary > Add roles and features.
- Select Role-bases or Feature-based installation.
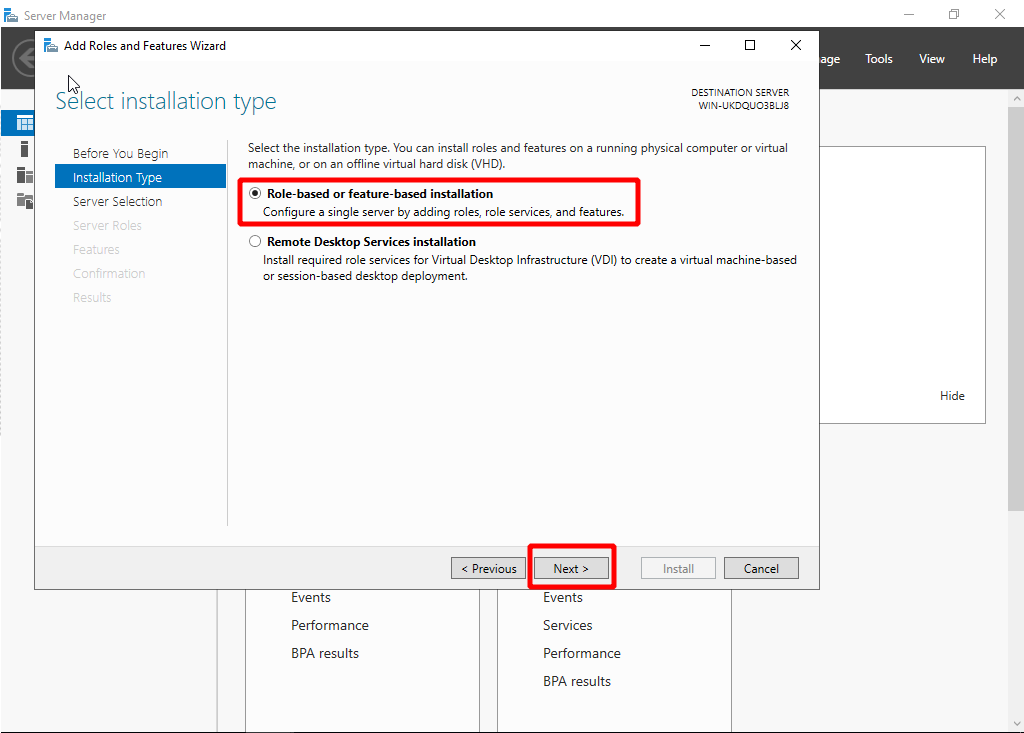
- Click Server Role and select Active Directory Domain Services and DNS, then click Next.

Do not select DNS if you intend to use a standalone DNS server.
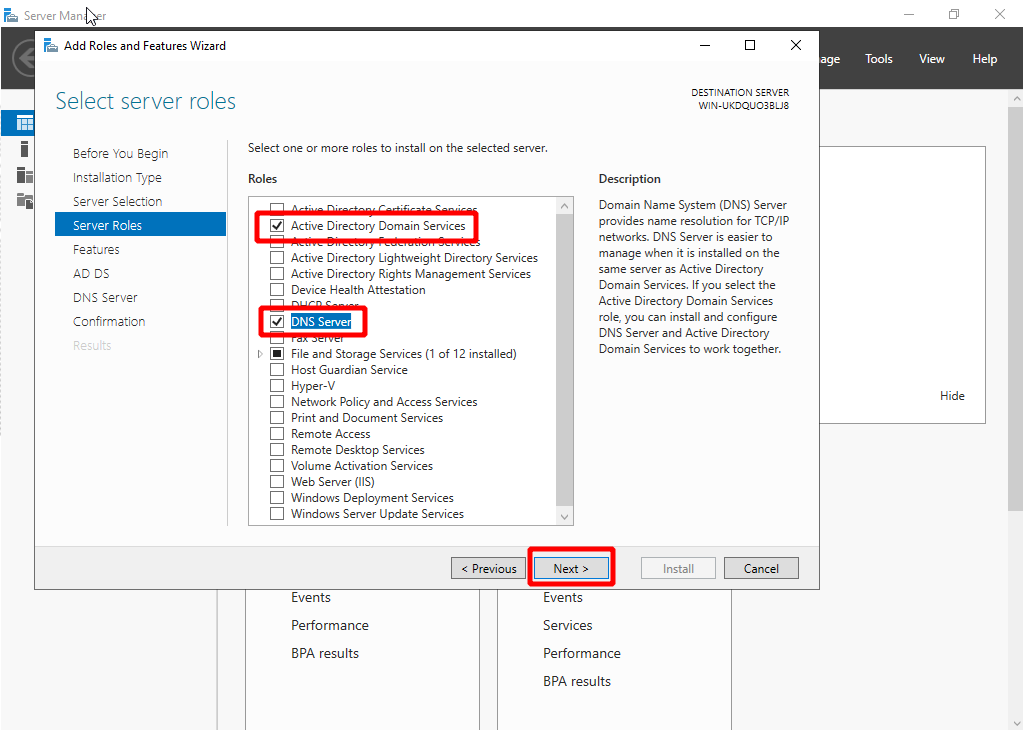
- Keep clicking Next until you reach the Confirmation page. Select Restart the destination server automatically if required, and click Install.
- Open the Server Manager go to Dashboard > Roles Summary > Add roles and features.
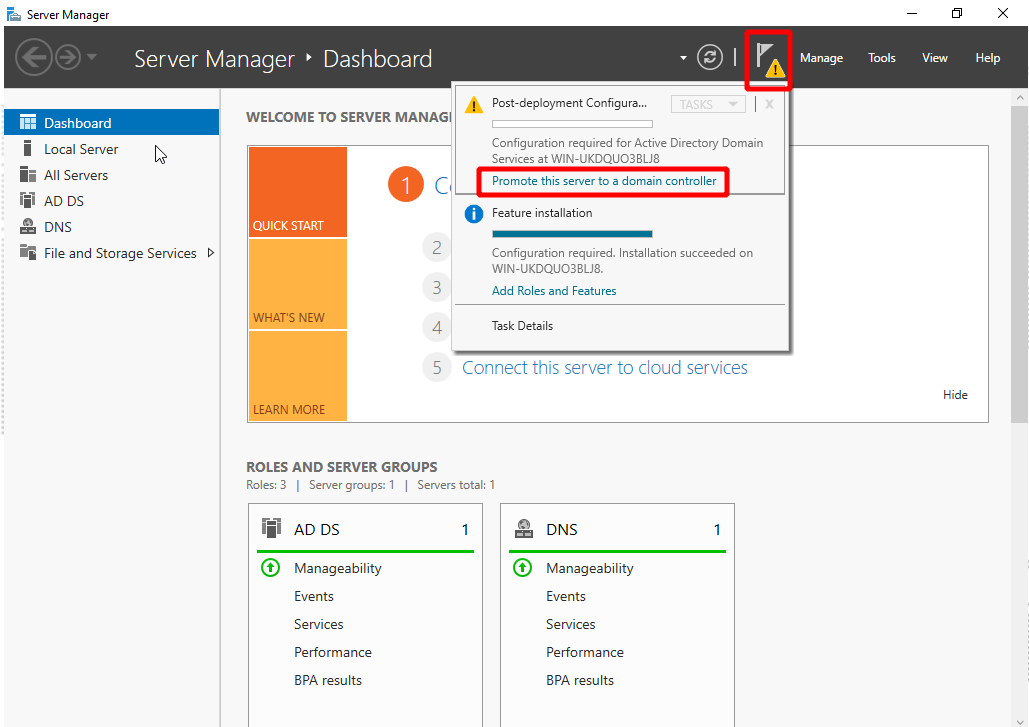
- Promote the server into a domain controller.
- Click the notification flag next to the Manage menu and click Promote this server to a domain controller. The configuration wizard opens.
- In Deployment Configuration, select Add a new forest and enter the Root domain name.
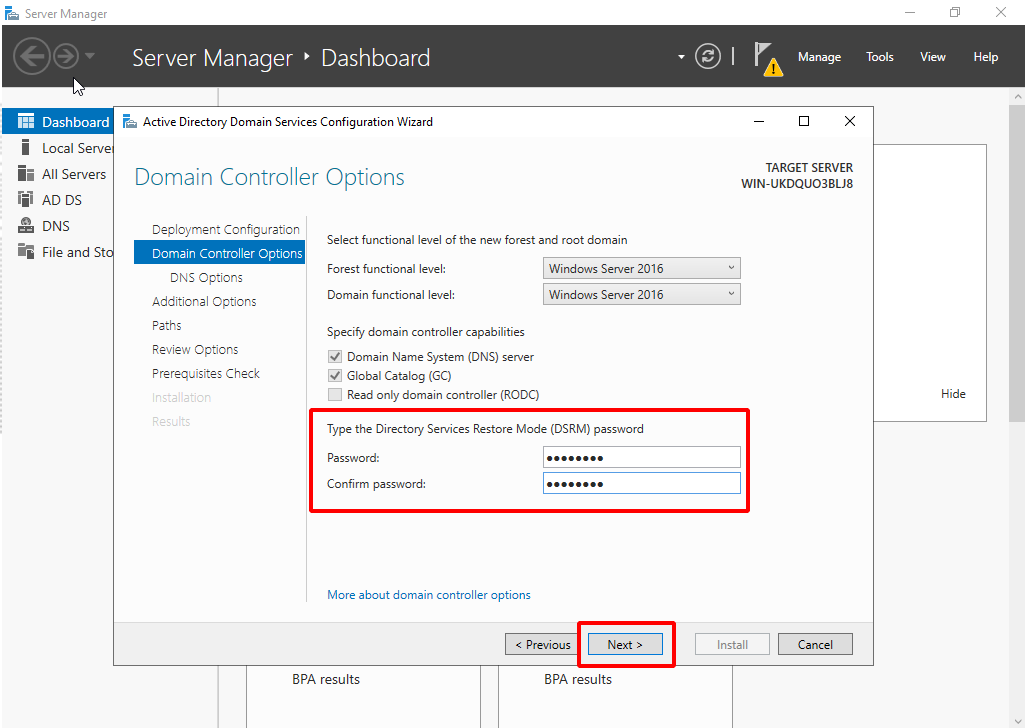
- In Domain Controller Options, enter a password for the domain.
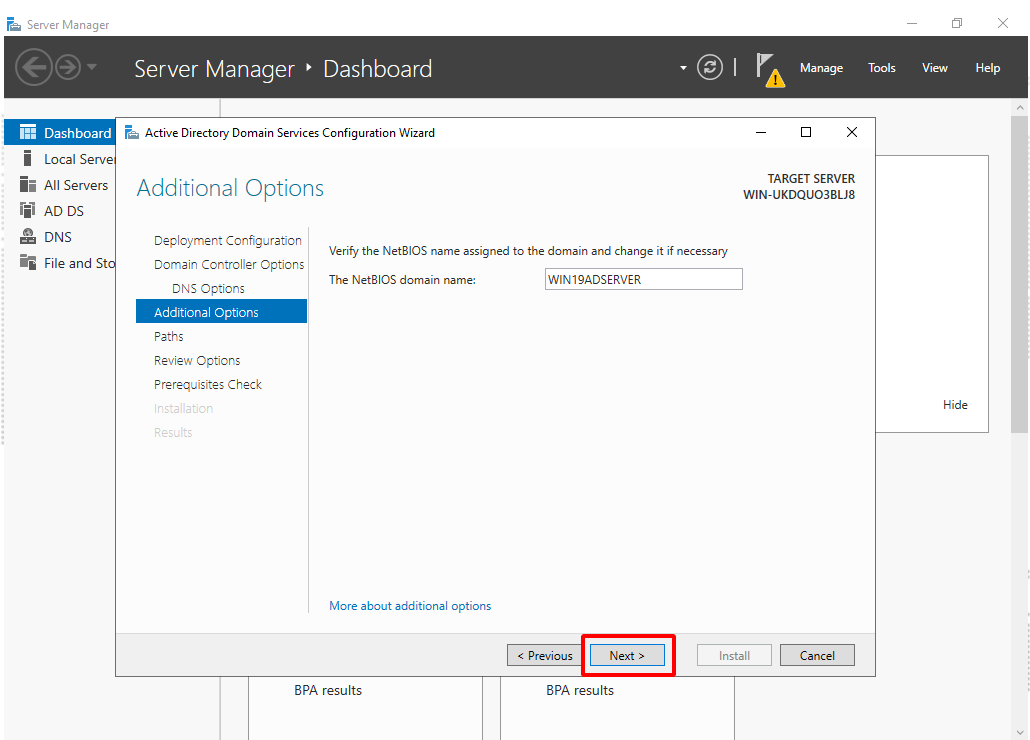
- In Additional Options, enter a NetBIOS name for your domain ( the default name is recommended).
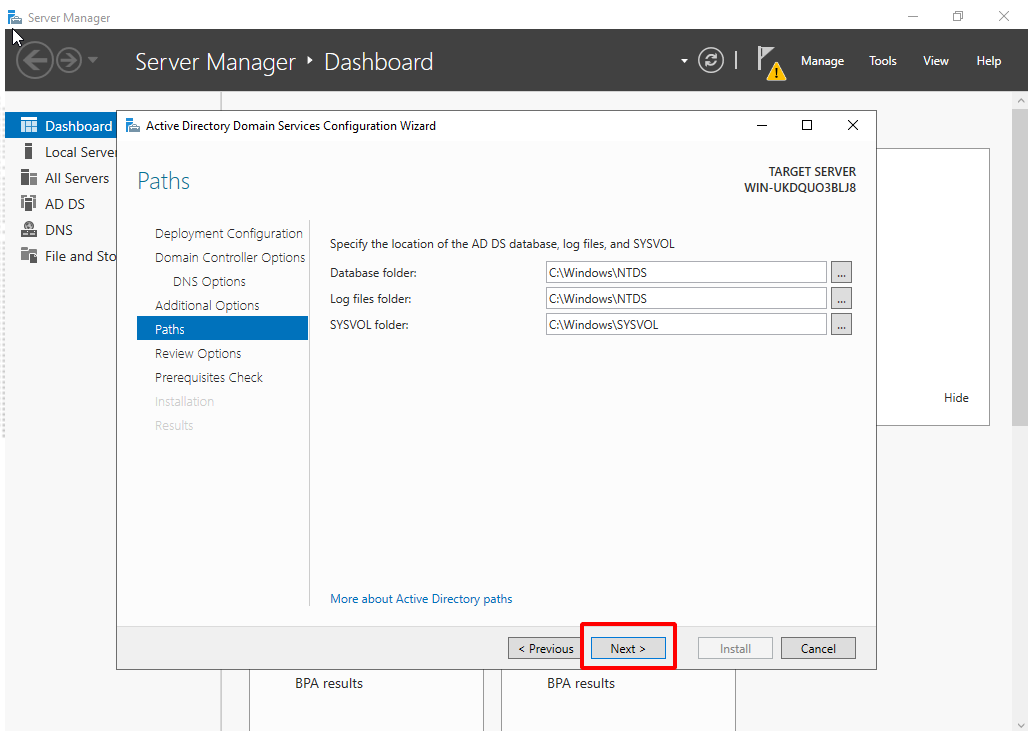
- In Paths, select the folder where your database, log files, and SYSVOL will be stored (the default folder is recommended), then click Next.
- Wait for a check-mark to appear and then click Install.

- The PC will restart.
- Click the notification flag next to the Manage menu and click Promote this server to a domain controller. The configuration wizard opens.
2. Set up the DNS server
Configure the server according to your requirements. A standalone DNS server can be used.
- To add more endpoints to this domain, you may want to configure the DNS forward rule to allow these endpoints to resolve public domains.
- To use a standalone DNS server, DNS server should not be installed in Step 1.
- The endpoint may use two DNS servers, one for the local domain, and another for public domains.
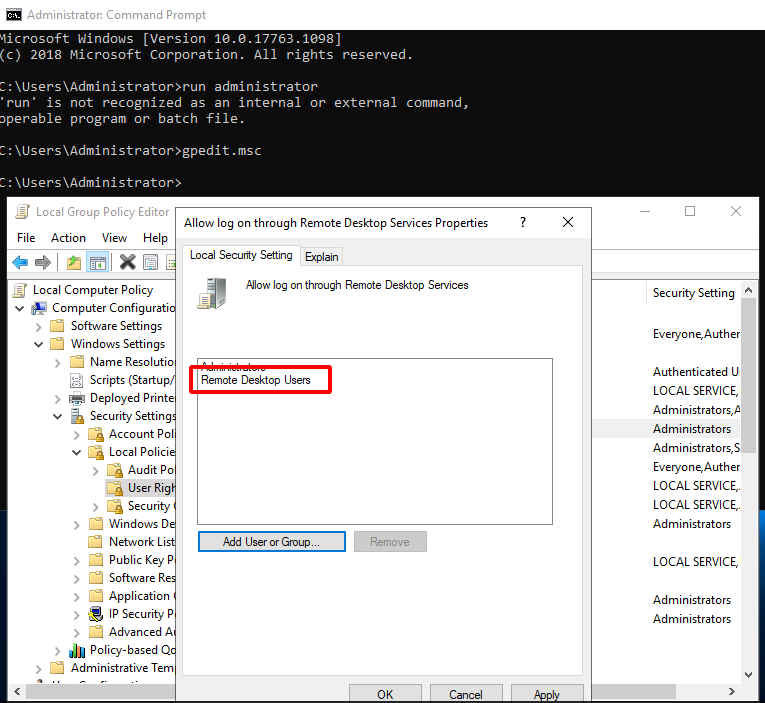
3. Add Remote Desktop Users to the Allow log on through Remote Desktop Services Properties policy
- Open a command window as an administrator, then enter
gpedit.mscto open the local group policy.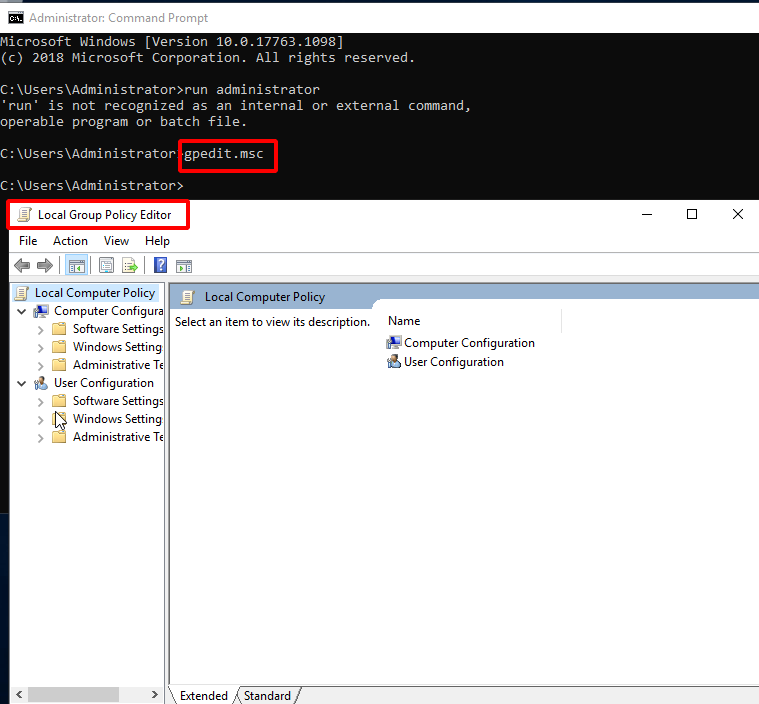
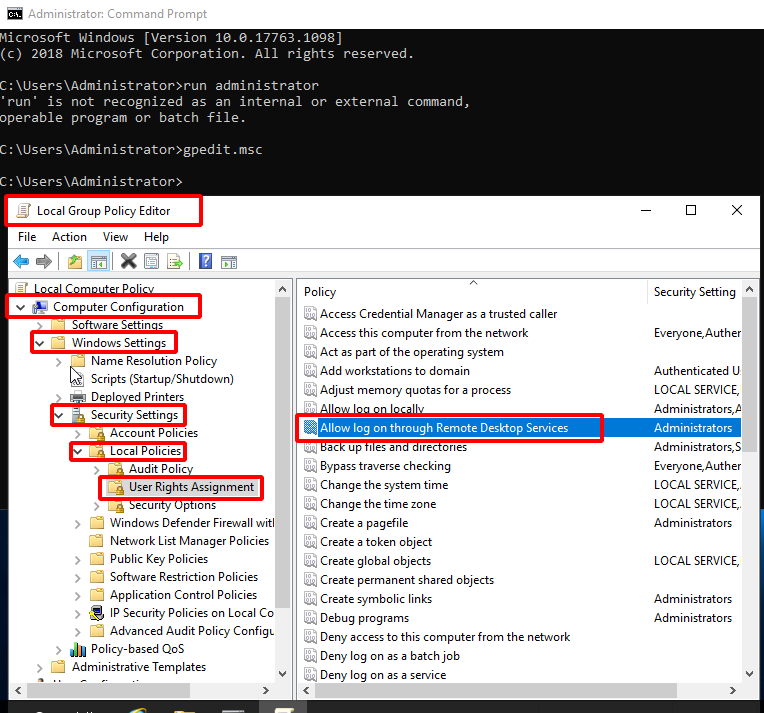
- Go to Computer Configuration\Windows Settings\Security Settings\Local Policies\User Rights Assignment\Policy Name: Allow log on through Remote Desktop Services.
- Select Add User or Group of Allow log on through Remote Desktop Services policy.
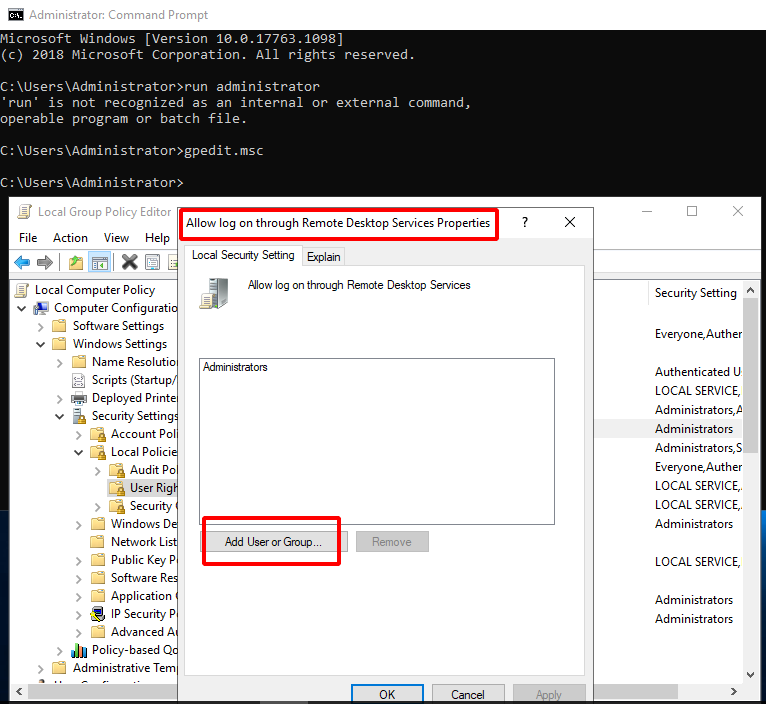
- Click Advanced.
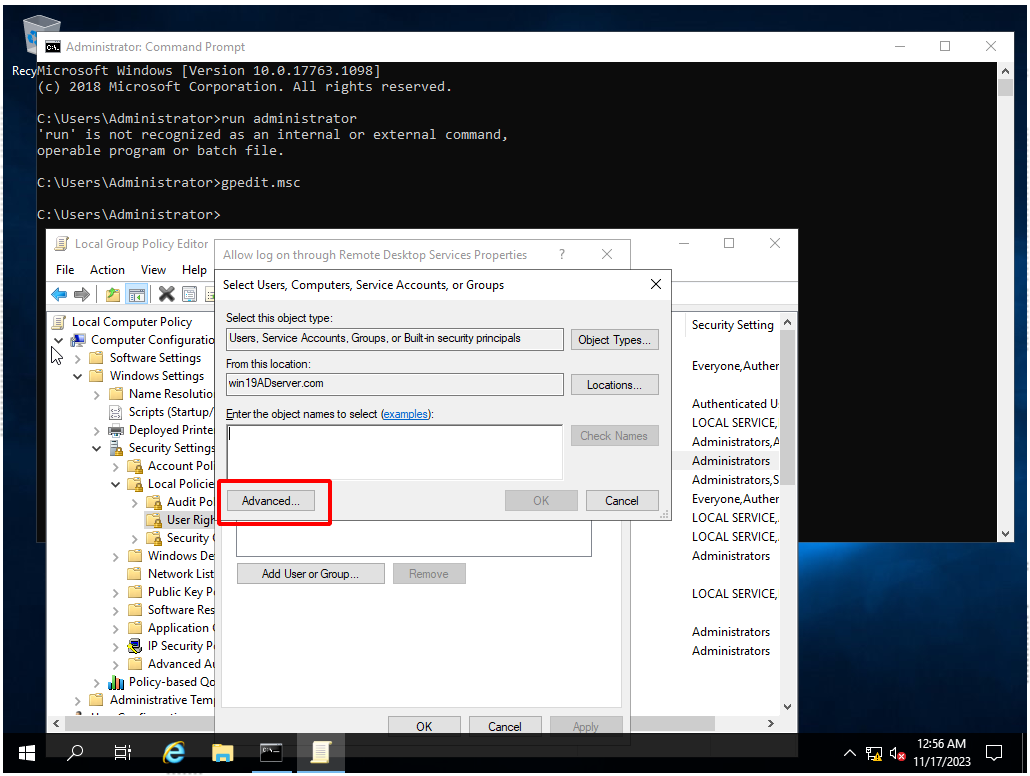
- Click Find Now.
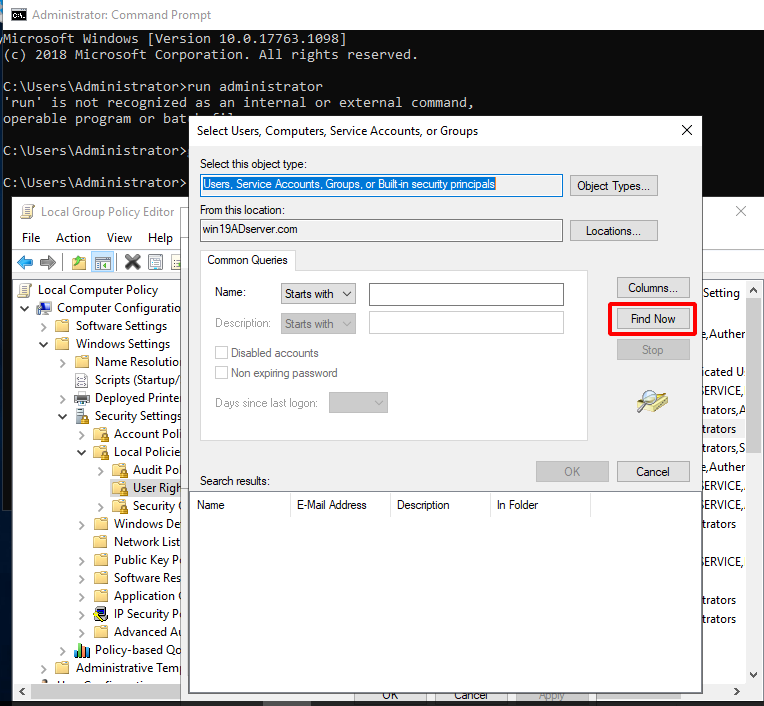
- Add Remote Desk User group.
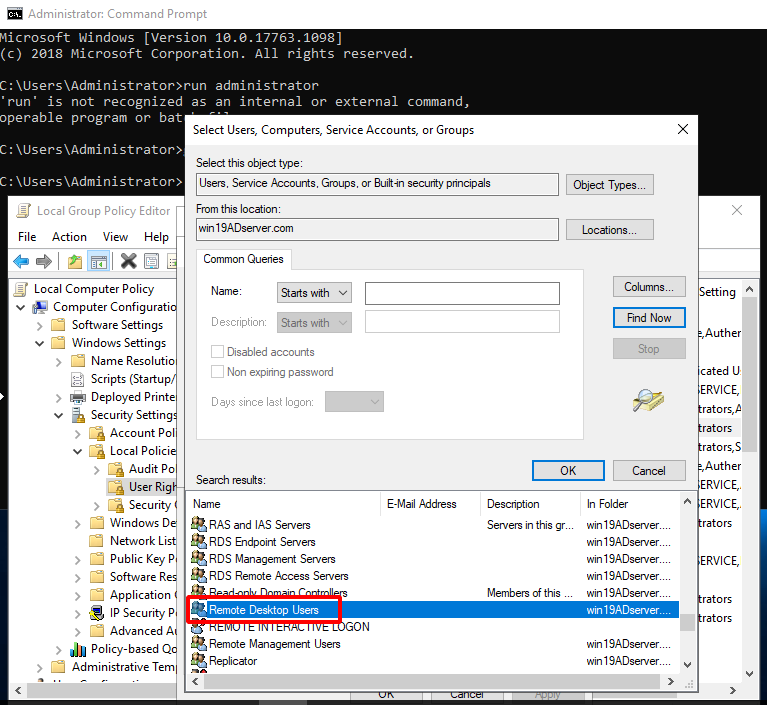
- Remote Desktop Users is added.
4. (Optional) Add AD Users to the Remote Desk User group
- Add Active Directory Users
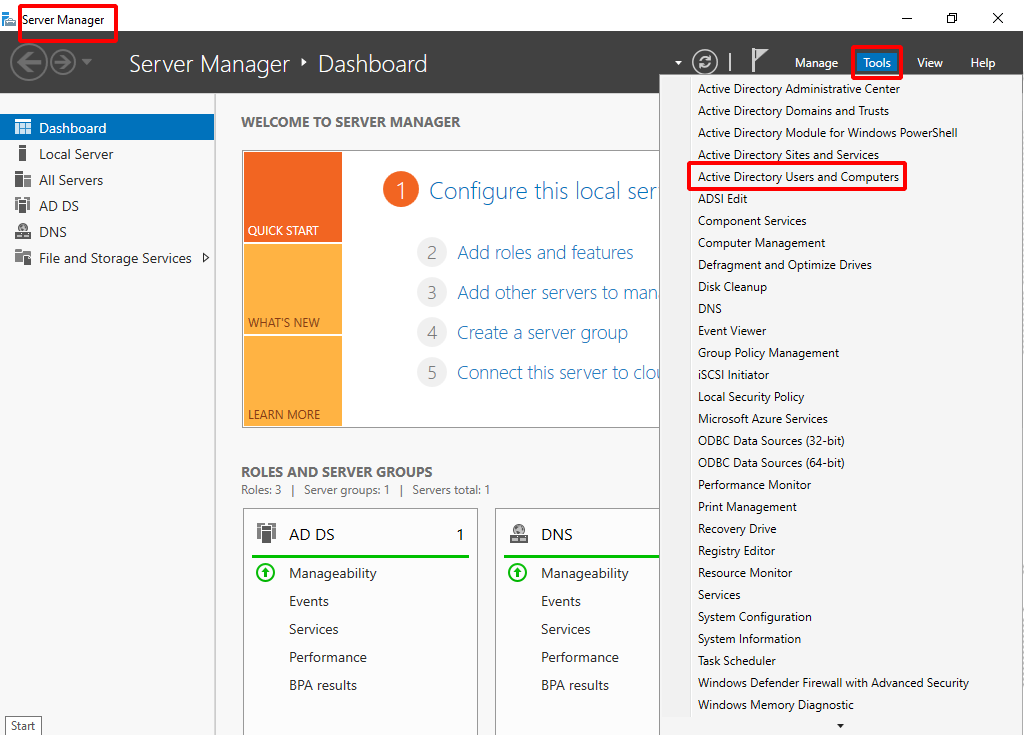
- In the Server Manager, click Tools > Active Directory Users and Computers.
- Right-click the domain name and open the Users folder.
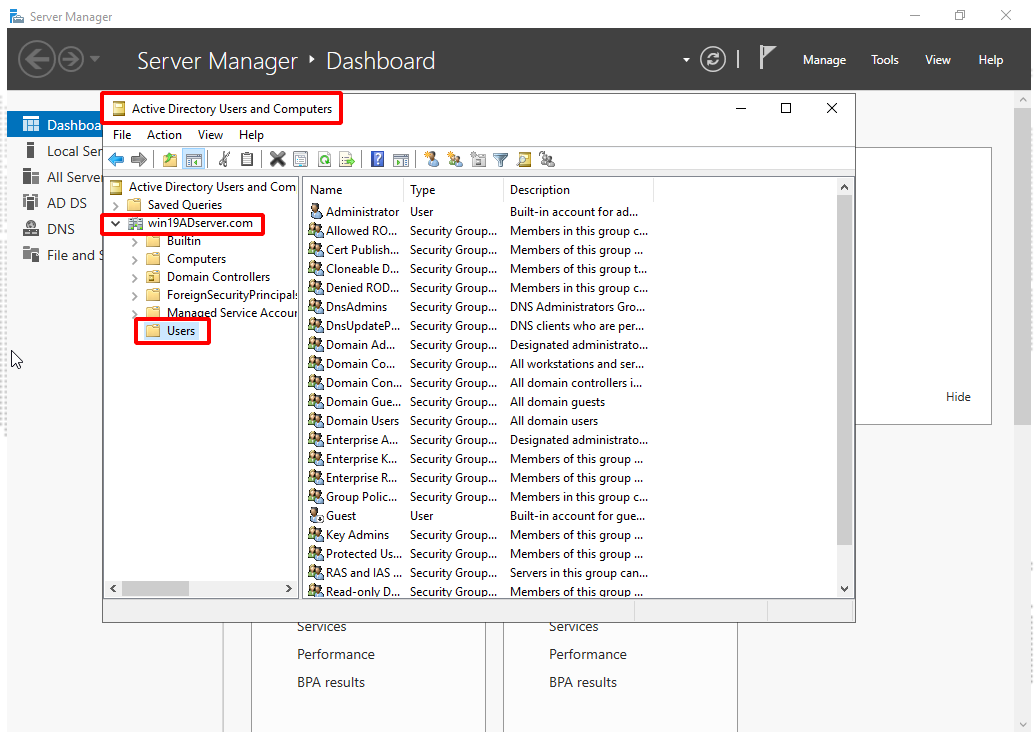
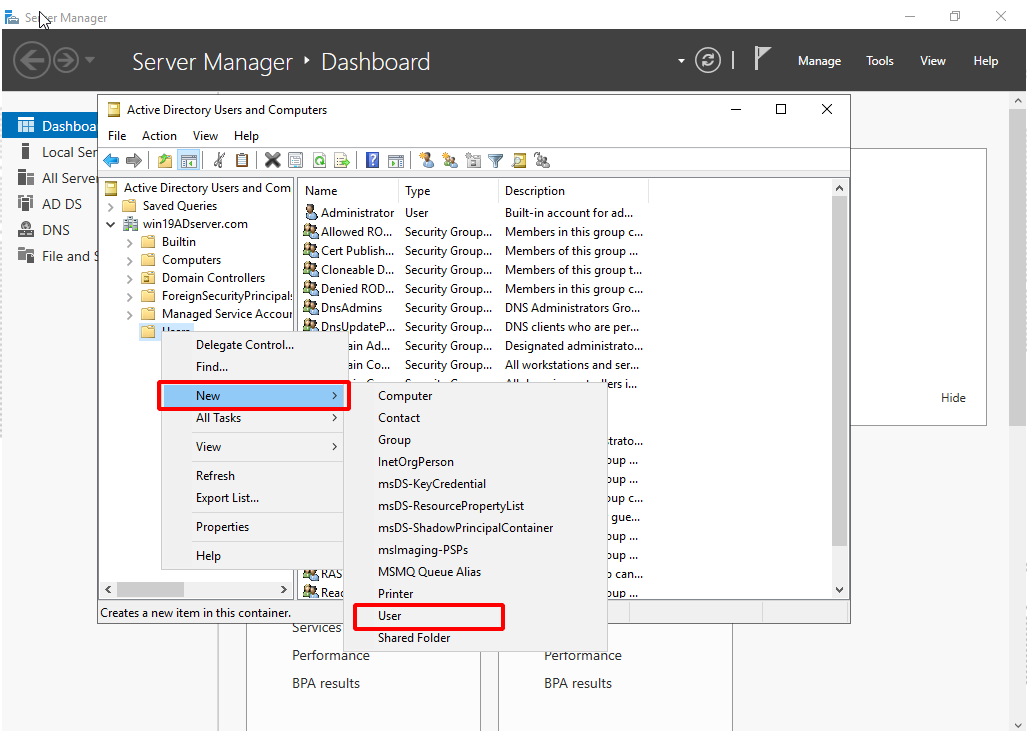
- Right-click the Users folder and select New > User.
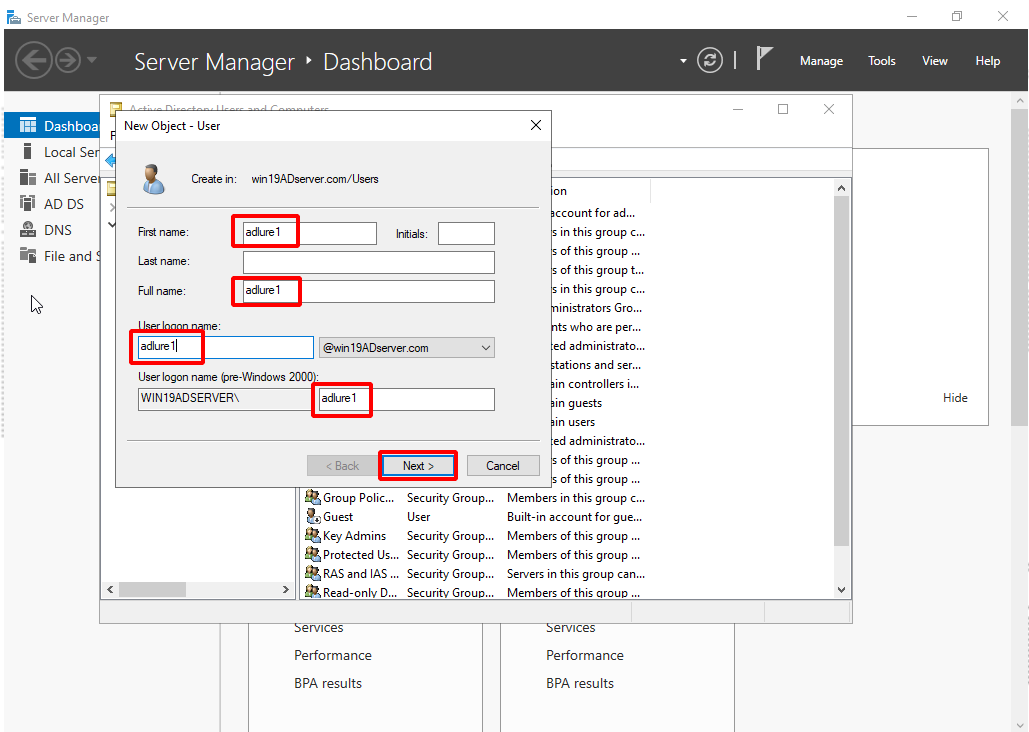
- Enter the AD user name and click Next.
- Enter the AD user password and click Next.
- Disable User must change password at next logon.
- Enable User cannot change password and Password never expires.
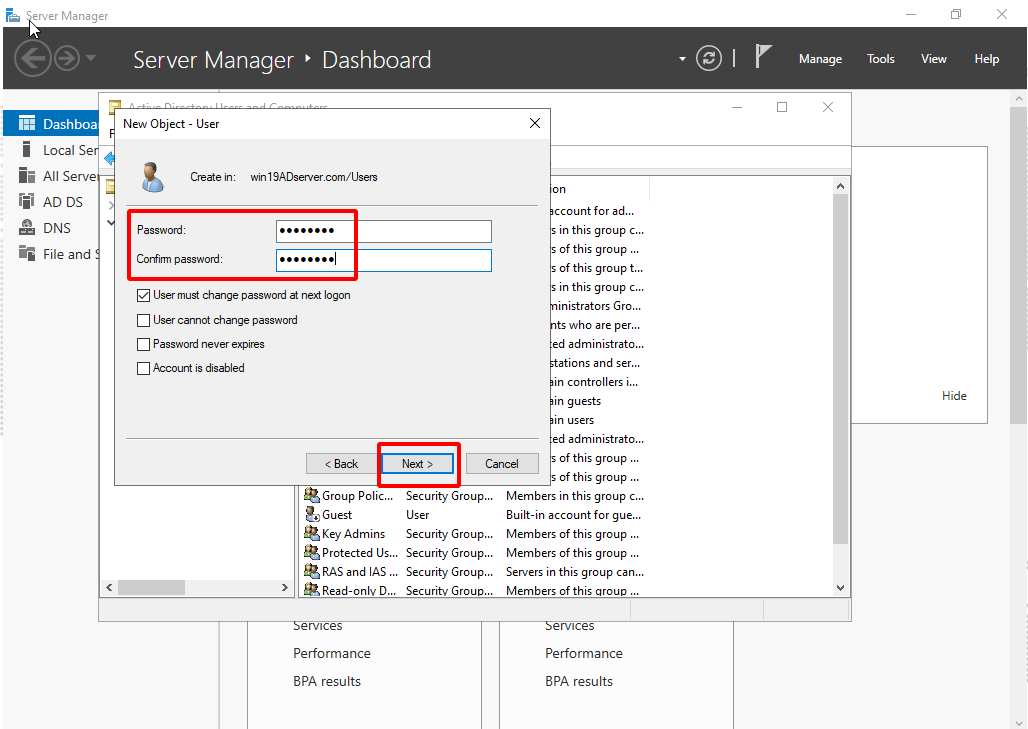
- Click Finish.
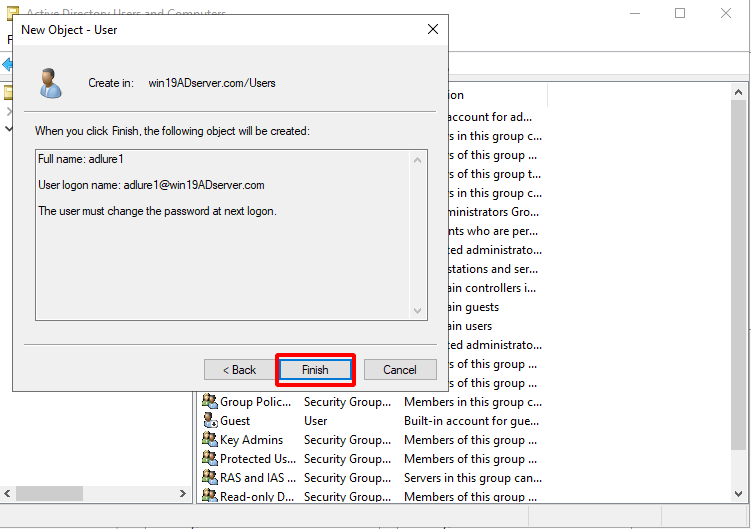
- The AD Users are added.
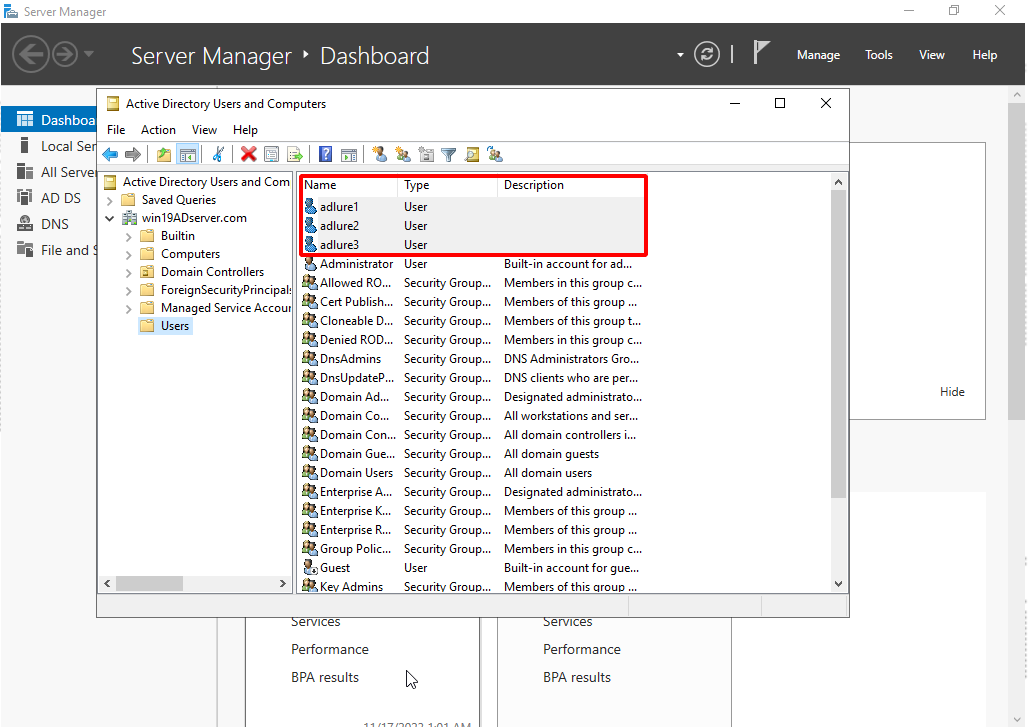
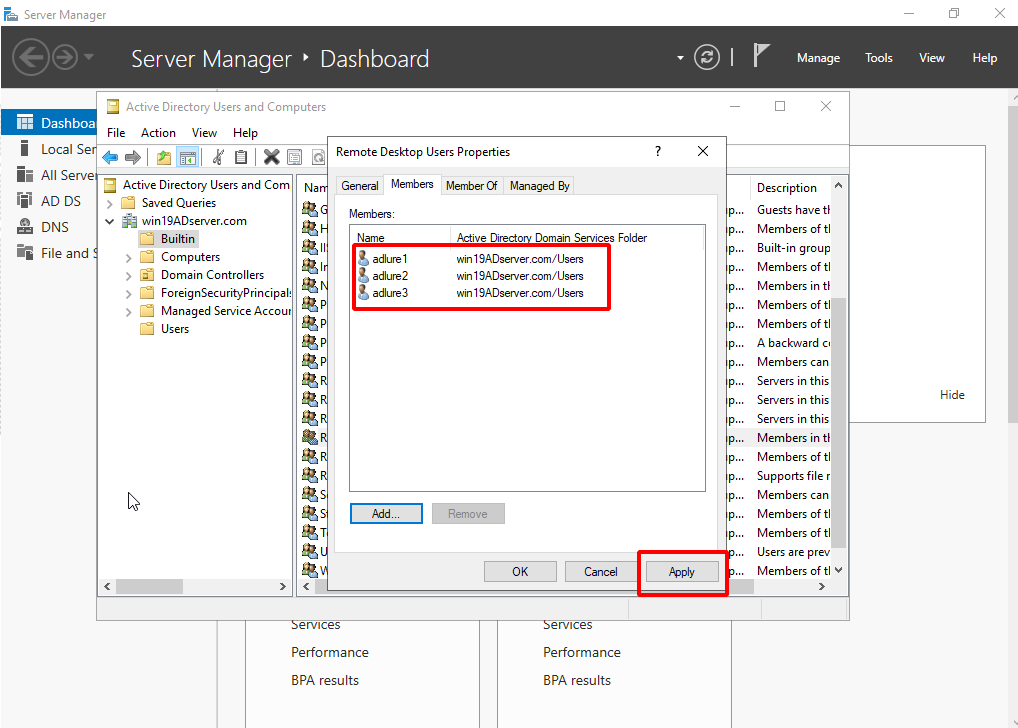
- In the Server Manager, click Tools > Active Directory Users and Computers.
- Add the new AD users to the Remote Desk User group.
- In the Server Manager, go to Tools > Active Directory Users and Computers >{domain name} > Builtin > Remote Desk User group.
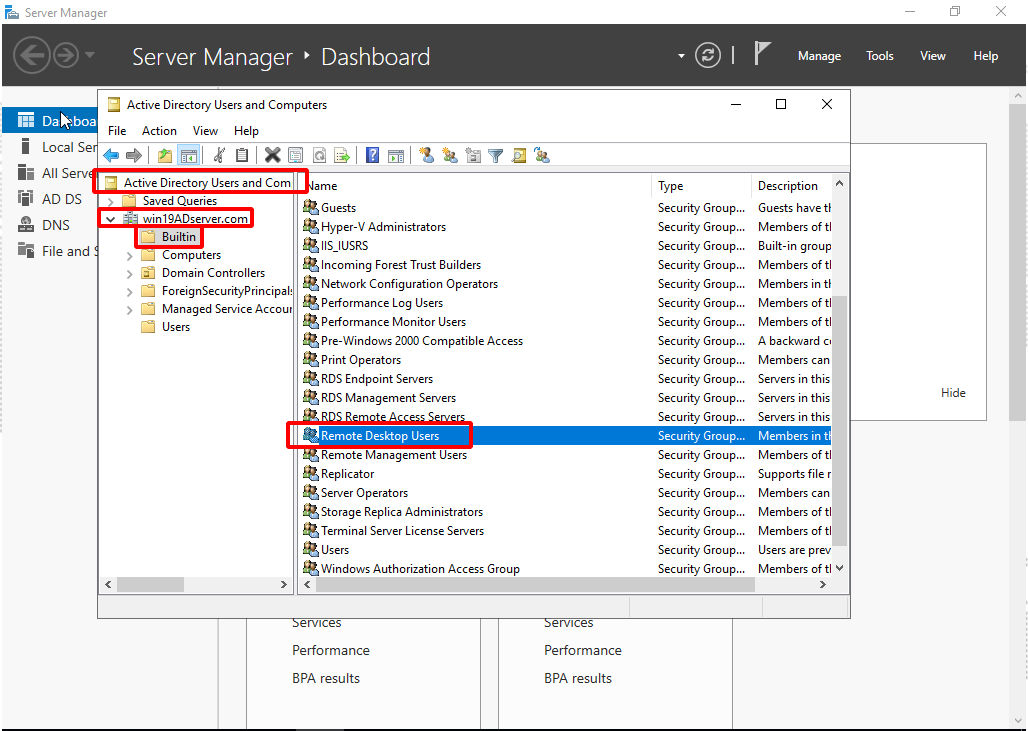
- Double-click Remote Desk User group, click the Members tab and click Add.
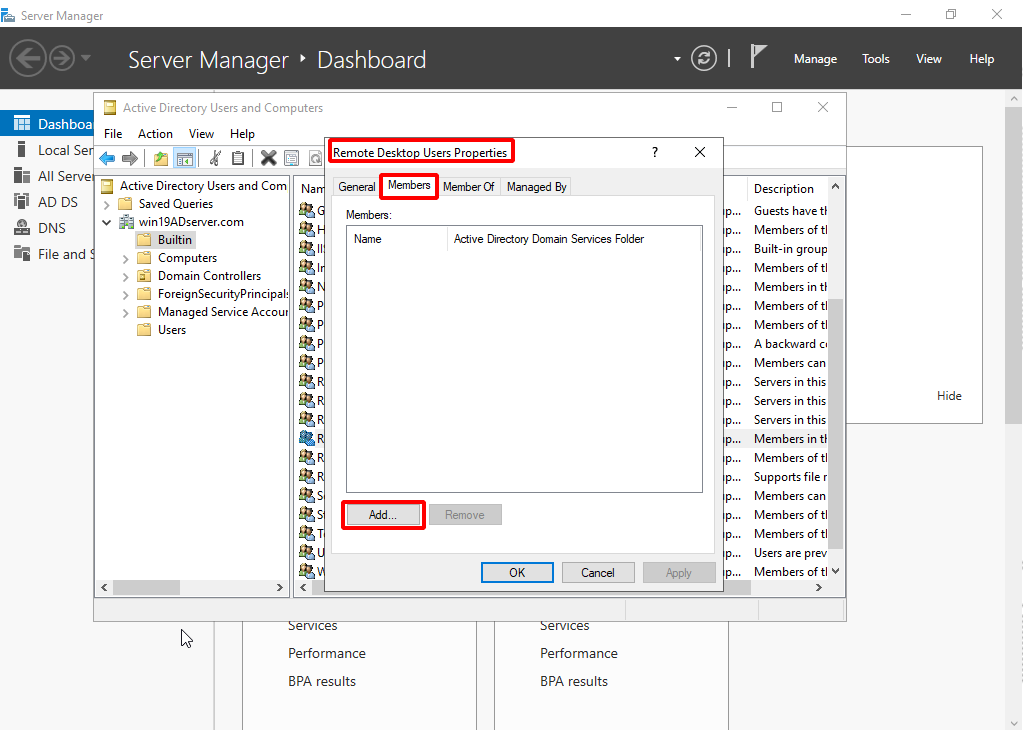
- Click Advanced.
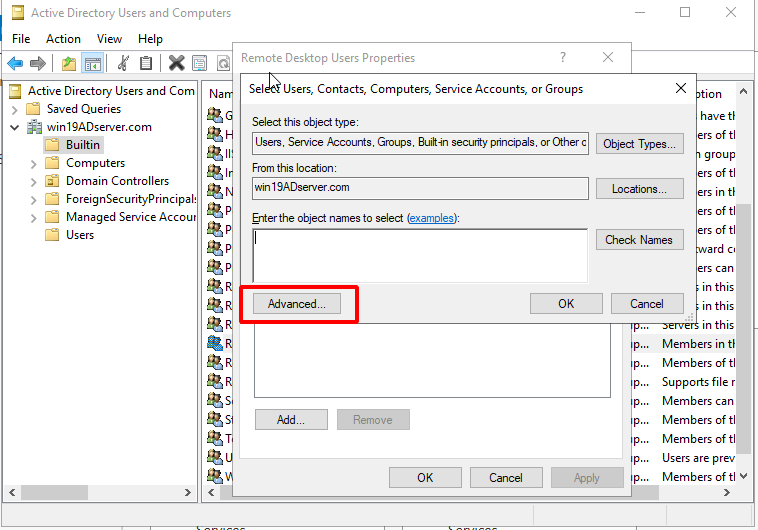
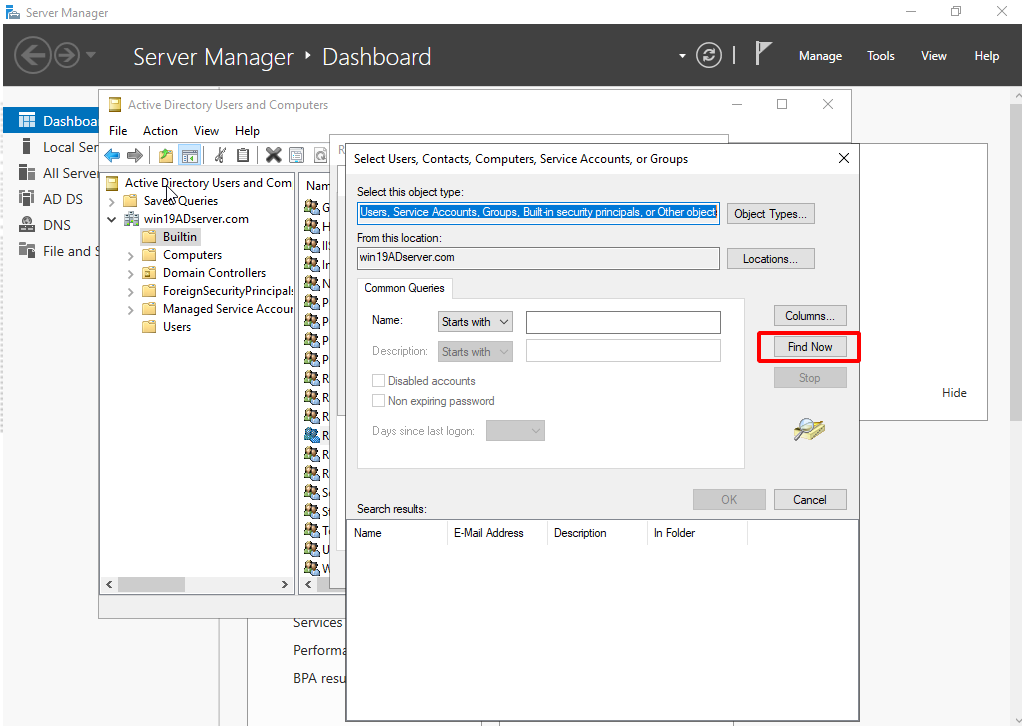
Click Find Now and choose the AD users you would like to add to the Remote Desk User group.
- Click OK.
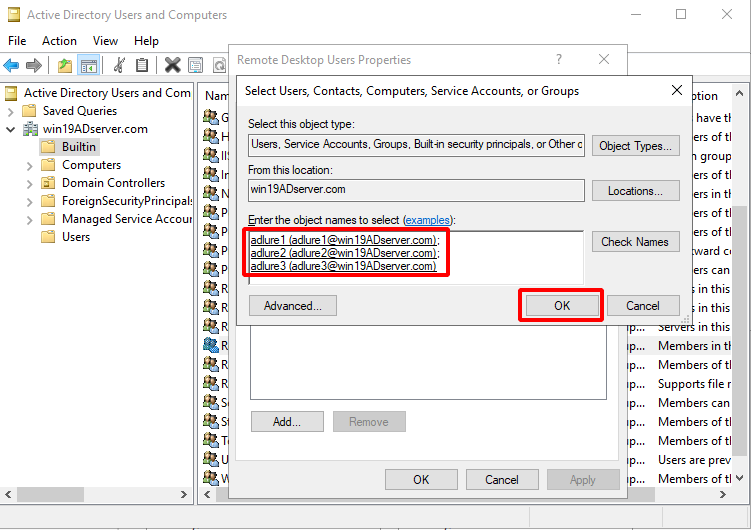
- The AD users are added to the Remote Desk User group.
Click Apply.
- In the Server Manager, go to Tools > Active Directory Users and Computers >{domain name} > Builtin > Remote Desk User group.
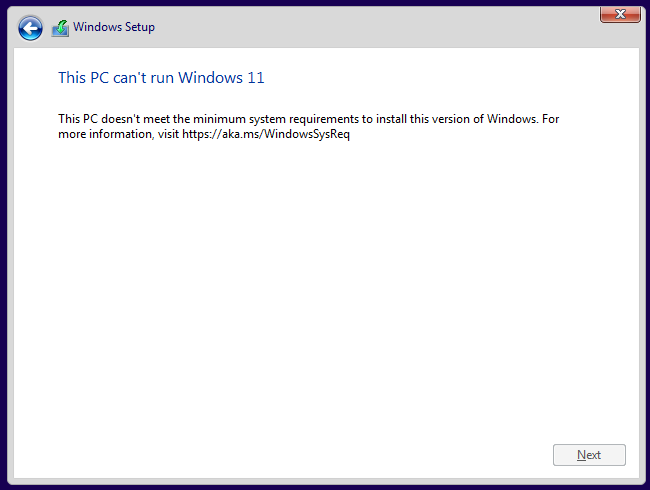
Custom OS Windows 11
- Windows 11 23H2 is supported.
- Windows 11 24H2 is not supported.
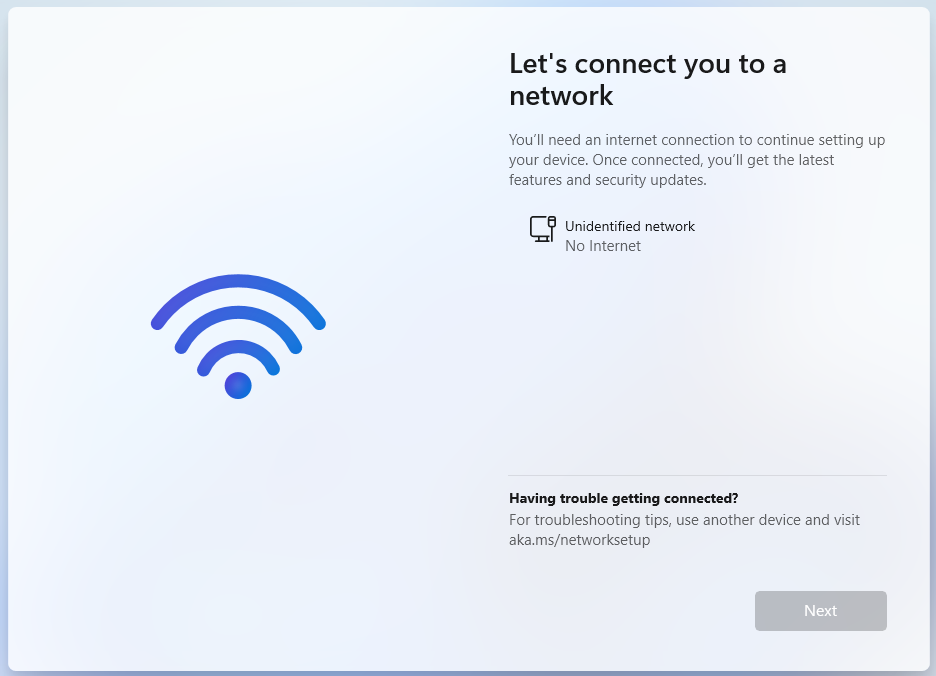
The Windows 11 (64-bit) operating system is similar to the Windows 10 service. However, its graphical user interface (GUI) restricts CPU cores, memory, and storage. Since Windows 11 (64-bit) requires more resources, you may encounter the following messages:
You may also be blocked on the following OOBE page.
To run Set Bypass TPM and SecureBoot check:
- Boot off of your Windows 11 install disk.
- Press SHIFT + F10 to launch the command prompt (If this does not work, you can try SHIFT + F10 +FN).
- Enter
regeditand press Enter.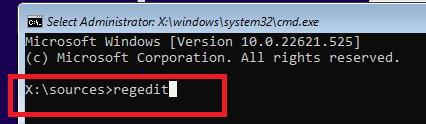
- Go to HKEY_LOCAL_MACHINE > SYSTEM> Setup. Right-click the folder to add a new key folder called
LabConfig.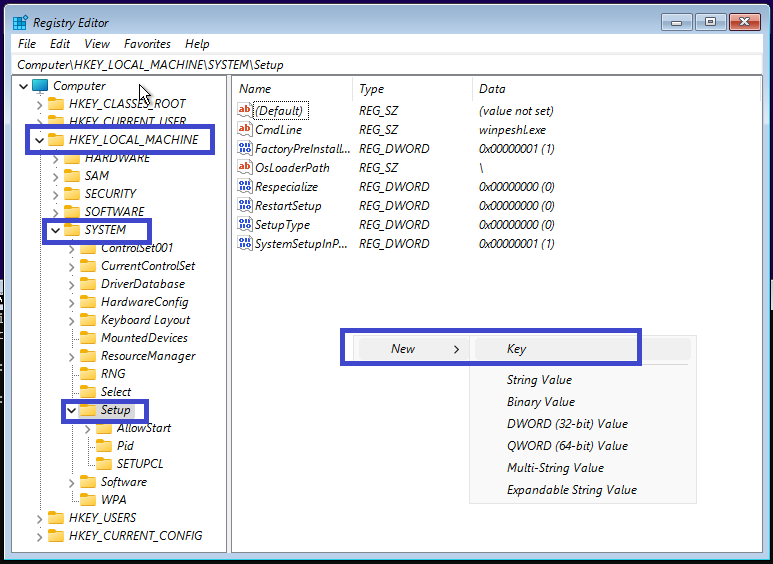
- Add new value named
BypassTPMCheck. - In the LabConfig folder, type REG_DWORD", set it to 1.
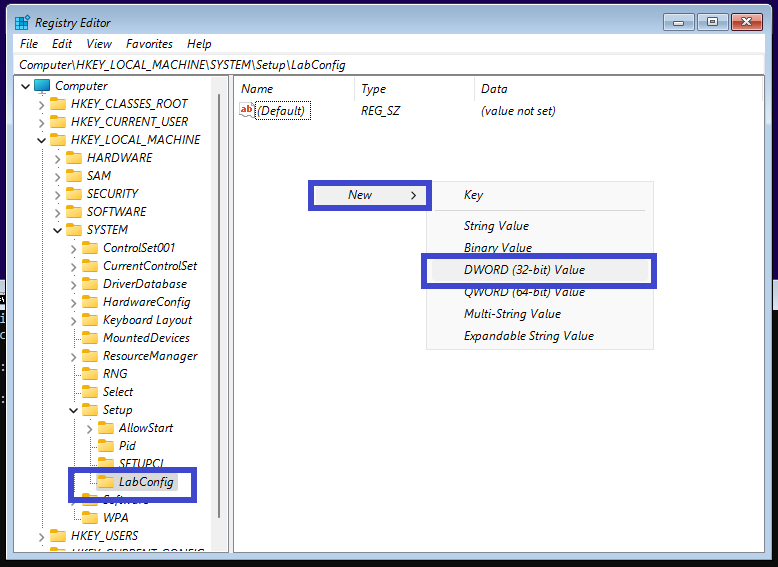
- In the LabConfig folder, add a new value called BypassSecureBootCheck then type REG_DWORD, and set it to 1.


You can set the RAM larger or equal to 4G during configuration, but If the RAM is less than 4G, you can add another new value called BypassRAMCheck to the LabConfig folder, and type REG_DWORD, and set to 1.
To set the bypass network setup during OOBE:
- Press SHIFT + F10 or SHIFT +Fn+ F10 to launch the command prompt when asked to setup network
- Enter "
OOBE\BYPASSNRO" and press Enter.
Join a domain
Before joining a custom Windows OS to a domain, change its DNS server to the DNS server of the domain.
|
|
This task is optional. |
To join a domain:
- Go to Control Panel > System and Security > System and click Change settings.
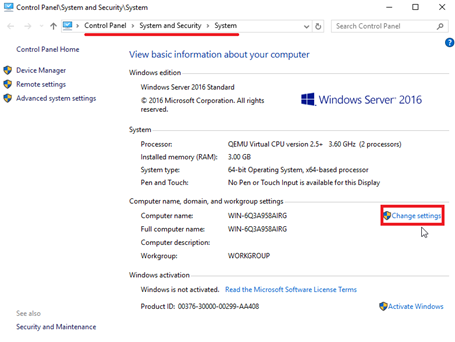
- On the System Properties dialog box, click Change.
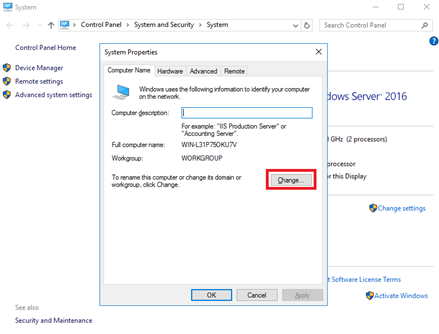
- Enter the Domain and click OK.
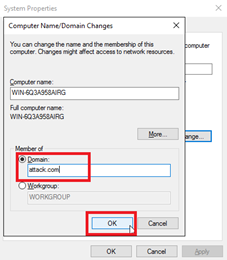
- Click Close and restart the computer to join the domain.
Install the FortiDeceptor customization toolkit
When system customization is complete, right-click FDC_CUS_toolkit.exe and select Run as Administrator and wait for the installation to finish.
Another option is to run the CLI command FDC_CUS_toolkit.exe as an administrator.
Save the custom image
When the customization status in the GUI displays Ready, click Start -> Power > Shut down to shut down Windows and then click Save to save this image.
If the Windows Server is connected to a domain, there may not be a Power option in the GUI. In this case, run the command shutdown /s /t 1 /f as administrator.
It might take several minutes to save the entire image. When the image is saved, the page lists the image in Customized Images.
In Deception > Customization, the Customized Images tab lists the custom images.
The Actions column has icons for you to view logs, apply the image, or delete the image.
Deploy custom image
To apply a custom image:
- Go to Deception > Custom Decoy Image and click the Customized Images tab.
- Select a custom image and click the Apply button or click the Apply icon
 beside a custom image.
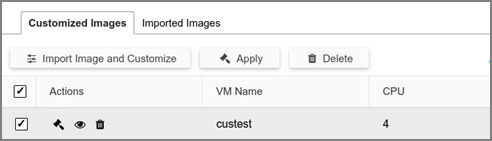
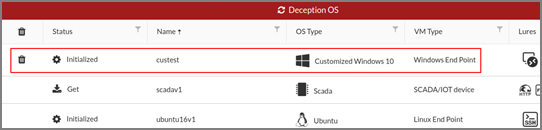
It might take a few minutes to apply the custom image. When applied, the custom image is listed in Deception > Deception OS.
To deploy decoys with custom images–generic image:
- Go to Deception > Deployment Wizard.
- Click a custom image and deploy it like a standard decoy.
- Select whether to domain users to access RDP and SMB.
For normal users:
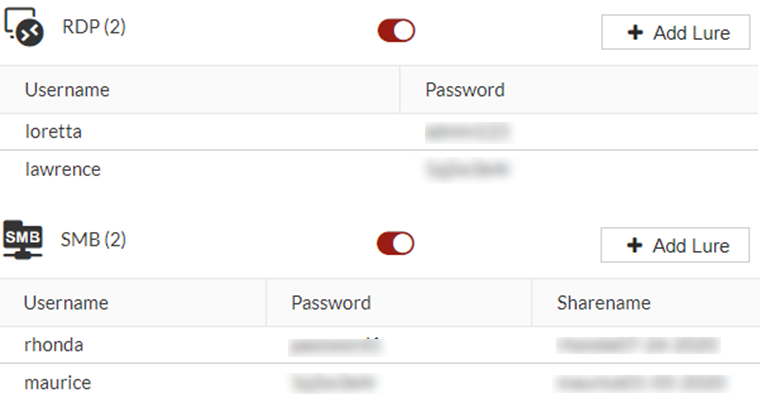
For domain users:
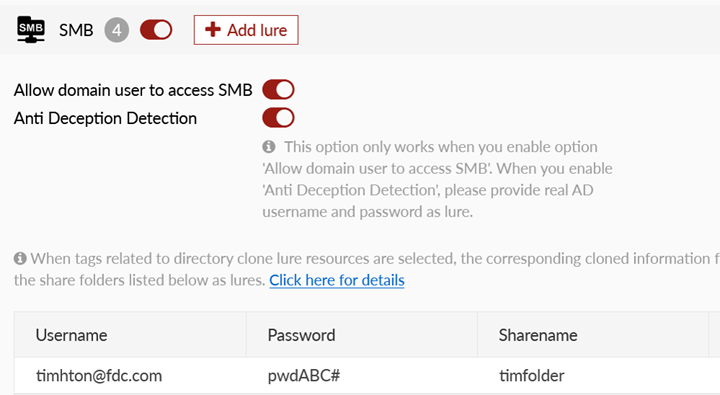
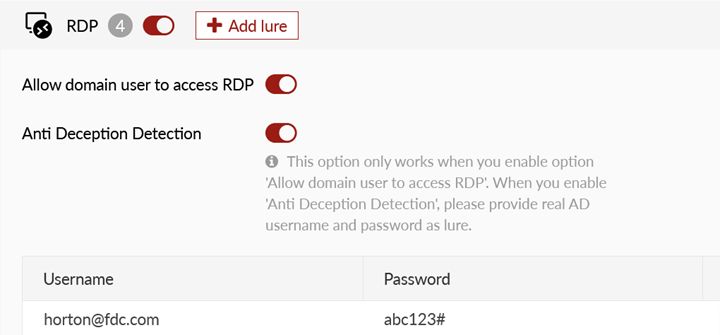
We highly recommend enabling RDP and SMB services for decoys joined in the domain and not set in any local lure accounts. Many domains have different policies for account name and password which may cause the decoy to fail to initialize.
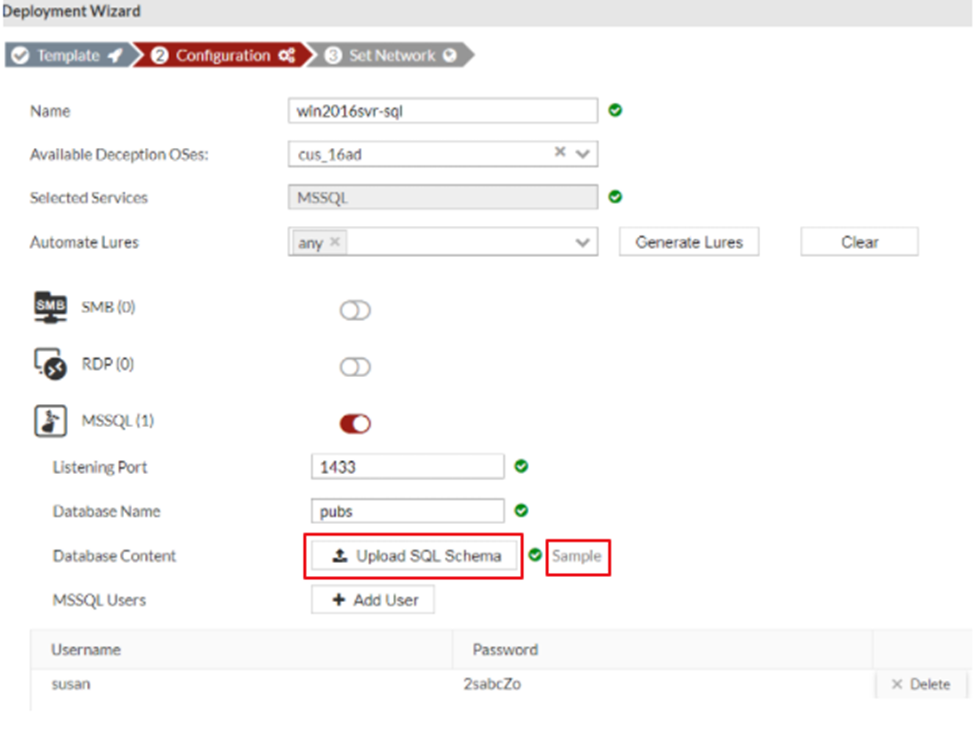
To deploy decoys with custom images–SQL Server:
- Go to Deception > Deployment Wizard.
- Click a custom SQL server image.

- (Optional) Click Sample to download a sample .sql file.
- Click Upload SQL Schema to upload your own custom .sql file .
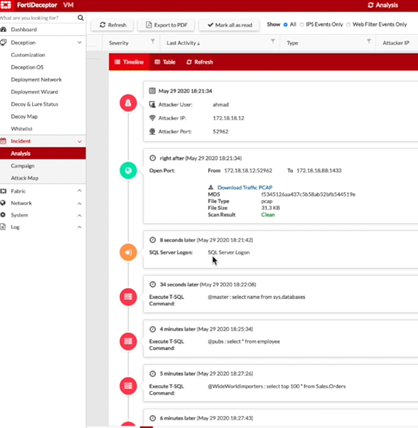
To generate SQL alerts:
- You can generate SQL alerts using the
SQLCMDtool or usingWideWorldImporters.- To use
SQLCMD, run the following commands.sqlcmd -S "IP Address" -U "username" -P "password"
use WideWorldImporters;
SELECT name
from SYSOBJECTS
WHERE
xtype = 'U'
go
- To use
WideWorldImporters, run the following commands.use WideWorldImporters;
select top 100 * from Sales.Orders;
go
The Incident > Analysis page displays the alerts for the SQL server attack.
- To use
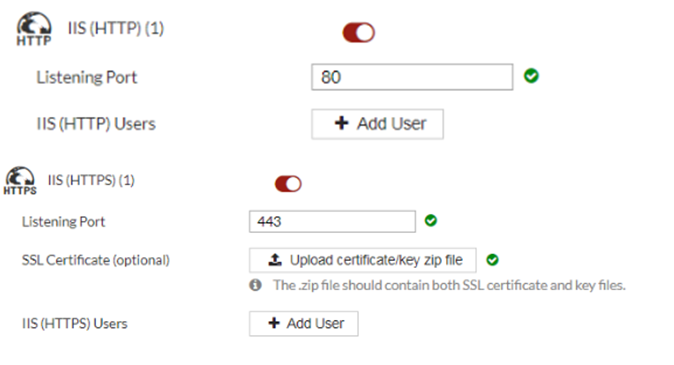
To deploy decoys with custom images–IIS (HTTP/HTTPS):
- Go to Deception > Deployment Wizard.
- Click a custom IIS image.
To deploy decoys with custom images–NBNSSpoofSpotter:
- Go to Deception > Deployment Wizard.
- Click a custom NBNSSpoofSpotter image.
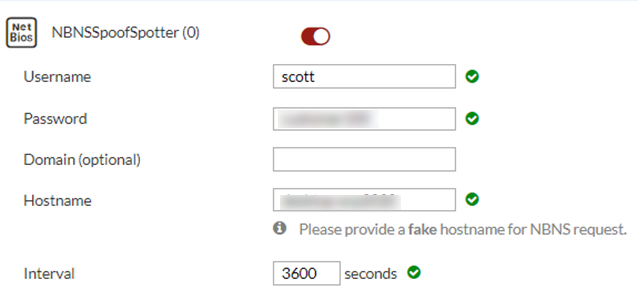
|
|
NBNSSpoofSpotter feature detects attacks using the Responder tool and includes a link to https://github.com/SpiderLabs/Responder with more information about the attack. |
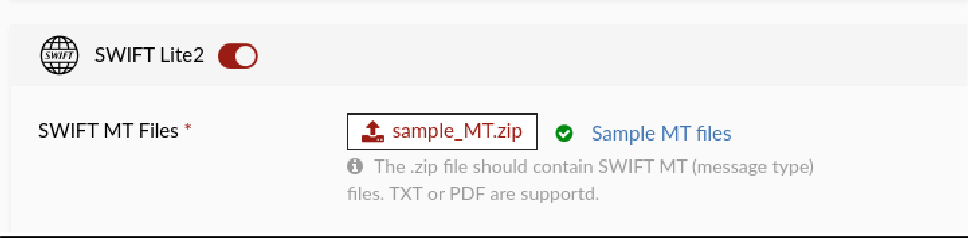
To Deploy decoys with custom images-SWIFT Lite2
-
Go to Deception > Deployment Wizard.
-
Click SWIFT Lite2 service.
-
Upload the MT Files.