
DNS Database Plans
FortiEdge Cloud lets you create DNS Database plans to configure your FortiExtender as a DNS server. After creating a DNS Database plan, you can apply it to a profile or individual device.
-
Navigate to Plans > DNS Database and click Add.
-
Configure the following settings in the plan.
-
Field Name
Description
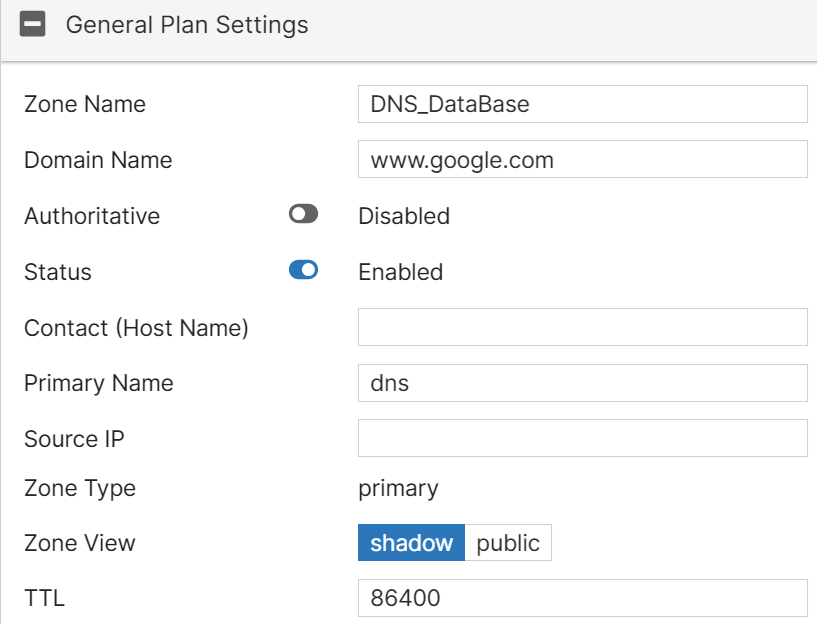
General Settings
Zone Name
Change the zone name if necessary.
Domain Name
Change the domain name if necessary.
Authoritative
Select the status of the authoritative zone.
Status
Select the status of the DNS zone.
Contact (Host Name)
Enter the email address of the zone administrator. You can specify either the username (e.g., admin) or the full email address (e.g., admin@test.com). When using a simple username, the domain of the email will be this zone.
Primary Name
Enter the domain name of the default DNS server for this zone.
Source IP
Enter the source IP for forwarding to the DNS server.
Zone Type
Select the DNS zone to manage entries directly.
Zone View
Select the zone view:
- shadow: Shadow DNS zone to serve internal clients.
- public: Public DNS zone to serve public clients.
TTL
Enter the time-to-live value for the entries of this DNS zone.
Note: The value ranges from 0 to 2147483647. The default is 86400.
Forwarder Settings
Forwarder Click Add Forwarder to enter the DNS zone forwarder IP address.
DNS Entries
DNS Entry
Click Add DNS Entry to add a DNS Entry.
Hostname
Name of the host.
TTL
Time-to-live for this entry.
Type
Resource record type:
-
A — Host type.
-
NS — Name server type
-
CNAME — Canonical name type
-
MX — Mail exchange type
-
PTR — Pointer type
Status
Select the resource record status.
IP
Enter the IPv4 address of the host.
Note: Applicable to A and PTR( types) only.
Canonical name
Canonical name of the host.
Note: Applicable to CNAME (type) only.
Preference
DNS entry preference, 0 is the highest preference.
Note: Applicable to MX (type) only.
After you create a DNS database plan, you can view the plan's configurations, modify them as required, or delete them. Select a plan and click Edit or Delete for any of these operations.