


Registering the service insertion definition to NSX-T
FortiManager supports VMware NSX-T connectors. After configuration is complete, FortiManager can retrieve groups from VMware NSX-T manager and store them as dynamic firewall address objects, and a FortiGate that is deployed by the registered VMware NSX-T service can connect to FortiManager to receive dynamic objects for VMware NSX-T.
Following is an overview of the steps required to set up a VMware NSX-T connector:
- Enabling read-write JSON API access
- Creating a fabric connector for VMware NSX-T
- Configure the NSX-T Manager
- Registering the service insertion definition to NSX-T
Enabling read-write JSON API access
A VMware NSX-T connector requires read-write access to the FortiManager JSON API.
The JSON API registers a service with VMware NSX-T manager and retrieves object updates from VMware NSX-T manager.
To enable read-write JSON API access:
- On FortiManager, go to System Settings > Admin > Administrators.
- Select your Administrator account, and click Edit.
- From the JSON API Access dropdown, select Read-Write, and click OK.
The FortiManager will log you out to activate the settings.
Creating a fabric connector for VMware NSX-T
In FortiManager, create a fabric connector for VMware NSX-T.
To configure an NSX-T connector on FortiManager:
- Log into FortiManager.
- Go to Policy & Objects > Objects Configuration > Fabric Connectors > Endpoint/Identity.
- Click Create New > NSX-T Connector.

- Configure the parameters for the new NSX-T connector, and click OK.

For example:- Name: NSXT-Manager.
- Status: ON.
- NSX-T Manager Configurations:
- Server: NSX-T server.
- User Name: NSX-T user name.
- Password: NSX-T password.
- FortiManager Configurations:
- IP Address: FortiManager IP or FQDN.
-
User Name: Your FortiManager administrator user name.

The user name under FortiManager configurations can be any other FortiManager local user with JSON API access set to read-write. This user will be used by the NSX-T Manager to perform the API calls to the FortiManager in order to dynamically update the VM groups objects.
- Password: Your administrator password.
To configure a registered service:
- On FortiManager, edit the configured NSX-T connector, and click Add Service under Registered Services.
- Configure the service details:
- Integration: Integration, for example East-West.
- FortiGate Password: Your FortiGate admin password.
-
License URL Prefix: Enter the license URL prefix, for example:
http://x.x.x.x/lics/.
- Click the plus icon to add a new image location, and click OK.
- Type: Select the VM type, for example VM01.
-
Location: Enter the image location, for example:
http://x.x.x.x/FortiGate-VM64xCPU.nsxt.ovf.

- Click OK, and save the NSX-T connector.
- In the NSX-T Manager, go to System > Service Deployment > CATALOG to confirm that the FortiGate-VM service was properly registered on NSX-T Manager.
Configure the NSX-T Manager
To configure NSX-T Manager:
- In the NSX-T Manager, go to Inventory > Groups, and click ADD GROUP.
- Enter a name, and click Set Members.
- Select the IP Addresses tab, and add the IP addresses to add as members of this group.
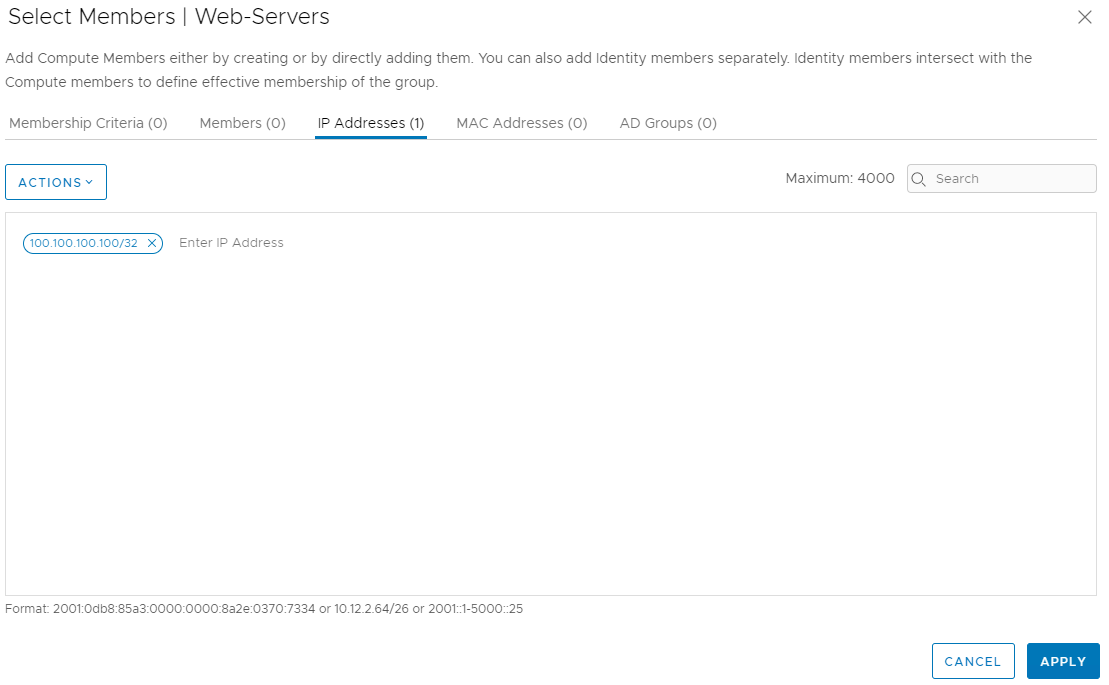
- Save your changes, and repeat these steps until you have created all of the groups that you require.
Group membership is what is used to determine dynamic NSX-T addresses in FortiOS. There are multiple criteria which can be defined on the NSX-T Manager to make a virtual machine part of that group.
- Go to Settings > Network Introspection Settings > Service Profiles.
- Select the Registered Service from the Partner Service dropdown list, and click ADD SERVICE PROFILE.
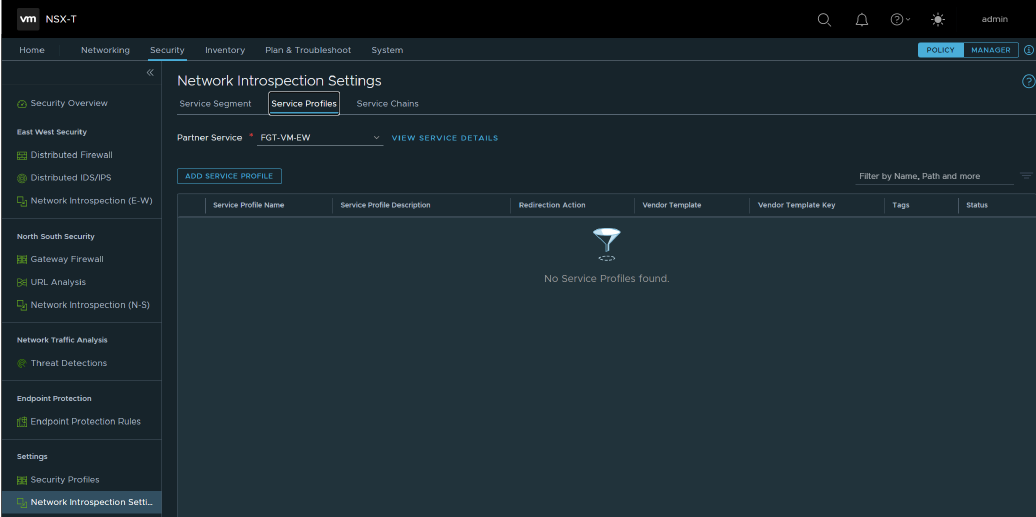
- Configure the following parameters, and click Save.
- Name: Enter a name.
- Vendor Template: Select the template listed in the dropdown.
- Go to the Service Chains tab and click ADD CHAIN.
- Configure the following parameters, and click Save.
- Name:Enter a name.
- Service Segment: Service-Segment.
- Click Set Forward Path, and then click ADD PROFILE IN SEQUENCE.
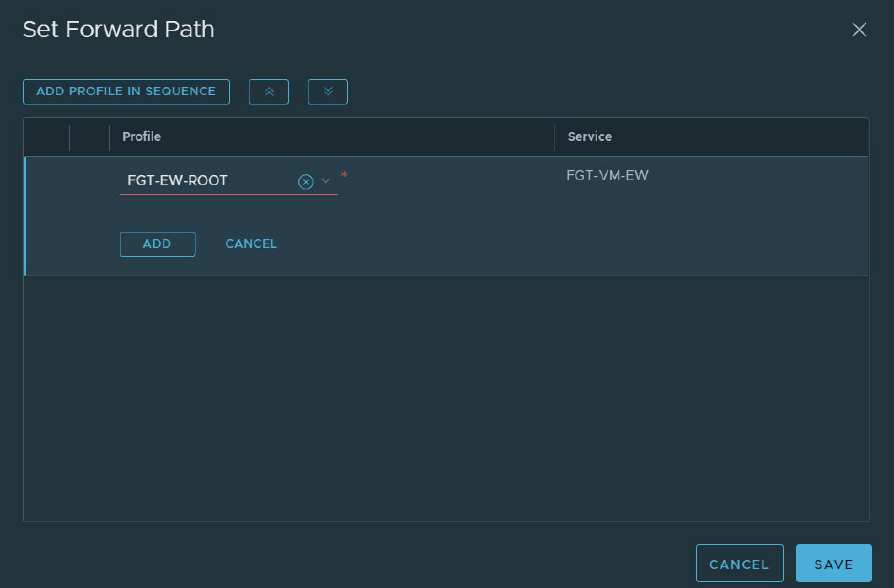
- Select the profile you just created, and click ADD.
- Save your changes.
- Go to East West Security > Network Introspection (E-W), and click on Add Policy.
- Click on the policy name and you can change it if required.
To create the redirection rule in NSX-T:
- Select the policy you created in the previous step, and click ADD RULE.
- Configure the parameters as follows:
- Name: Redir-Rule.
- Source: Any (Groups needs to be selected).
- Destination: Any (Groups needs to be selected).
- Services: Any.
- Applied To: DFW.
- Action: Redirect.
This rule will redirect all traffic to the FGT-EW-VM instance. You can be more granular by selecting any combination of Sources, Destinations, Services, or Applied To for specific groups. If specific groups are selected, only they will be associated with the Service Manager and show up on FortiManager.
- Click PUBLISH to apply the changes.