

Creating column profiles
Create and manage column profiles to customize and organize how data is displayed. You can also share custom profiles with other users in your organization.
To create a column profile:
- Go to:
- Detections > Detections table.
- Investigation results
- Select the columns you want to include in the profile, apply filters, and adjust the column width.
- Click the column selector icon.

- Under Column Profiles, click Create New Profile. The Column Profile dialog opens.
- Configure the column profile settings and click Save.
Setting
Description
Name Enter a name for the column profile.
Include time range Select one of the following:
- Absolute (xxx-xx-xx - xxxx-xx-xx): This is the date range in the date picker.
- Relative (last xx Days): The value of xx is the difference between the start date and the end date.
This option only applies to the Detections Table.
Include other filters Enable to include any filters you applied to the table.
This option only applies to the Detections Table.
Shared Profile Enable to share the column profile with other members of your organization.
To view and edit column profiles:
- Select the columns you want to include in the profile, apply filters, and adjust the column width.
- Click the column selector icon.
- Next to Column Profiles, click the dropdown arrow to view saved profiles.
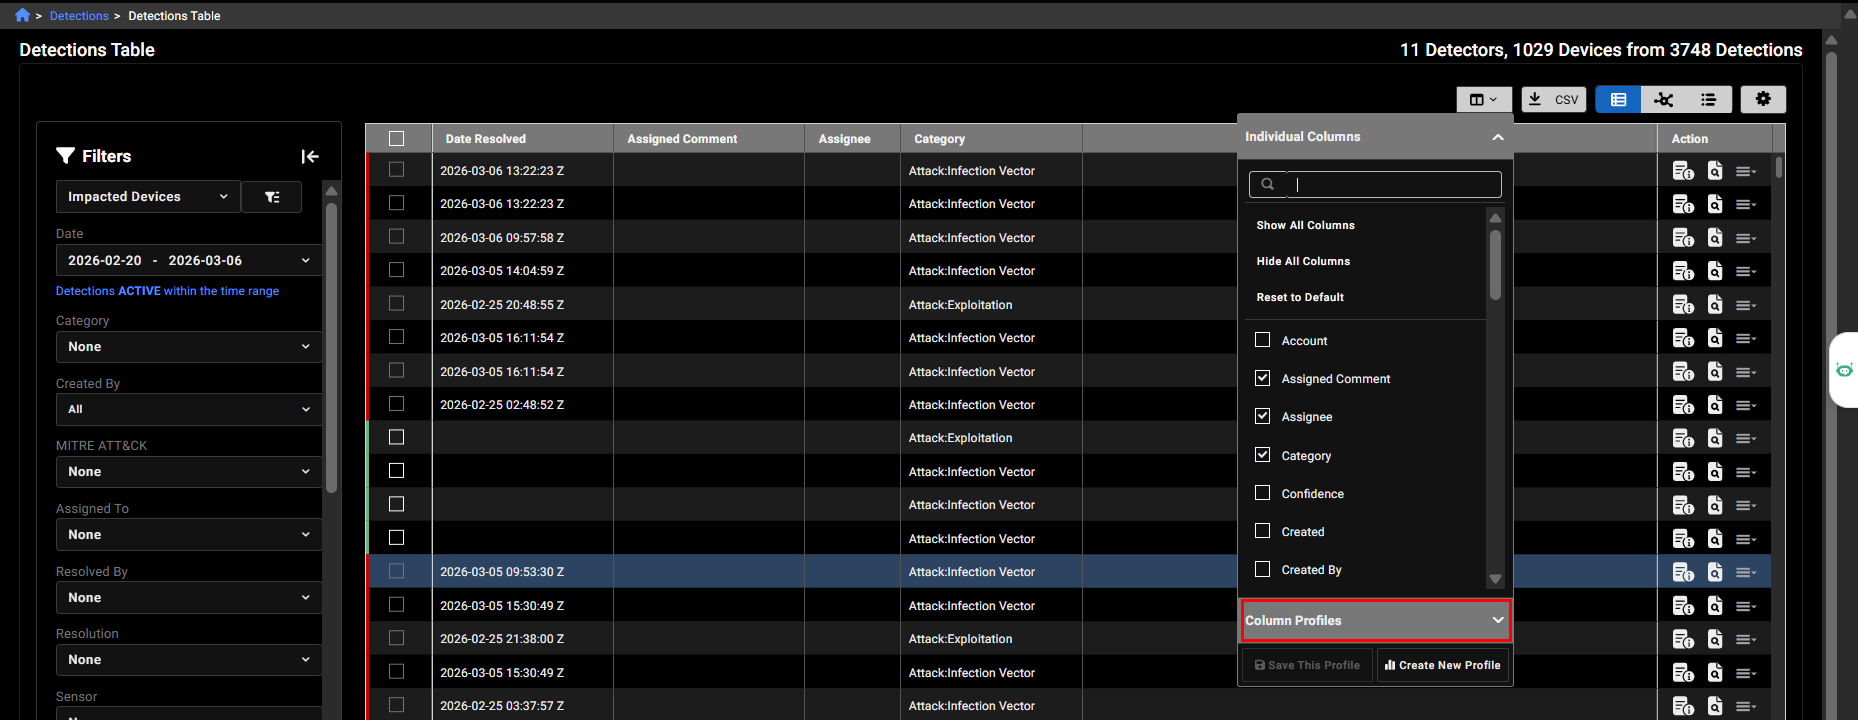
- Select a profile in the list to view or edit it.
- Click Save this Profile to update any changes you made.