Adding a New portal
Perform the steps in this procedure to add a portal.
- Navigate to Portal > Portal Settings and select the site for which the portal is to be created. Click Add Portal.
- Enter a unique Portal Name for your site and select a Theme and Color from the pallet for the portal authentication page. Click Next.
- Upload your Company Logo and a Background Image. Separate background display images are required for desktop and mobile devices. Images in the JPG and PNG format are supported. Click Next.
Note:When upgrading from an older release, the one image uploaded is used for both desktop and mobile devices and first theme is applied by default. - Enter the acceptable usage policy for the visitors of your establishment/site and select Show Policy to prompt users to accept the policy prior to logging in.
- Select the supported/permissible authentication methods.
Portal Login – allows visitors to login using the captive portal. The login credentials are the same as portal users.
Social Login – allows visitors to login using their Facebook, Google, Instagram, or LinkedIn credentials.
No Login - allows visitors to login without any authentication mechanism.
SMS Login – allows visitors to login using a One Time Password (OTP) sent via SMS on the user provided mobile number. Attach a specific SMS provider to this portal. To configure the SMS provider, see Portal Settings.
Click on the SMS Template Settings ( ) icon to customize the default SMS text. The %OTP% variable MUST be a part of the SMS text, irrespective of whether the default SMS text is customized or not.
The %OTP% variable translates to the actual OTP in the text message sent to the user provided mobile number. The user will not be able to save the message if the %OTP% variable is not present.
Note: This feature is available only for paid tier users.
If you do not select any of the above options, the portal authenticates the visitor without any credentials. - Select the Language for your portal authentication page. English is the default and the supported languages are, French, Spanish, Romanian, Italian, and Portugese. Click Next.
- You can optionally modify the GDPR Consent Details as per requirement. The GDPR page is enabled by default, you can disable it while creating a site, see Site Management.
-
Enable Collect Email to collect email information during visitor authentication through Captive Portal; enable Verify Email to verify the collected email information.
- For visitors to receive the company's newsletter regularly, enable Subscribe to the company's newsletter.
-
Configure the website redirection options for visitors after successful login into the captive portal.
Default Success Page – Visitors are redirected to a successfully logged in portal page.
Original Request URL – Visitors are redirected to the initial URL they tried to browse before authenticating on the portal.Specific URL – Visitors are redirected to the URL specified while creating the portal, for example https://www.fortinet .com.
- To download the portal for customization, click Download.
- Click Save.
The portals created can be edited and deleted.
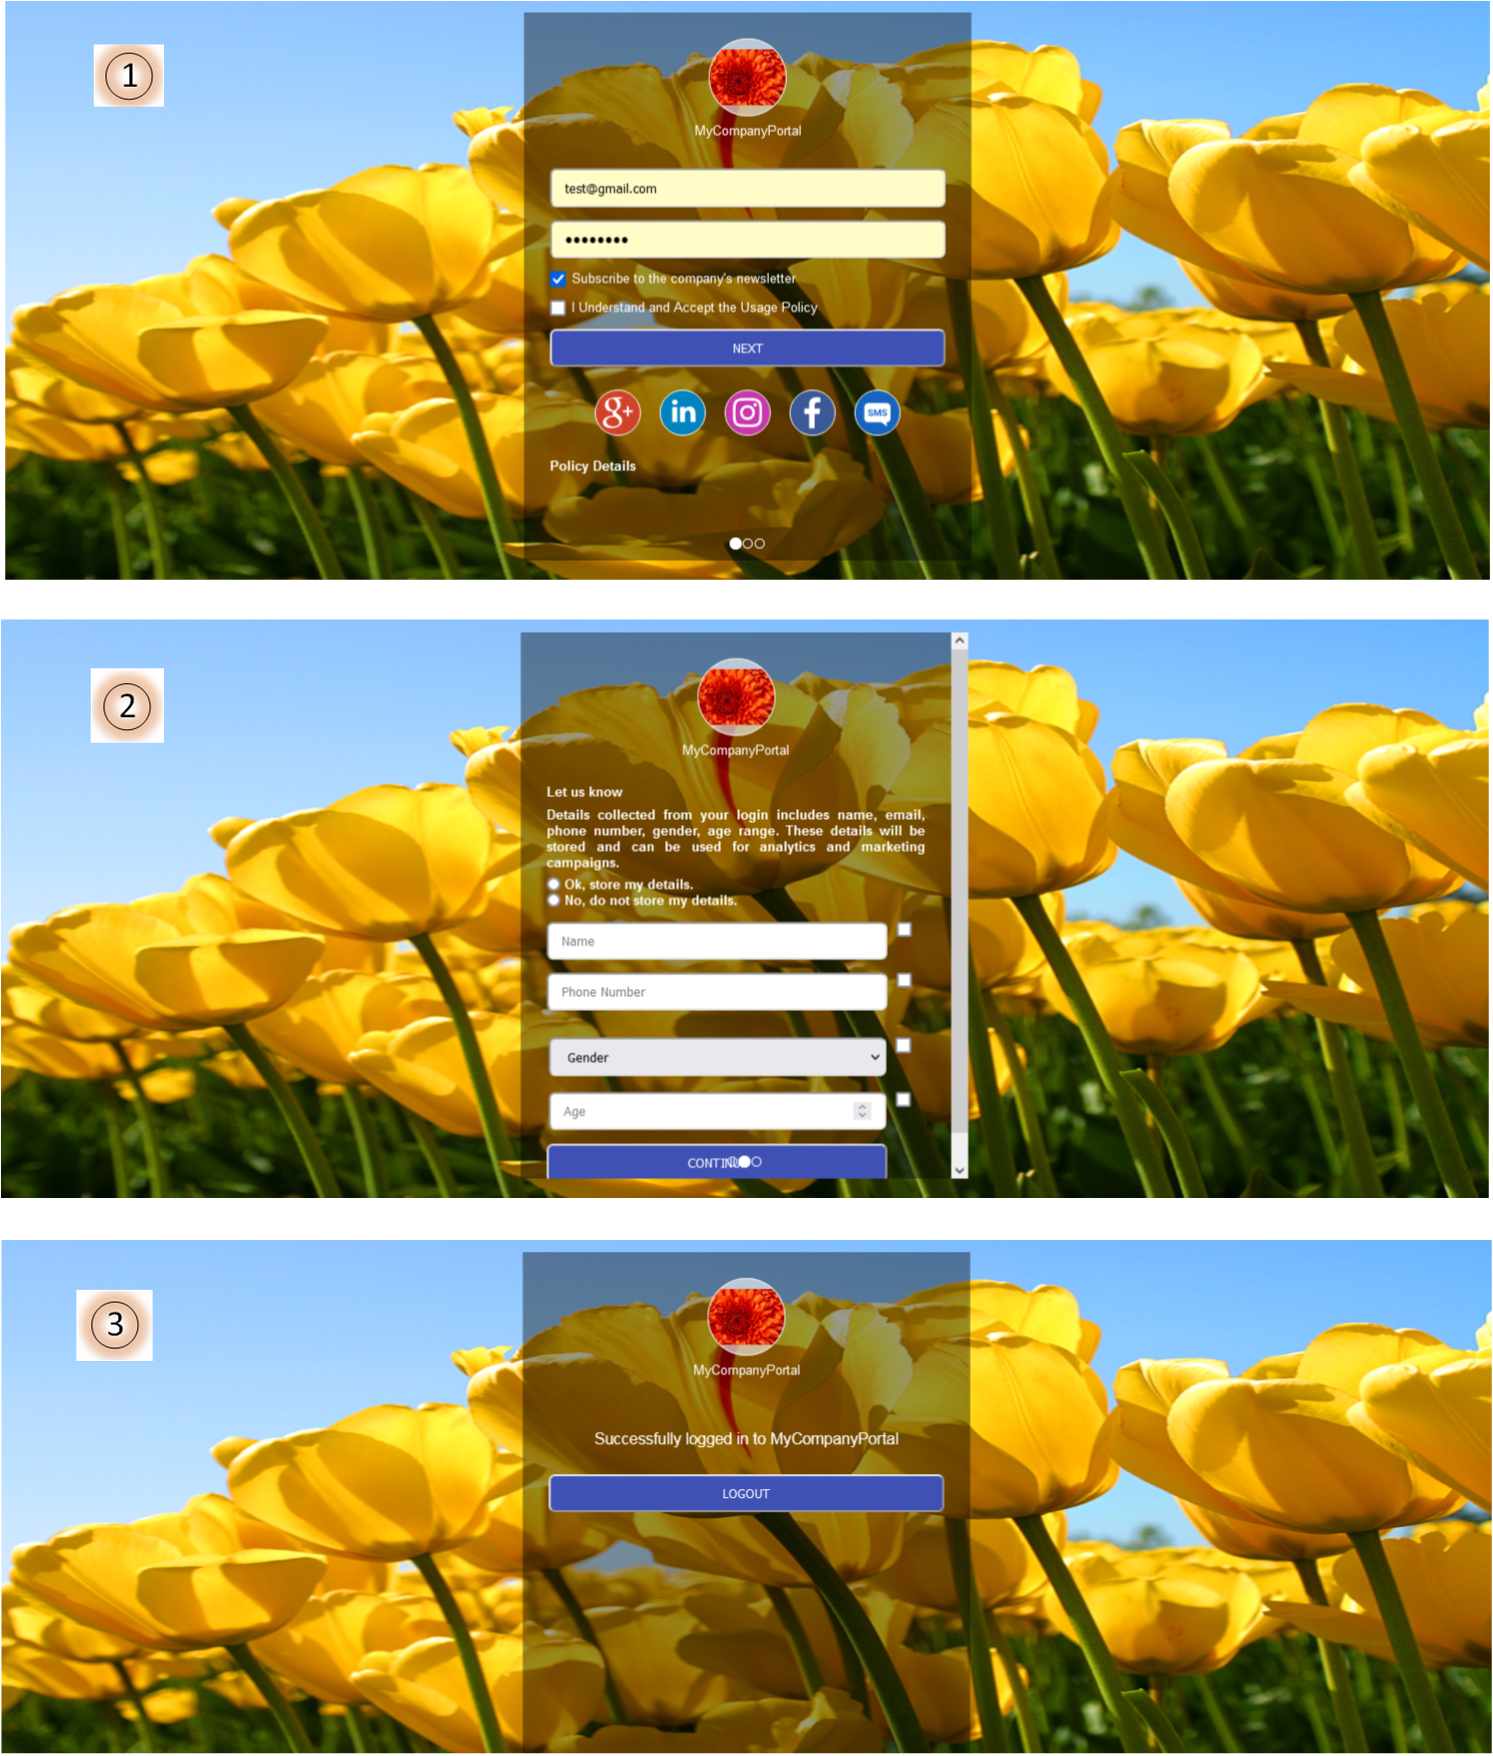
This is a sample captive portal created and viewed on the FortiPresence GUI.