


Using SAML authentication with Okta
This example shows how to configure SAML authentication with Okta on a FortiProxy unit. You need to configure both Okta and FortiProxy for SAML authentication to work.
Okta configuration
Complete the following steps in Okta:
-
Log in Okta using a developer account and select Admin under the user settings.

-
Go to the Applications tab and select Add Application.

-
Select Create New App and create a new application with the SAML 2.0 sign on method.


-
Enter an App name, which will be the name of the portal the user logs into.
-
Select Next.
-
Specify the single sign on URL and audience URI as per the SSL VPN settings on the FortiProxy.

-
Select Download Okta Certificate. You will need to import the certificate to the FortiProxy later.
-
Specify the Attribute Statements. These are the values that will be passed on to the FortiProxy by the Okta IdP. The Name attribute will be used as the SSL VPN username on the FortiProxy.
-
Specify the Group Attribute Statements value if you are performing group matching based on group membership of Okta users on the FortiProxy.

-
Confirm to be an Okta customer and select App type option This is an internal app that we have created.

-
Click Finish.
-
In the Sign On tab, select View SAML setup instructions to get the IdP single sign on URL and the identity provider issuer.

-
In the Assignments tab, select Assign > Assign to People to assign the users to add to the application. This allows the user to log in to the application’s portal.
-
Save the changes and click Done.
FortiProxy configuration
Step 1: Configure SAML
To configure SAML from the GUI:
-
Select User & Authentication > SAML and click Create New.

To configure SAML from the CLI:
FPX222 (wadtest_Okta) # show
config user saml
edit "wadtest_Okta"
set cert "Fortinet_CA_SSL"
set entity-id "https://fpx222.domain.local:7831/XX/YY/ZZ/saml/metadata/"
set single-sign-on-url "https://fpx222.domain.local:7831/XX/YY/ZZ/saml/login/"
set single-logout-url "https://fpx222.domain.local:7831/XX/YY/ZZ/saml/logout/"
set idp-entity-id "http://www.okta.com/exk78nt5jbkceEzPK697"
set idp-single-sign-on-url "https://trial-3508499.okta.com/app/trial-3508499_samlfpx_1/exk78nt5jbkceEzPK697/sso/saml"
set idp-single-logout-url "https://trial-3508499.okta.com/app/trial-3508499_samlfpx_1/exk78nt5jbkceEzPK697/slo/saml"
set idp-cert "REMOTE_Cert_3"
set user-name "username"
set group-name "groupname"
set digest-method sha256
next
end
Step 2: Configure a user group
To configure a user group from the GUI:
-
Select User & Authentication > User Groups.

To configure a user group from the CLI:
config user group
edit "saml-okta"
set member "wadtest_Okta"
config match
edit 1
set server-name "wadtest_Okta"
set group-name "saml_grp"
next
end
next
end
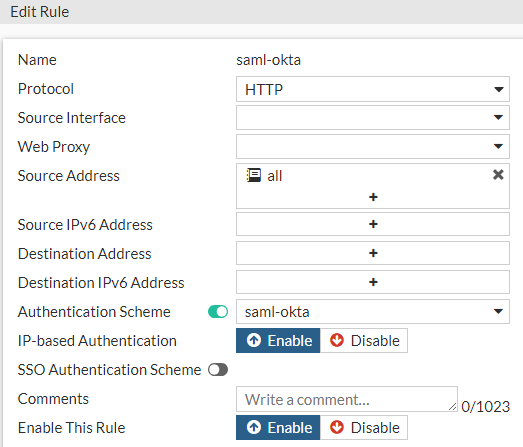
Step 3: Configure an authentication scheme
To configure an authentication scheme from the GUI:
-
Select Policy & Objects > Authentication Rules and click Create New > Authentication Scheme.

To configure an authentication scheme from the CLI:
config authentication scheme
edit "saml-okta"
set method saml
set saml-server "wadtest_Okta"
next
end
Step 4: Configure an authentication rule
To configure an authentication rule from the GUI:
-
Select Policy & Objects > Authentication Rules and click Create New > Authentication Rule.
To configure an authentication rule from the CLI:
config authentication rule
edit "saml-okta"
set srcaddr "all"
set active-auth-method "saml-okta"
next
end
Step 5: Configure authentication settings
To configure authentication settings from the GUI:
-
Select Policy & Objects > Proxy Auth Setting.

To configure authentication settings from the CLI:
config authentication setting
set active-auth-scheme "saml-okta"
set captive-portal "fpx222.domain.local"
end
Step 6: Configure Okta proxy address
To configure an Okta proxy address from the GUI:
-
Select Policy & Objects > Addresses and click Create New > Address.
- Create two addresses as follows:


To configure an Okta proxy address from the CLI:
config firewall address
edit "ok14static.oktacdn.com"
set uuid 81d34684-48ed-51ee-22b8-f53e92f0a163
set type fqdn
set fqdn "*.oktacdn.com"
next
edit "trial-3508499.okta.com" (This url is unique for each Okta account.
set uuid b43a9e10-48f2-51ee-e65b-68c810c9ea69
set type fqdn
set fqdn "trial-3508499.okta.com"
next
end
Step 7: Configure Okta proxy address group
To configure an Okta proxy address group from the GUI:
-
Select Policy & Objects > Addresses and click Create New > Address Group.
- Create an address group as follows:

To configure an Okta proxy address group from the CLI:
config firewall addrgrp
edit "Okta SAML"
set uuid 8f7f07be-48ed-51ee-0a40-b24e8c4cb57e
set member "trial-3508499.okta.com" "ok14static.oktacdn.com"
next
end
Step 8: Configure a firewall policy
config firewall policy
edit 2000
set type explicit-web
set name "okta-bypass"
set uuid 241be4a0-48ee-51ee-8082-af80c2ae0d0b
set dstintf "any"
set srcaddr "all"
set dstaddr "Okta SAML"
set action accept
set schedule "always"
set service "webproxy"
set explicit-web-proxy "web-proxy"
set logtraffic all
next
edit 1000
set type explicit-web
set name "SAML_Okta"
set uuid 16b251e6-48ee-51ee-9346-1efcabdc66f6
set dstintf "any"
set srcaddr "all"
set dstaddr "all"
set action accept
set schedule "always"
set service "webproxy"
set explicit-web-proxy "web-proxy"
set logtraffic all
set webcache enable
set webcache-https enable
set groups "saml-okta"
set ssl-ssh-profile "custom-deep-inspection"
next
end
Step 9: Import the Okta certificate
In System > Certificates, import the Okta certificate by selecting Import > Remote Certificate.