FortiSandbox VM on Nutanix
Creating the FortiSandbox Deployment Image
Creating the FortiSandbox Deployment Image
- In the Prism Element web console, go to VM > Create VM.
- Enter the following configuration information for General Configuration and Compute Details:
- In the NAME field, enter the desired name for your VM, like FortiSandbox-VM.
- In the VCPU(S) field, enter 2.
- In the MEMORY field, enter 4.
- By default, a CD-ROM is listed under Disks. Delete the CD-ROM.
- You must create a boot disk and a data disk for the VM. First, let's create the boot disk.
- Click Add New Disk.
- The boot disk will be cloned from the VM image that you uploaded. Under OPERATION, select Clone from Image Service.
- Under BUS TYPE, select SATA.
- Under IMAGE, select the FortiSandbox disk image uploaded in Uploading the FortiSandbox Deployment Image to Nutanix.
- Click Add. The boot disk has been added.
- Create the data disk by first Clicking Add New Disk.
- Under OPERATION, select Allocate on Storage Container
- Under BUS TYPE, select SATA.
- Under SIZE (GB), enter 200.
- >Click Add. The log disk has been added.
- Add a network interface for the VM.
- Under Network Adapters (NIC), click Add New NIC.
- Under VLAN NAME, select NR_PRT_STATIC.
- Click Add.
- Click Save. The system displays a Successfully submitted Create operation message when the VM has been created successfully with no error.
Creating the FortiSandbox Deployment Image
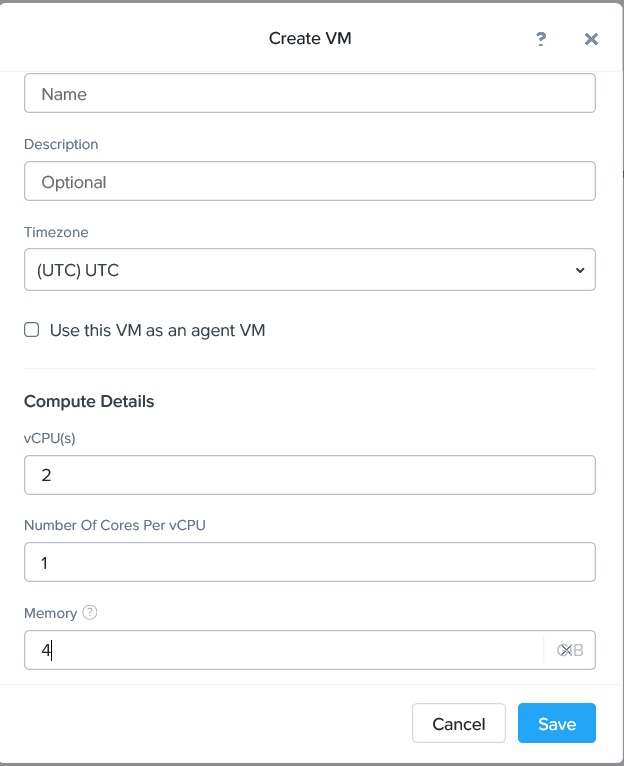
- In the Prism Element web console, go to VM > Create VM.
- Enter the following configuration information for General Configuration and Compute Details:
- In the NAME field, enter the desired name for your VM, like FortiSandbox-VM.
- In the VCPU(S) field, enter 2.
- In the MEMORY field, enter 4.
- By default, a CD-ROM is listed under Disks. Delete the CD-ROM.
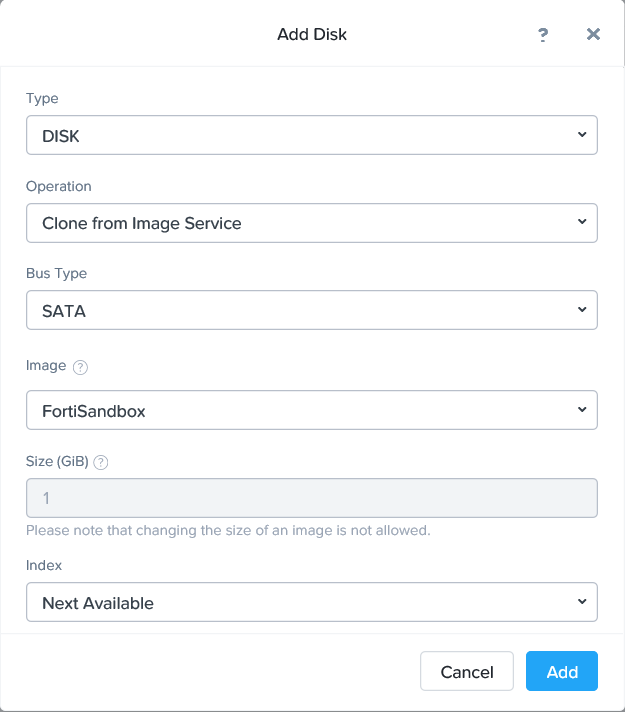
- You must create a boot disk and a data disk for the VM. First, let's create the boot disk.
- Click Add New Disk.
- The boot disk will be cloned from the VM image that you uploaded. Under OPERATION, select Clone from Image Service.
- Under BUS TYPE, select SATA.
- Under IMAGE, select the FortiSandbox disk image uploaded in Uploading the FortiSandbox Deployment Image to Nutanix.
- Click Add. The boot disk has been added.
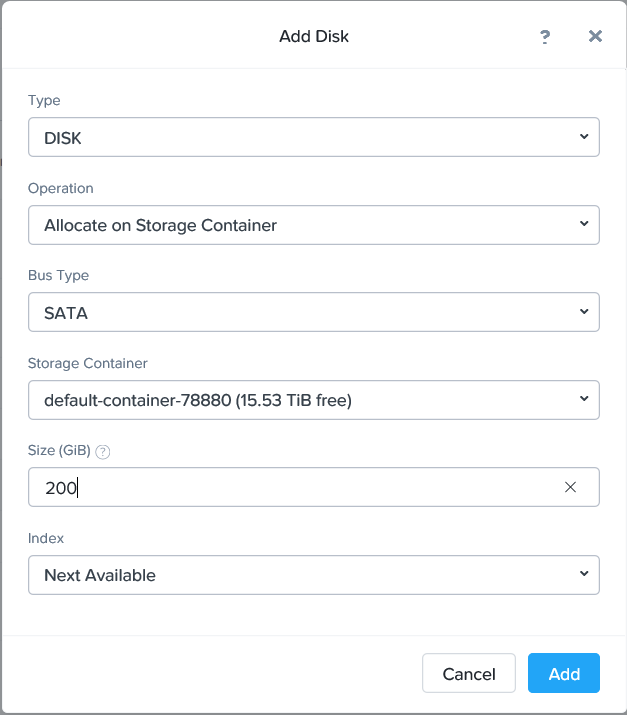
- Create the data disk by first Clicking Add New Disk.
- Under OPERATION, select Allocate on Storage Container
- Under BUS TYPE, select SATA.
- Under SIZE (GB), enter 200.
- >Click Add. The log disk has been added.
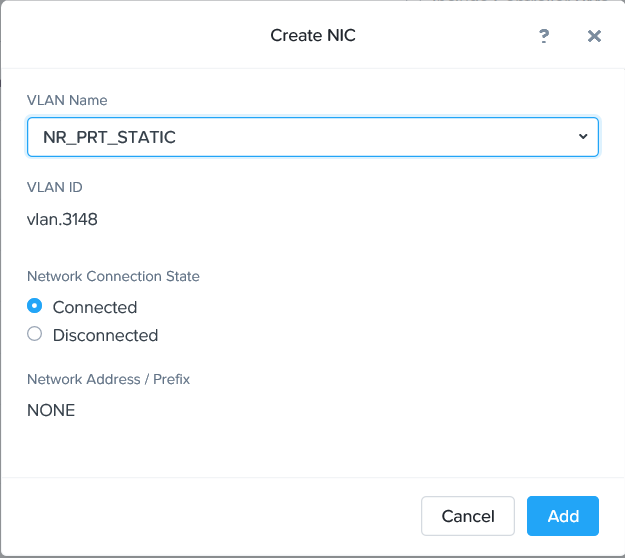
- Add a network interface for the VM.
- Under Network Adapters (NIC), click Add New NIC.
- Under VLAN NAME, select NR_PRT_STATIC.
- Click Add.
- Click Save. The system displays a Successfully submitted Create operation message when the VM has been created successfully with no error.


