


Deploy FortiSandbox VM on Azure (PAYG / BYOL)
You can deploy FortiSandbox VM using the Azure GUI or CLI:
- Deploy FortiSandbox instance on Azure using the GUI
- Deploy FortiSandbox instance on Azure using the CLI
Deploy FortiSandbox instance on Azure using the GUI
|
|
Starting in FortiSandbox version 4.4.4, only nested BOYL deployments from the marketplace are supported. For more information, see Nested deployments. |
To deploy FortiSandbox on Azure with the GUI:
- Go to Azure Marketplace and search for Fortinet FortiSandbox.
- From the Plan dropdown, select Fortinet FortiSandbox-VM for Azure PAYG or Fortinet FortiSandbox-VM for Azure BYOL and click Create.

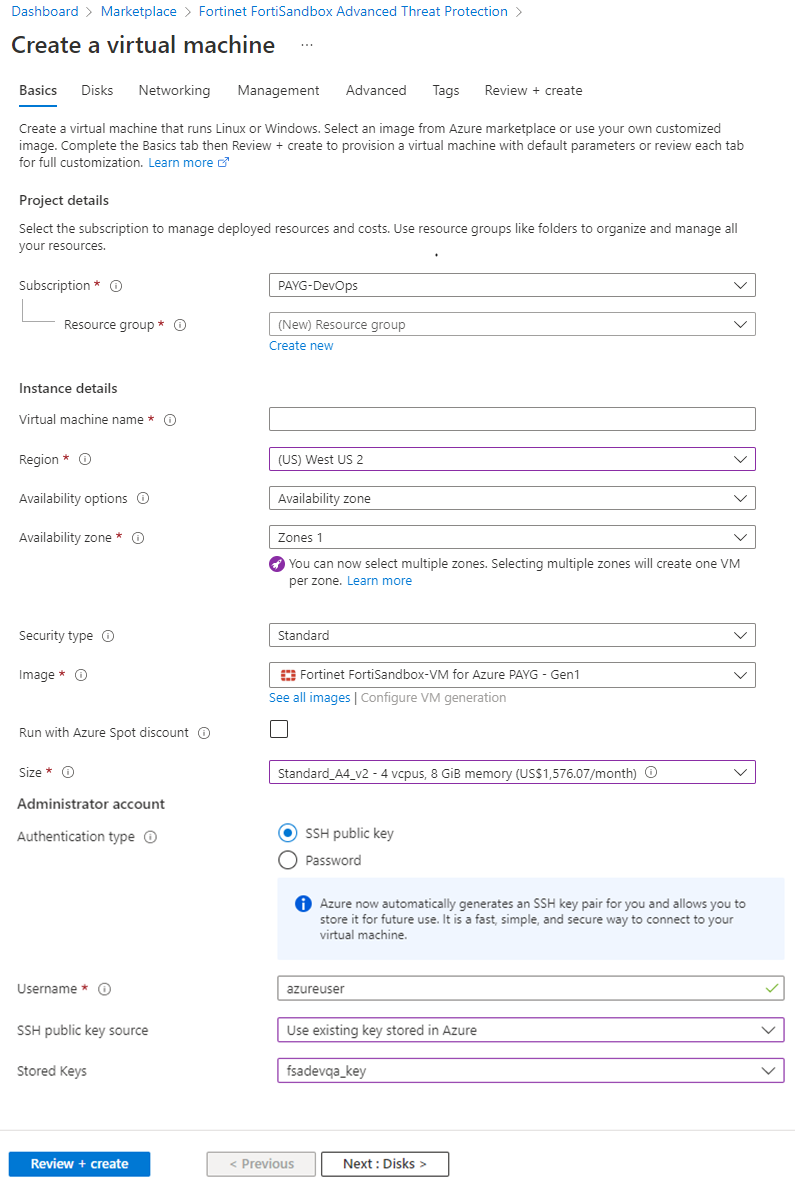
- On the Create a virtual machine, configure the settings in the Basics tab.
Resource group
Choose the one created for FSA.
Virtual machine name
Name of the FSA VM.
Region
The region should be same as the resource group.
Size
Select the VM instance type. The type should be close to the resource recommendations as shown in the table above. FortiSandbox on Azure uses the temporary disk (provided free by the VM) to store and process job files. A secondary disk is not required.
For nested BYOL, please select Standard_D8s_v3 and above. Use the guidelines in the Minimum system requirements to choose the correct size.
Authentication type
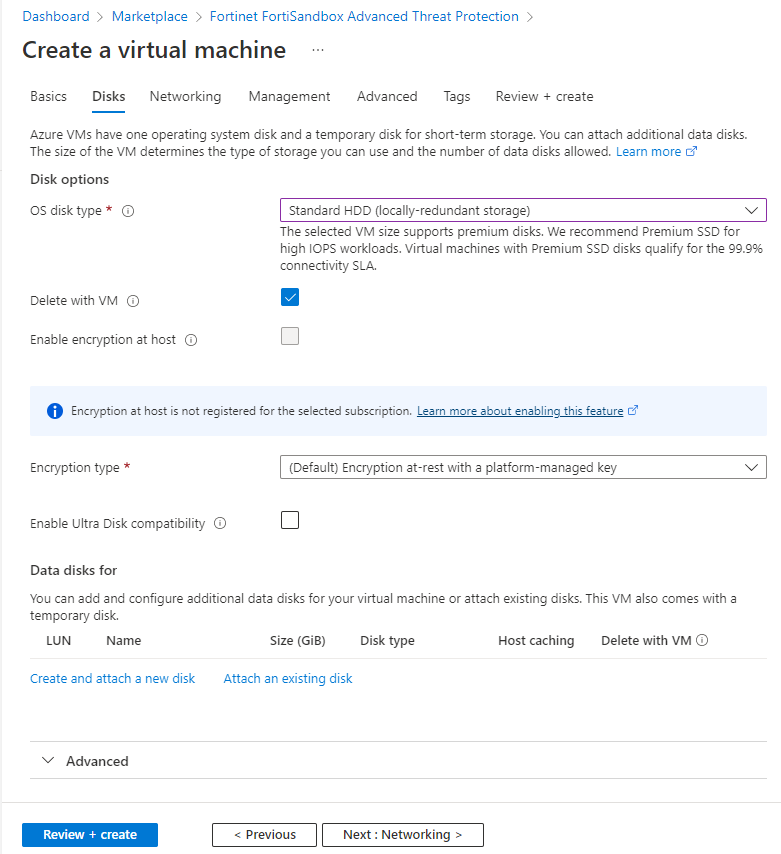
- Click the Disks tab to configure the disks.
OS disk type
Select the disk type depending on your needs.
Note: This option is only available in version 4.4.3.
Data disk for
Select Create and attach a new disk or Attach an existing disk.
- Click the Network tab to configure the network interface.
Virtual Network Select the Virtual Network which you created for FortiSandbox. Subnet Select the subnet you created for FortiSandbox port1.
Public IP Create a new for FortiSandbox port1, , or use an existing IP. Configure network security group Select the security group you created for FortiSandbox and allowed access to FortiSandbox port1. 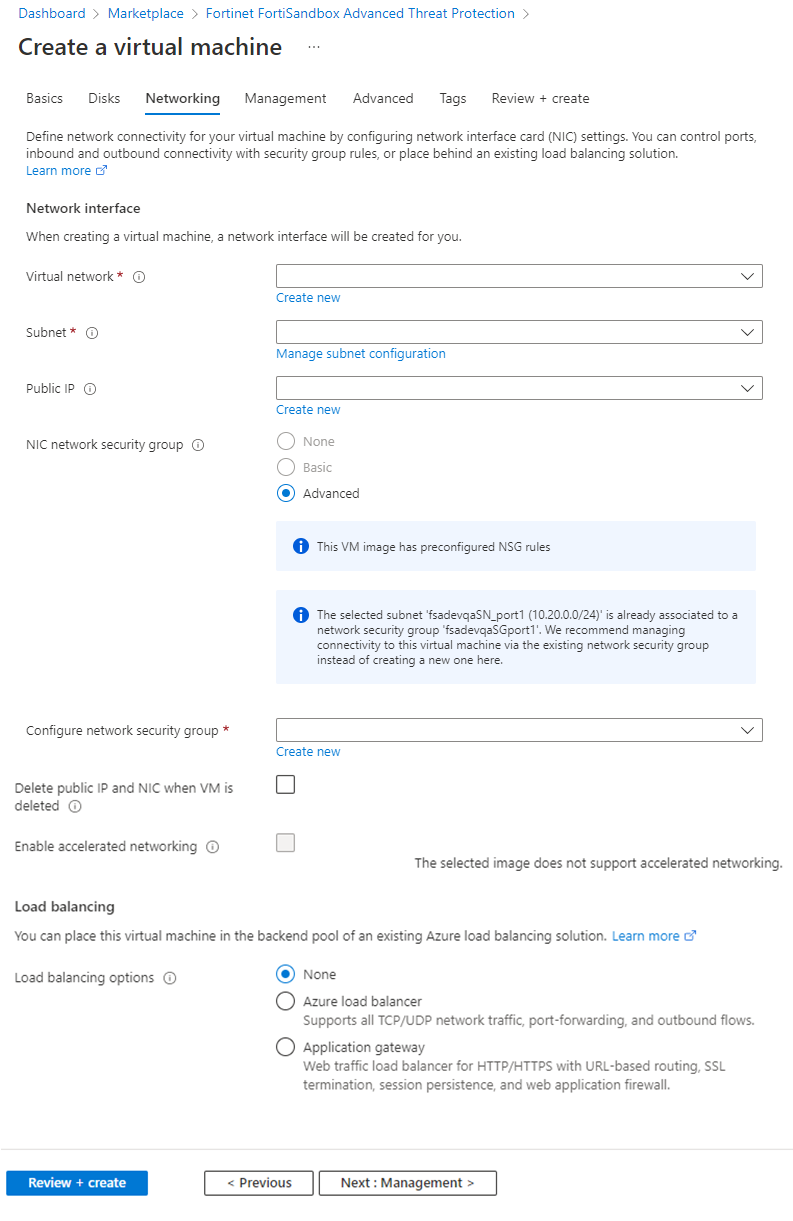
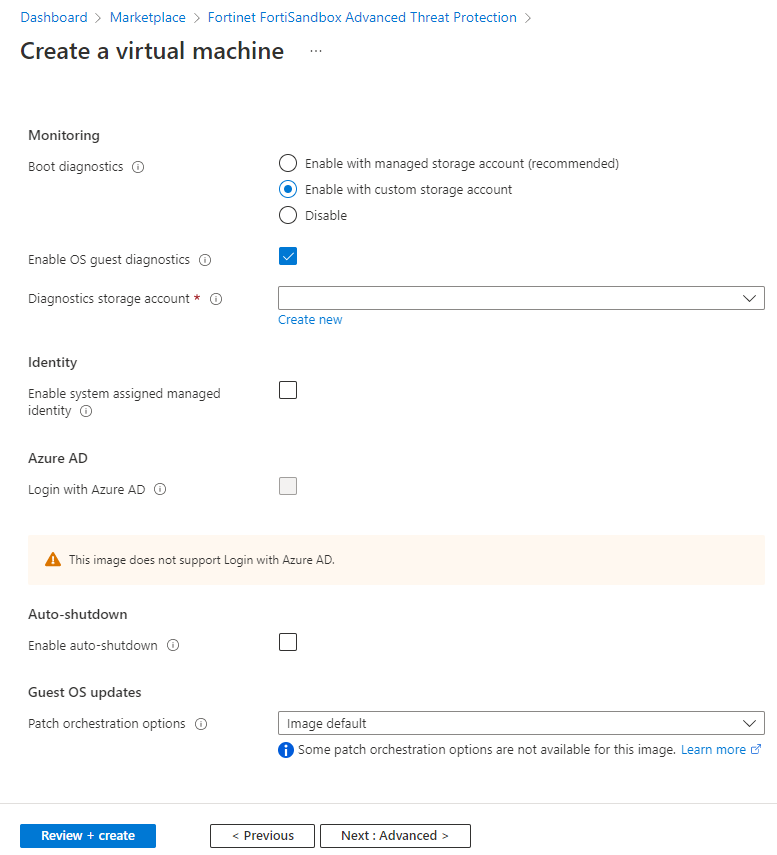
- It is high recommended you enable certain diagnostics settings. Click the Management tab to configure these diagnostics settings.
Boot diagnostics
Enable OS guest diagnostics
Enable.
Diagnostics storage account
Choose the debug storage account.
- Click Review + Create.
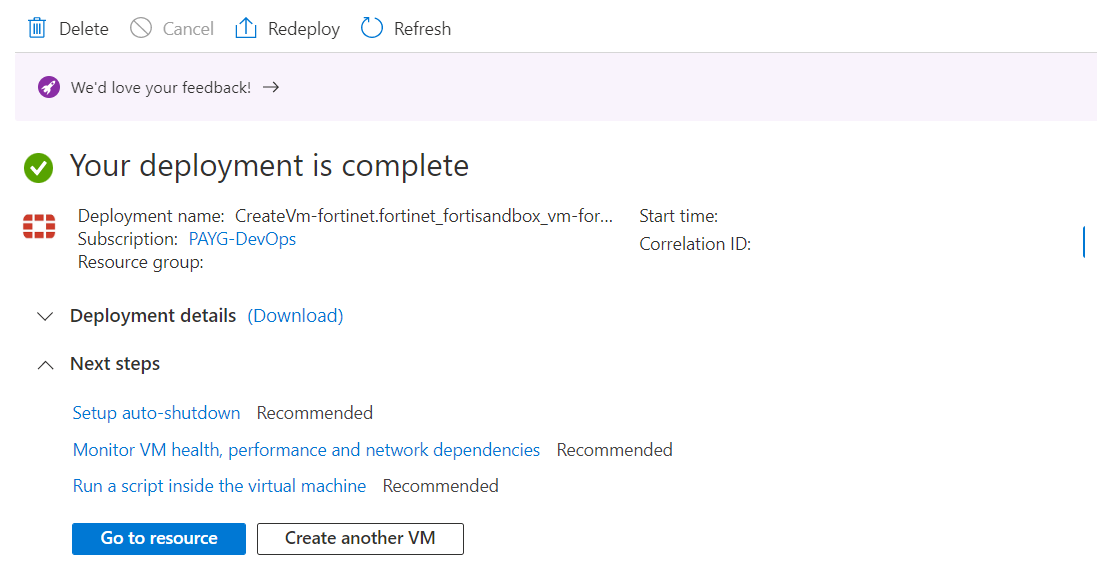
- Wait for the setup wizard to validate your information and click Create.
- When the VM is available, click Go to resource to go to the VM.
- Use the Public IP address assigned to the FortiSandbox port1 via HTTPS once the FSA OS boots up completely via its console.

- Get the default admin password for the FortiSandbox VM using the Azure CLI command:
az vm list --output tsv -g <resource group name> |grep <FortiSandbox-VM name>
The VM-ID UUID is the default password for Admin access

- Prepare FortiSandbox for scanning contents. See Import Azure settings into FortiSandbox.
To set up configuration and guest VM installation:
- In the Azure portal of the new FortiSandbox, open the console via Menu > Help > Serial console.
- Log in as FortiSandbox admin:
PAYG and Non-Nested BYOL: Use the VM ID for the password.
Nested BYOL: By default there is no password.
- FortiSandbox will prompt you to create a new password.
- Check that the IP of port1 and default gateway is set with the CLI
show. - If the IP of port1 and default gateway are set, you can skip the next step.
- Set up the private IP of port1 (such as
10.0.0.5) and default gateway (such as10.0.0.1). - Log into the GUI.
- Go to Dashboard > Status > License
- For PAYG and Non-Nested BYOL, the unit type is Azure.

- While for Nested BYOL, the unit should display HyperV.

- For PAYG and Non-Nested BYOL, the unit type is Azure.
Deploy FortiSandbox instance on Azure using the CLI
To create the VM using the Azure CLI:
- Since the Marketplace URN is subject to change without notice, you can get the latest FortiSandbox image URN with the following command:
az vm image list -p fortinet -f fortinet_fortisandbox_vm --all --query "[].urn"

- Create the Azure FortiSandbox with the Azure CLI from the Azure Marketplace with the network interfaces and data disk for the FortiSandbox you created.
- Create the Azure FortiSandbox BYOL.
az vm create --resource-group [resource group name] --name [ FortiSandbox_BYOL_VM name] --image "fortinet:fortinet_fortisandbox_vm:fortinet_fsa-vm:4.2.0" --size [vm size] --nics [NIC for port1] [NIC for port2] [NIC for port3] [NIC for port4] --attach-data-disks [attach_data_disks_name] --location [location_of_ resource_group_for_FSA] --boot-diagnostics-storage [boot_diagnostics_storage_ container_name] --verbose
- Create the Azure FortiSandbox PAYG.
az vm create --resource-group [resource group name] --name [ FortiSandbox_PAYG_VM name] --image "fortinet:fortinet_fortisandbox_vm:fortinet_fsa-vm_payg:4.2.0" --size [vm size] --nics [NIC for port1] [NIC for port2] [NIC for port3] [NIC for port4] --attach-data-disks [attach_data_disks_name] --location [location_of_ resource_group_for_FSA] --boot-diagnostics-storage [boot_diagnostics_storage_ container_name] --verbose
- Create the Azure FortiSandbox BYOL.
- Get the default admin password for the FortiSandbox VM using the following Azure CLI command:
az vm list --output tsv -g <resource group name> |grep <FortiSandbox-VM name>
The VM-ID UUID is the default password for Admin access.
- Prepare FortiSandbox for scanning contents. See Import Azure settings into FortiSandbox.