


Configuring the Microsoft Entra ID (formerly Azure AD)
The following Entra ID configuration demonstrates how to add the FortiSandbox as an enterprise non-gallery application. This application provides SAML SSO connectivity to the Entra ID IdP. Some steps are performed concurrently on the FortiSandbox.
|
|
This example is configured with an Entra ID free-tier directory. There may be limitations to managing users in Azure in this tier that are not limited in other tiers. Consult the Microsoft Entra ID documentation for more information. |
To configure Entra ID:
- Create a new enterprise application.
- Configure the SAML SSO settings on the application and FortiSandbox.
- Assign Entra ID users and groups to the application.
Create a new enterprise application
To create a new enterprise application:
- Log in to the Azure portal.
- In the Azure portal menu, click Microsoft Entra ID.
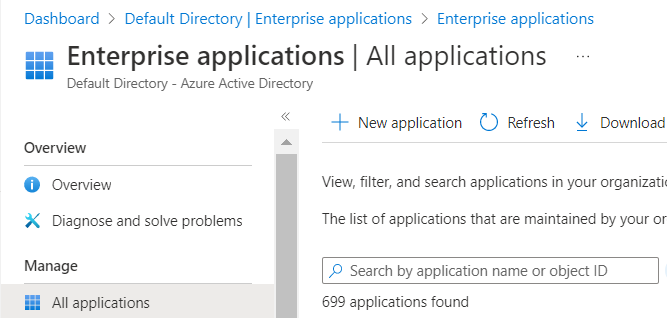
- In the left navigation pane menu go to Manage > Enterprise applications.
- Click New application.
- Click Create your own application.

- Enter a name for the application and select Integrate any other application you don't find in the gallery (Non-gallery).

- Click Create.
Configure the SAML SSO settings on the application and FortiSandbox
|
|
This task requires going back and forth between Azure and the FortiSandbox GUI. We recommend keeping the FortiSandbox GUI open for the entire procedure. |
To configure the SAML SSO settings on the application and FortiSandbox
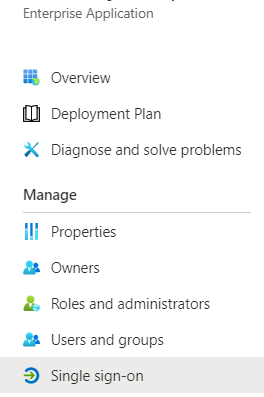
- On the Enterprise Application overview page, go to Manage > Single sign-on and select SAML as the single sign-on method.
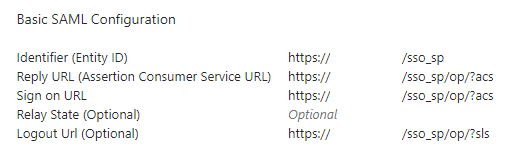
- Click Edit of Section 1 (Basic SAML Configuration)

- Keep the Azure Portal open and in FortiSandbox go to System > SAML SSO and click Enable next to Enable SSO.
- In Azure go to Set up Single Sign-On with SAML > Edit Section 1 and copy the following URLs from the FortiSandbox to the Basic SAML Configuration section:
From FortiSandbox
To Azure field
SP Entity ID
(
https://10.1.0.1/sso_sp)Identifier (Entity ID)
SP login URL
(
https://10.1.0.1/sso_sp/op/?acs)Reply URL and Sign on URL
SP logout URL
(
https://10.1.0.1/sso_sp/op/?sls)Logout URL

If you are deploying FortiSandbox or FortiAuthenticator on a public cloud you will need to update the Public IP to Private IP manually. Otherwise, the URLs will not work.
- Click Save.
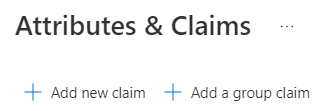
- Edit Section 2 (Attributes & Claims) > Add new claim.
- Configure the new claim:
Claim
Value
Name
username
Namespace
Leave blank
Source
Attribute
Source attribute
user.userprincipalnameThe value of this attribute has to match the username of the administrator who will be logging in

-
Click the Save button to add this new claim.
-
Click the close button (X) at the top-right to return.
- In Section 3 (SAML Certificates), download the Certificate (Base64).

- To import this certificate into FortiSandbox, go to System > Certificates.
- On FortiSandbox, go to System > SSO to configure the SSO settings. Copy the following URLs fromEntra ID SAML-based Sign-on > Section 4 page:
From Azure
To FortiSandbox field
Microsoft Entra Identifier
IdP Entity ID
Login URL
IdP login URL
Logout URL
IdP logout URL
- For IdP certificate, choose the certificate you imported earlier.
- Click OK, to save you settings to FortiSandbox.
Assign Entra ID users and groups to the application
To assign Entra ID users and groups to the application:
- In Azure, go to Manage > Users and groups and click Add user/group.
- Select the users or groups.
