


Schedules
FortiSOAR provides you with a Schedules module that allows you to schedule playbooks to run at regular intervals.
Permissions required for working with Schedules
-
To access the
Schedulespage, you must be assigned a role with minimumReadpermission on thePlaybooksmodule, which means that this permission must be assigned to users who require to perform any operations such as view, create or update schedules. -
To create and update schedules; you must be assigned a role with a minimum of
Create,Read, andUpdatepermission on theSchedulesmodule. To modify schedules, you must be assigned a role with a minimum ofReadandUpdatepermission on theSchedulesmodule. To view the existing schedules, you must be assigned a role with a minimum ofReadpermission on theSchedulesmodule. To create and delete schedules, you must be assigned a role with a minimum ofCreate,Read,Update, andDeletepermission on theSchedulesmodule.
Working with Schedules
- Click Automation > Schedules in the left navigation bar.
On theSchedulespage you can see the list of schedules created. You can also filter schedules by schedule name and/or By Status (Active/Inactive):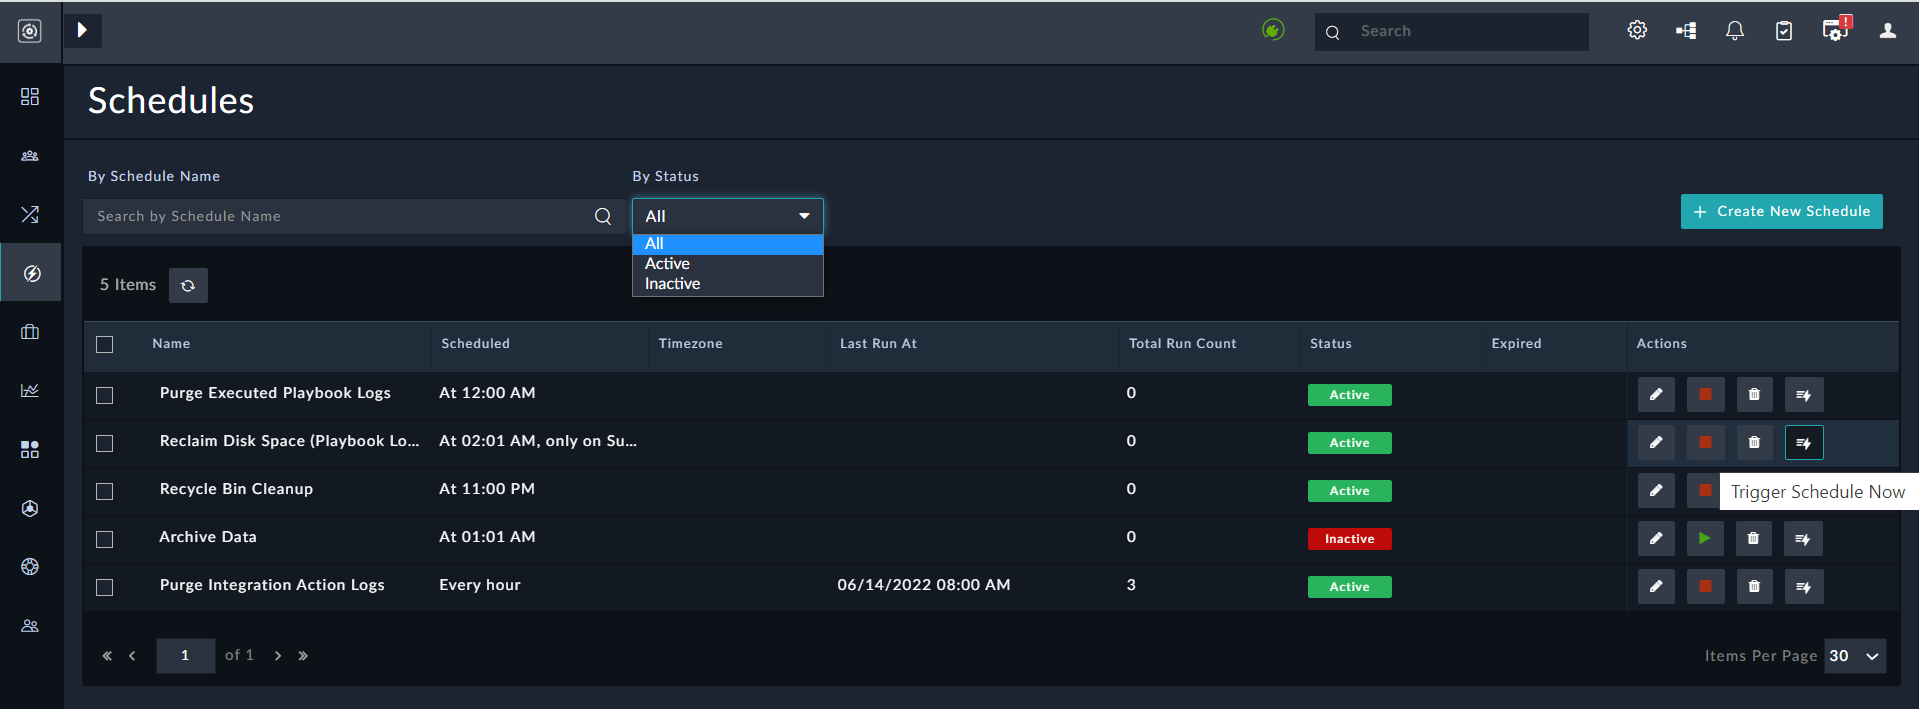
- To define a new schedule for a periodic playbook, on the
Schedulespage, click Create New Schedule. - In the
Schedule Detailsdialog, enter the following details:- In the Name field, add the name of the schedule.
Note: Schedule names must be unique and comprehensive. You should be able to understand what the purpose of the schedule is by reading the name of the schedule. For example, if you want a playbook to run every day and connect to your SIEM, for example, Splunk, and gather alerts from Splunk, and then make the corresponding updates in the FortiSOARAlertsmodule, you can name such a schedule asSchedule PB to run daily for Splunk Updates. - If you want to start the schedule immediately after creating the schedule, click the Start Schedule checkbox.
- From the Playbook drop-down list, select the playbook that you want to schedule.
- In the Schedule Frequency field, add a valid cron expression.
Cron expression is a string consisting of six or seven subexpressions (fields) that describe individual details of the schedule.
In the Cron Expression section, you can click the Every X minute, Hourly, Daily, Weekly, Monthly, or Yearly links in theByrow to add a schedule.
For example, to schedule a report to run daily at 9:00 am in the morning, click the Daily link and in the Minute box type0and in the Hour box, type9, as shown in the following image. A short description of the schedule also appears below the cron expression box, in our example, it appears asAt 9:00 AM, which means the report will run daily at 9 am.
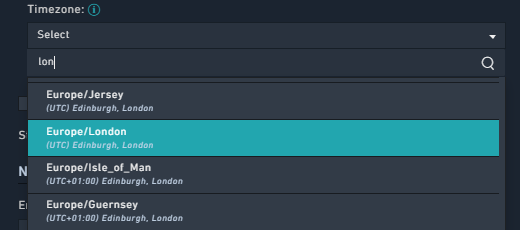
- From the Timezone drop-down list, search for and select the timezone in which you want to export the report associated with this schedule. By default, the timezone is set as UTC.
You can search for a timezone in the Search box as shown in the following image:
- If you want to ensure that you do not rerun the workflow, if previous scheduled instance of the schedule is yet running, then click Limit execution to one active instance at a time.
- (Optional) In the Start Time field, you can specify the date and time from when the schedule will start running.
- (Optional) In the End Time field, you can specify the date and time after which the schedule will not run, i.e., the date and time to stop the schedule.
Note: Once a schedule reaches the specified end time, then the schedule displays Yes in the Expired column on the schedules listing page. It is recommended that you should make the expired schedules "Inactive". - Click Save to save the schedule.
To run the schedule immediately, click the Run Schedule Now button.
- In the Name field, add the name of the schedule.
- Once you create a schedule, if you have not selected the Start Schedule checkbox, then the schedule remains in the Inactive state until the schedule starts at the date and time you have specified in the Start Time field. You can also manually start the schedule by clicking the Start Schedule icon (green play icon) in the
Actionscolumn.
To stop an Active schedule, click the Stop Schedule icon (red stop icon) in theActionscolumn.
Note: When you stop a schedule the value, i.e., datetime of the Last Run At field becomes blank.
To edit a schedule click the Edit icon in theActionscolumn, which will display theSchedule Detailsdialog in which you can edit the schedule properties.
To delete a schedule click the Delete icon in theActionscolumn, which will display theConfirmationdialog and once you click OK in it the schedule gets deleted.
If you want to delete multiple schedules, then select the schedules in the grid view and click Delete.
To run a schedule immediately (outside of its scheduled time), click the Trigger Schedule Now icon in theActionscolumn.
On the Schedules page, you will see a schedule named "Integration Action Log Purge" active on the Schedules page by default, which is scheduled to run every hour and purge action integration logs. When any interaction is performed using a FSR Agent, for example, invoking a direct connector action using an FSR agents, such requests are first stored in the connector_executeaction database table in the base FortiSOAR node with its state set as "In Progress". Once the response is received from the FSR agent then the state of this entry is updated to "Finished". The "Integration Action Log Purge" schedule clears these logs since they tend to grow after some time. Note that this action log is an event details store in the database and not a log file in the system. This schedule is associated with the "Purge Integration Logs" playbook that is part of the System Fixtures (Settings > System Configuration > System Fixtures > Schedule Management Playbooks).