


Deploying FortiVoice Cloud
Use this procedure to deploy a FortiVoice Cloud instance. This instance is your business telephone system in the cloud.
|
|
Risk of deployment failure After Registering your FortiVoice Cloud licenses, you must wait at least 30 minutes before deploying a FortiVoice Cloud instance. |
- Make sure to complete Adding a DID number.
- Complete the setup to receive an email notification about the FortiVoice deployment status:
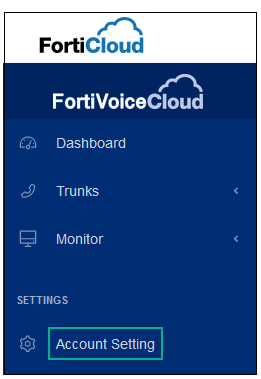
- Go to Settings > Account Setting.
- Enable FortiVoice instance notifications.
- Click Save changes.
- Go to Settings > Account Setting.
- If you want to import extensions using this procedure, prepare an extension (CSV) file that has three columns (name, number, and email). Otherwise, you can import extensions later.
To deploy FortiVoice Cloud
- In FortiVoice Cloud, go to Dashboard.
- In the Deploy FortiVoice widget, go to Status and click Deploy.

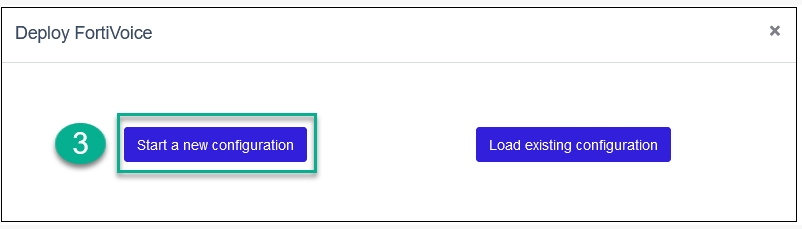
- Click Start a new configuration.
- To add a dialplan for outbound calling:
- Click Add dialplan patterns.
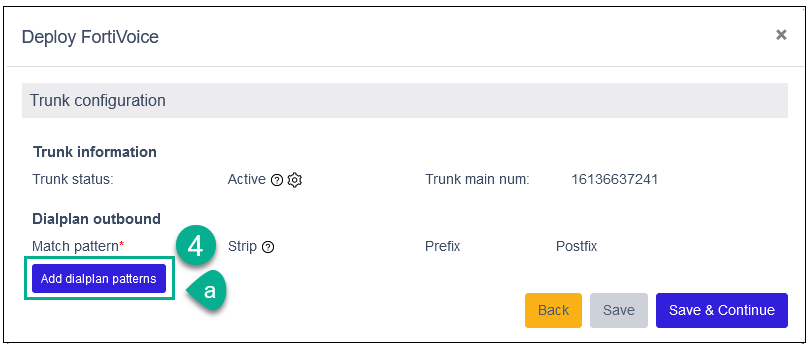
- Add a Match pattern. This number pattern is used to match a wide range of dialed numbers for external calls.
Pattern-matching syntax
Syntax
Description
X
Matches any single digit from 0 to 9.
Z
Matches any single digit from 1 to 9.
N
Matches any single digit from 2 to 9.
[ ]
(square brackets)
Matches any digits in the brackets.
For a range of numbers, use a dash.
Example: [15-7].
In this example, the pattern matches 1, 5, 6, and 7.
.
(period)
Acts as a wildcard that matches any digit and allows for any number of digits to be dialed.
Example of a pattern matching rule: XX.
In this example, the system looks for a dialed number match that has three or more digits.
!
(exclamation point)
Acts as a wildcard that matches any digit (including no digits) and allows for any number of digits to be dialed.
Example of a pattern matching rule: XX!
In this example, the system looks for a dialed number match that has two or more digits.
Pattern-matching examples
Syntax
Description
X.
Matches any dialed number.
NXXXXXX
Matches any seven-digit number, as long as the first digit is 2 or higher.
NXXNXXXXXX
Matches any dialed number that has 10 digits.
1NXXNXXXXXX
Matches any dialed number that matches this pattern: 1 + area code (between 200 and 999) + seven-digit number (first digit is 2 or higher).
011.
Matches any number that starts with 011 and has at least one more digit.
XX!
Matches any two or more digits.
- To manipulate the match pattern, configure the following fields, as applicable:
- Strip: Digits to remove from the match pattern. For example, if your Match Pattern is 9XXX and Strip is 1, you need to dial the full digit 9XXX, but the first digit, in this case 9, will be stripped by the system.
- Prefix: Digits to add at the start of the match pattern. For example, if your Match Pattern is 123XXXX and its area code is 555, you can enter 555 for the Prefix. When you dial a number using this pattern, you do not need to dial the area code 555.
- Postfix: Digits to add at the end of the match pattern. For example, if your Match Pattern is 9XXX and the numbers under this pattern have been upgraded to have the digit 5 as an additional digit, then you can enter 5 for the Postfix. When you dial a number using this pattern, you do not need to dial 5 as the last digit.
- To confirm, click Save & Continue.

- Click Add dialplan patterns.
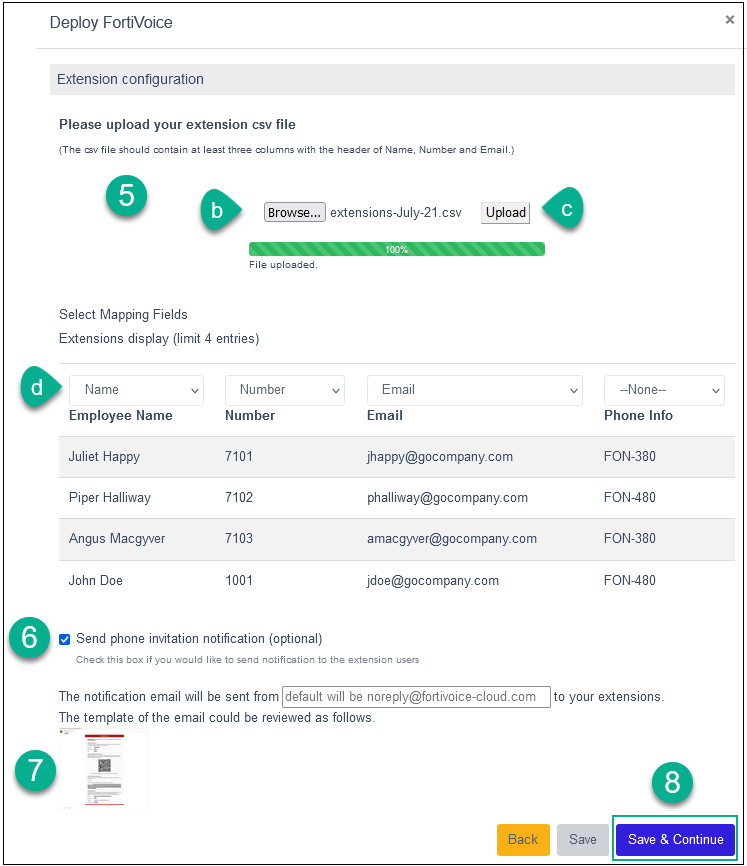
- To upload extensions, perform the following actions:
- Click Choose File.

- Browse and open a CSV file for your extensions.
- Click Upload.

Be patient for the CSV file to upload.
When the file upload is complete, you will see mapping fields.
- To complete the header mapping, select a header for each column.
- Click Choose File.
- To send a phone invitation notification to extension users:
- Select the check box. Extension users will receive a welcome email that contains details about registering their device (FortiFone mobile and desktop softclient, and desk phone) with FortiVoice Cloud and accessing the FortiVoice Cloud user portal.
- You can enter an email. If you do not enter an email address, FortiVoice Cloud uses the default email address (noreply@fortivoice-cloud.com) as the sender.
- To view the email template, click on the image. The template is read only.
- To confirm the extension configuration, click Save & Continue.
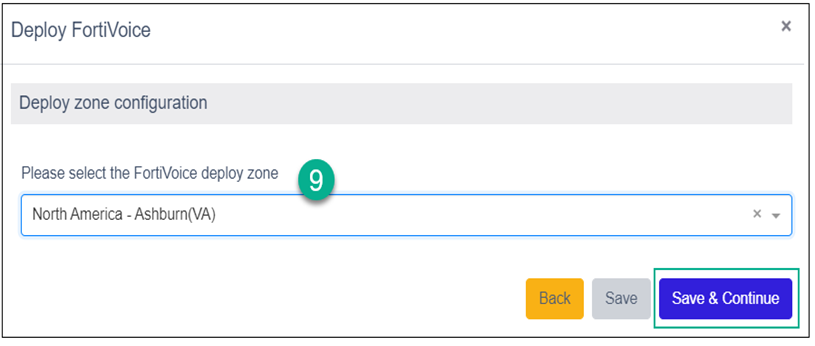
- Select the deploy zone that is closest to your location and click Save & Continue.
- Select the country and the time zone, and click Save & Continue.

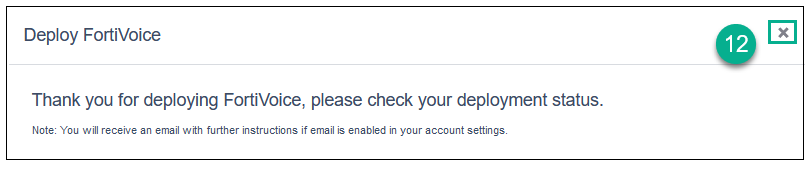
- To finish the FortiVoice Cloud deployment, click Deploy.

- FortiVoice Cloud confirms that the deployment task is complete. Close the dialog box.
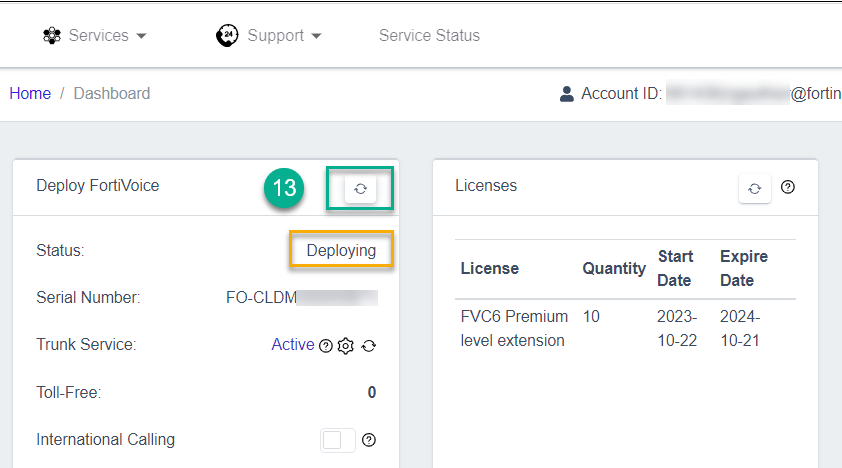
- In Dashboard, refresh the deployment status by clicking
 .
. The status shows Deploying.
- To follow the progress, click Message Center
 , click Pending Tasks, and .
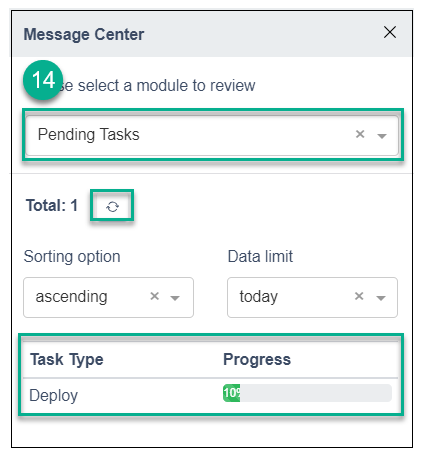
- If you have previously updated the Account setting (as explained in Before you begin), then check your email inbox for a message from Fortinet to confirm that your FortiVoice Cloud deployment is complete.
- In Dashboard, refresh the deployment status again by clicking .
When the deployment is complete, the status shows Deployed.

- For details about the following topics, see the FortiVoice Cloud Basic Administration Guide:
- Working with trunks
- Monitoring devices and calls
- Configuring FortiVoice Cloud settings
- To access advanced configuration tasks, go to Logging in to the FortiVoice admin portal.