


Launching FortiWeb-VM
FortiWeb-VM support Cloud-init on AWS. It enables you to deploy a FortiWeb-VM with preset configurations. To use this feature, you need to upload the command file to S3 and then configure an IAM role to access the file. If you prefer a clean FortiWeb-VM with no preset configurations, you can directly launch the VM.
Uploading command file to S3
- Create a .txt file containing the commands to be executed when FortiWeb-VM is launched.
For example, add the following commands in the file to configure FortiWeb to use timezone 03 and record logs with a severity ofnotificationor higher.
The commands in the file will be executed when FortiWeb-VM is launched. For more information about FortiWeb CLI commands, refer to FortiWeb CLI Reference. - Navigate to Amazon S3. Select an existing bucket to upload the command file or create a new bucket. Refer to AWS documentation Create a Bucket.
- Upload the command file to the bucket. Refer to AWS documentation Add an Object to a Bucket.
- If you want to launch the BYOL type of FortiWeb-VM, you can upload the license file to the S3 bucket. The license file will be applied when FortiWeb-VM is launched.
Configuring IAM role
Create an IAM role to grant FortiWeb-VM the list and read permissions to S3 in the Create policy step shown below. Refer to AWS documentation Creating a Role for an AWS Service (Console).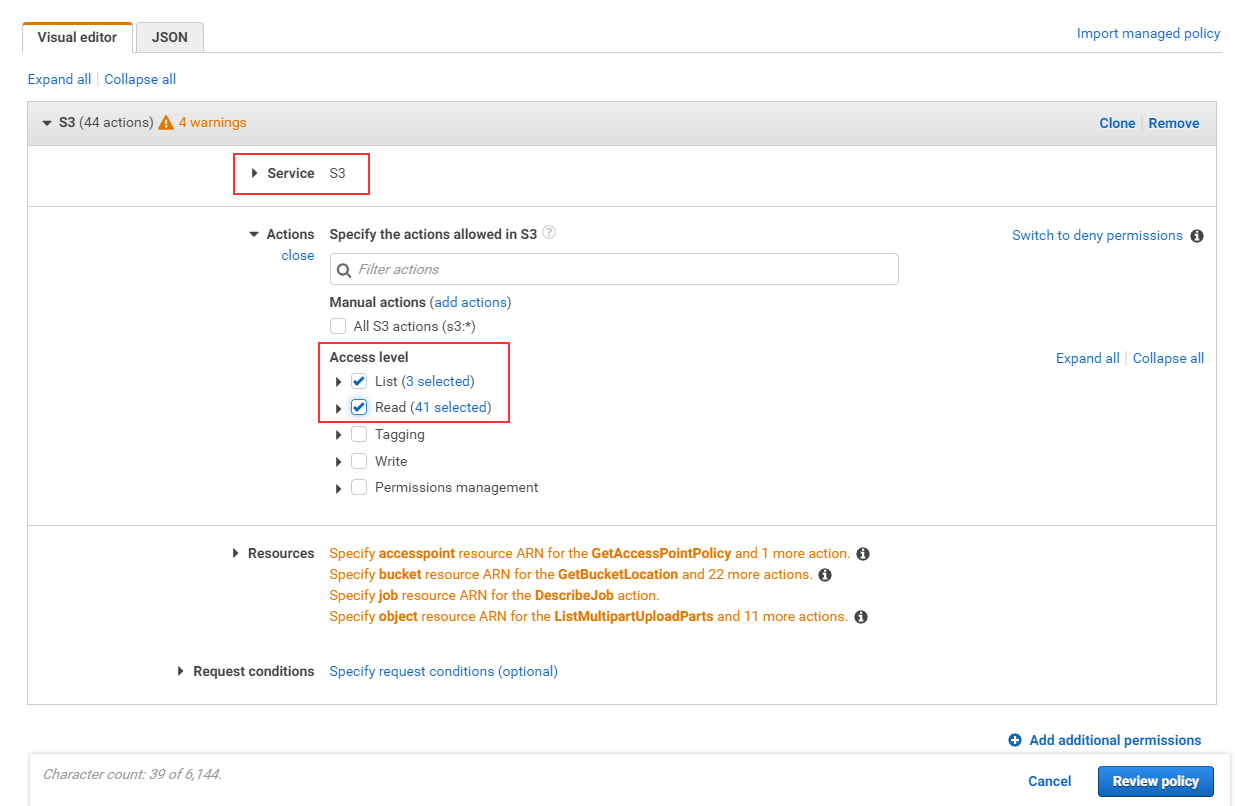
Launching FortiWeb-VM instance
- Change dashboards to the EC2 dashboard. Click Launch Instance on this screen.

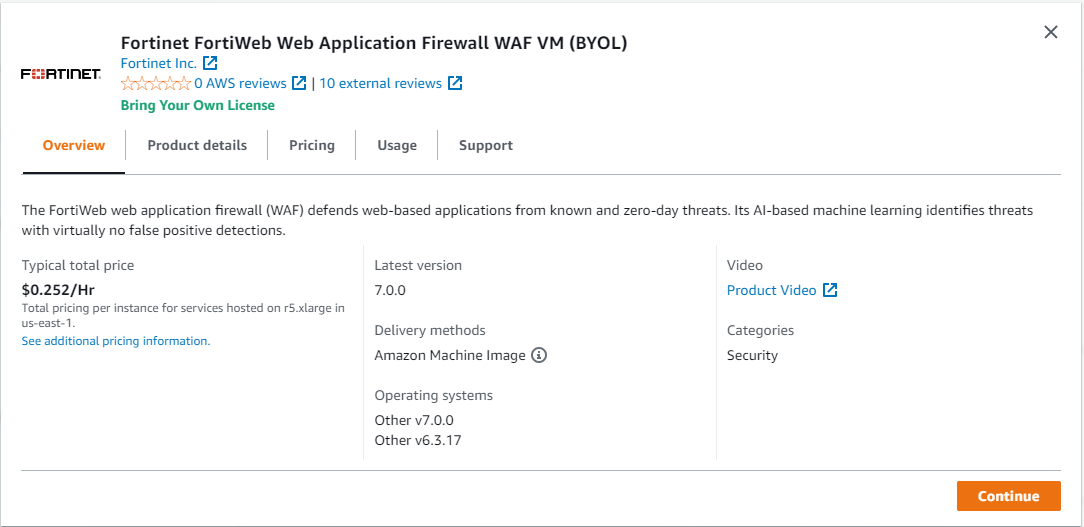
- Choose an AMI.

- For this guide we have chosen the Bring Your Own License version of the FortiWeb VM.
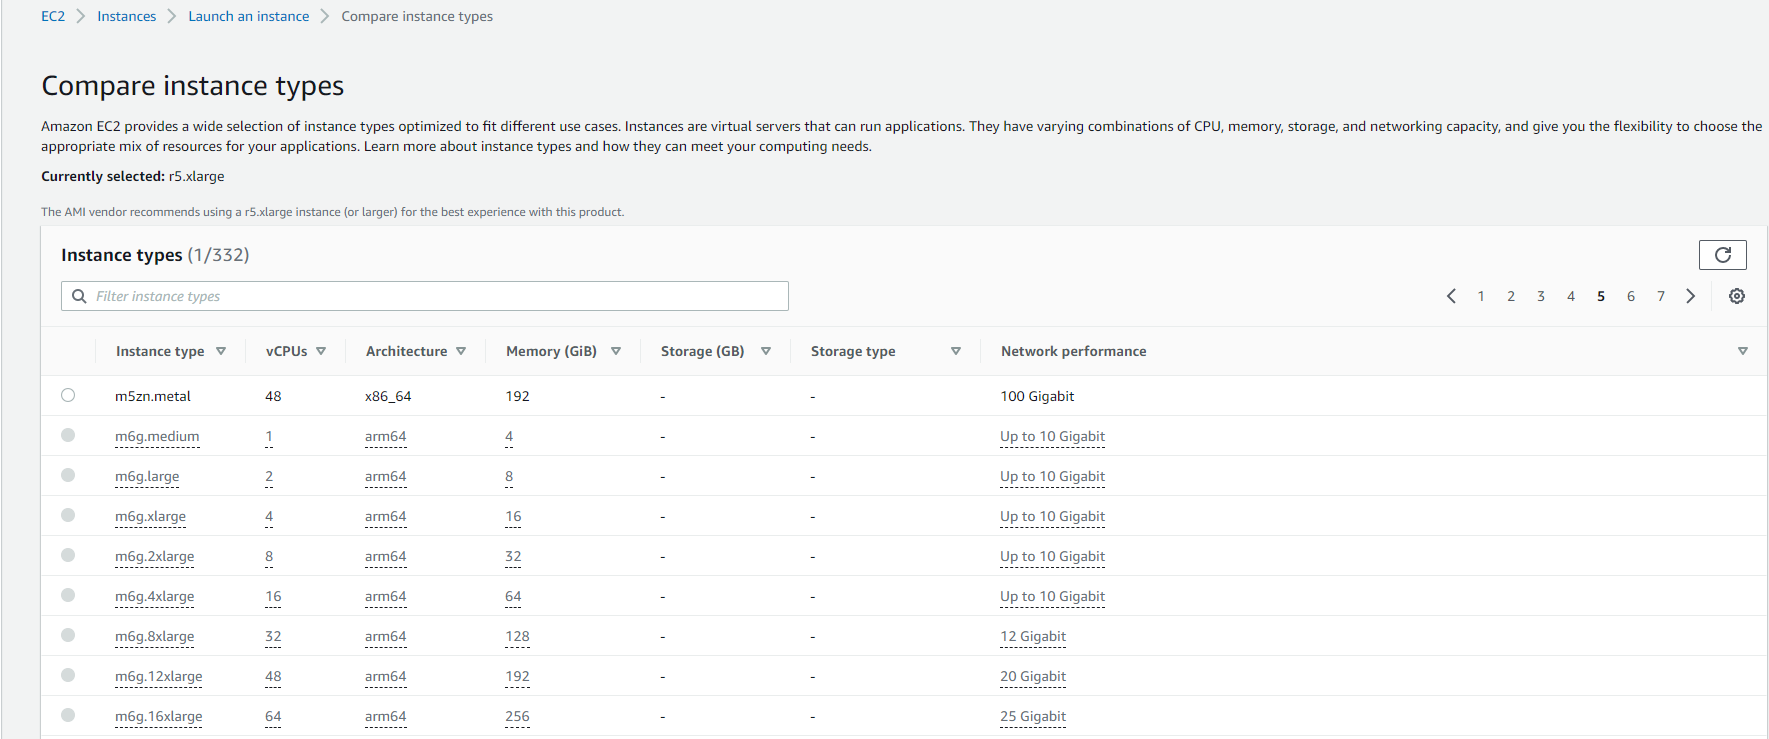
- Choose the instance type that matches the license. For this example we have a 2-vCPU license file. For details on instance types, see "Amazon EC2 Instance Types" in the Amazon EC2 Documentation: https://aws.amazon.com/ec2/instance-types.
- Configure instance details.
- For Network, select the VPC that you created in the previous step.
- For Subnet, select the subnet that you created in the previous step.
- Enable Auto-assign Public IP.
- If you want to use the cloud-init feature, select the IAM role you created in Configuring IAM role, and then paste the following code in Advanced Details > User data.
{"cloud-initd": "enable","bucket" : "the-bucket-containing-the-command-file",
"region" : "the-region-of-the-bucket","license" : "the-path-of-the-license-file-in-the-bucket",.)
"Flex_token" : "the-Flex-VM-token", (Flex-VM is supported since 7.2.0. You can either choose a license or Flex_token. For more information on Flex VM, see "Flex VM" in Licensing
"config" : "the-path-of-the-command-file-in-the-bucket",}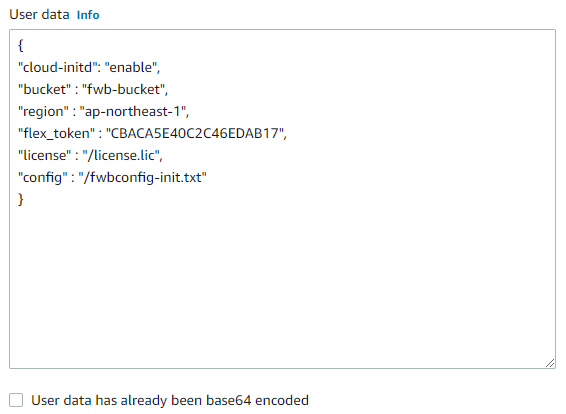
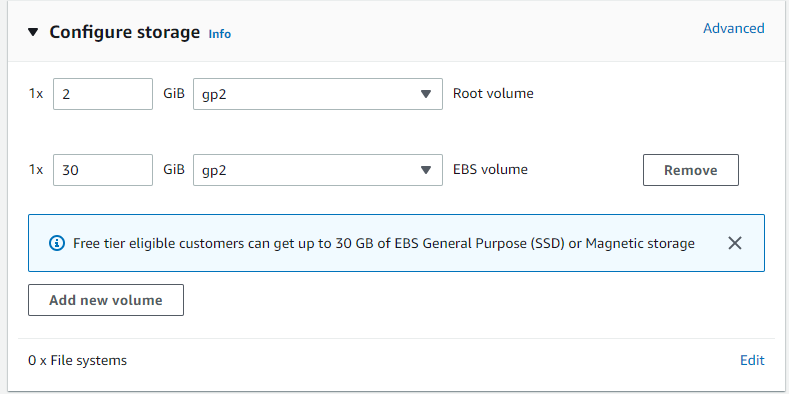
- Configure instance storage.
If you are configuring this for demonstration purposes, you can change the highlighted storage size to create a larger disk size for logging/reporting. It's recommended to use at least 8 GB RAM.
- Configure Instance Tags.
It is recommended to create at least a Name tag, so that you can search for this VM in the VM list using its name. Configure the Key and Value as shown below.

- Configure Security groups
It is important to allow some incoming ports. Allow TCP port 8443 for management from the GUI; You can also allow TCP port 22 for SSH login; Allow other ports where necessary as you need.

- Configure Key Pair.
In this example, we choose proceed without a key pair so we need to use the default FortiWeb user name and password to SSH into to the instance. You can also create a new key pair for easier access to the instance. For more information on key pair, see Amazon EC2 Key Pairs.

- Click Launch Instances to begin the provisioning.
|
|
When you deploy the FortiWeb-VM, network adapters are created automatically. If you want to delete network adapters, do it during the deployment process. It's not recommended to delete network adapters once the FortiWeb is deployed, otherwise unexpected error will occur. |