


Deploying FortiWeb HA resources
In this document we use FortiWeb BYOL image version for deploy demo.
- Log in to Google Cloud. Go to IAM&Admin > Service Accounts. Take note of the project name (highlighted in green rectangle in the screenshot below) and the Account name (highlighted in yellow rectangle). They will be used in later steps.

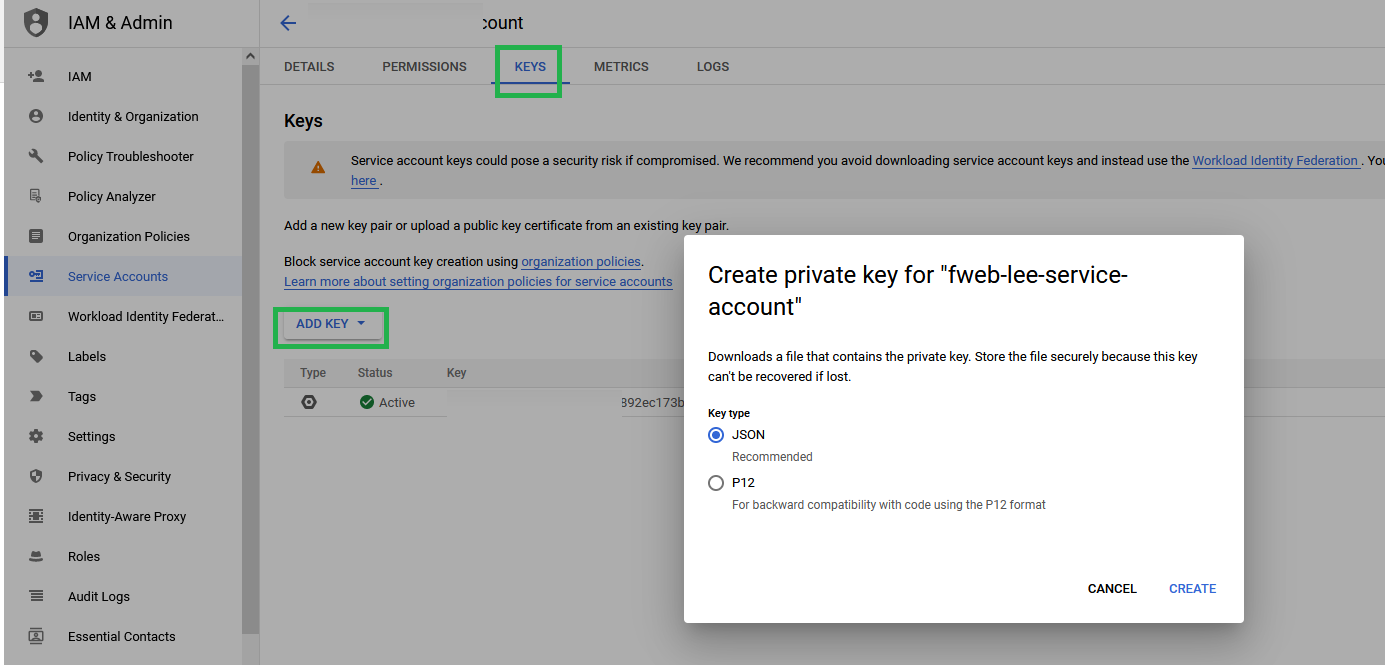
- Go to Keys tab on the Service Accounts page. Click Add Key, then click Create to create a private key. Save the JSON file. It will be used in later steps.
- Click the Cloud Shell icon at the top right corner, then the console pane will appear at the bottom of page. Click Upload to upload the FortiWeb-VM licenses to
~/demo/terraform/Active-Passive, and rename them as "license1.lic" and "license2.lic".
-
Modify vars.tf and fill out your desired info. The following three options need to be changed.
variable "project" {
type = string
default = ""
}
The value for default is the Project Name noted down in the first step.
variable "credentials_file_path" {
type = string
default = ""
}
The value for default is the path where the JSON file is uploaded to in step 3, and it should be an absolute path, such as /demo/credential.json.
variable "service_account" {
type = string
default = ""
}
The value for default is the Account Name noted down in the first step.
Note: You need to uncomment BYOL image link, as the default link is for non-license deploy.
You should have these files showing as below:

- Apply ‘terraform init’.

Please wait for 5 to 10 minutes for the deployment to complete, then you can check your devices via its MGMT IP address.