Repartitioning the hard disk
To upgrade from a version of FortiWeb previous to 5.5, you must first resize your FortiWeb operating system's disk.
In most cases, you'll have to install a special firmware image to repartition the disk. For details, see To use the special firmware image to repartition the operating system's disk .
For the following FortiWeb-VM tools, you cannot install the special firmware image to repartition the hard disk:
- Citrix XenServer
- Open-source Xen Project
- Microsoft Hyper-V
- KVM
For these platforms, to repartition the disk you must deploy a new virtual machine and restore the configuration and log data you backed up earlier. See To repartition the operating system's disk without the special firmware image.
|
|
Repartitioning affects the operating system’s disk (USB/flash disk), not the hard disk. Existing
data such as reports and event, traffic, and attack logs, which are on the hard disk, are not
affected. |
To use the special firmware image to repartition the operating system's disk
- Perform a complete backup of your FortiWeb configuration.
- Contact Fortinet Technical Support to obtain the special repartitioning firmware image: special build 5.4.1, build 6066.
- Follow one of the same procedures that you use to install or upgrade firmware using a standard image:
Although the repartitioning firmware image automatically saves your FortiWeb configuration, Fortinet recommends that you also manually back it up. For details, see the FortiWeb Administration Guide:
http://docs.fortinet.com/fortiweb/admin-guides
- In the Web UI, go to System > Status > Status. Locate the System Information widget. Beside Firmware Version, click [Update].
- In the Web UI, go to System > Maintenance > Backup & Restore. Select the Restore option in System Configuration.
- In the CLI, enter the
execute restore configcommand.
FortiWeb backs up the current configuration, resizes the hard drive partitions, and boots the system.
Continue with the instructions in Supported upgrade paths.
To repartition the operating system's disk without the special firmware image
- Perform a complete backup of your FortiWeb configuration. For details, see the FortiWeb Administration Guide:
- Use the instructions for your hypervisor platform to detach the log disk from the VM:
http://docs.fortinet.com/fortiweb/admin-guides
- To detach the log disk from a Citrix XenServer VM
- To detach the log disk from a Microsoft Hyper-V VM
- To detach the log disk from a KVM VM
- To attach the log disk to a Citrix XenServer VM
- To attach the log disk to a Microsoft Hyper-V VM
- To attach the log disk to a KVM VM
To detach the log disk from a Citrix XenServer VM
- In Citrix XenCenter, connect to the VM.
- In the settings for the VM, on the Storage tab, select Hard disk 2, and then click Properties.
- For Description, enter a new description, and then click OK.
- Select Hard disk 2 again, and then click Detach.
- Click Yes to confirm the detach task.
To detach the log disk from a Microsoft Hyper-V VM
- In the Hyper-V Manager, select the FortiWeb-VM in the list of machines, and then, under Actions, click Settings.
- Select Hard Drive (data.vhd), and then click Remove.
- Click Apply.
To detach the log disk from a KVM VM
- In Virtual Machine Manager, double-click the FortiWeb-VM in the list of machines.
- Click Show virtual hardware details (the "i" button).
- Click VirtIO Disk 2, and then click Remove.
To attach the log disk to a Citrix XenServer VM
- In Citrix XenCenter, connect to the VM.
- In the settings for the new, FortiWeb 5.5 or later VM, on the Storage tab, select Hard disk 2, and then click Delete.
- Click Yes to confirm the deletion.
- On the Storage tab, click Attach Disk.
- Navigate to the hard disk you detached from the old VM to attach it.
- Start your new virtual machine.
To attach the log disk to a Microsoft Hyper-V VM
- In the Hyper-V Manager, select the new, FortiWeb 5.5 or later virtual machine in the list of machines, and then, under Actions, click Settings.
- Select Hard Drive (log.vhd), and then click Browse.
- Browse to the hard drive you detached from the old virtual machine to select it.
- Click Apply.
- Start the new virtual machine.
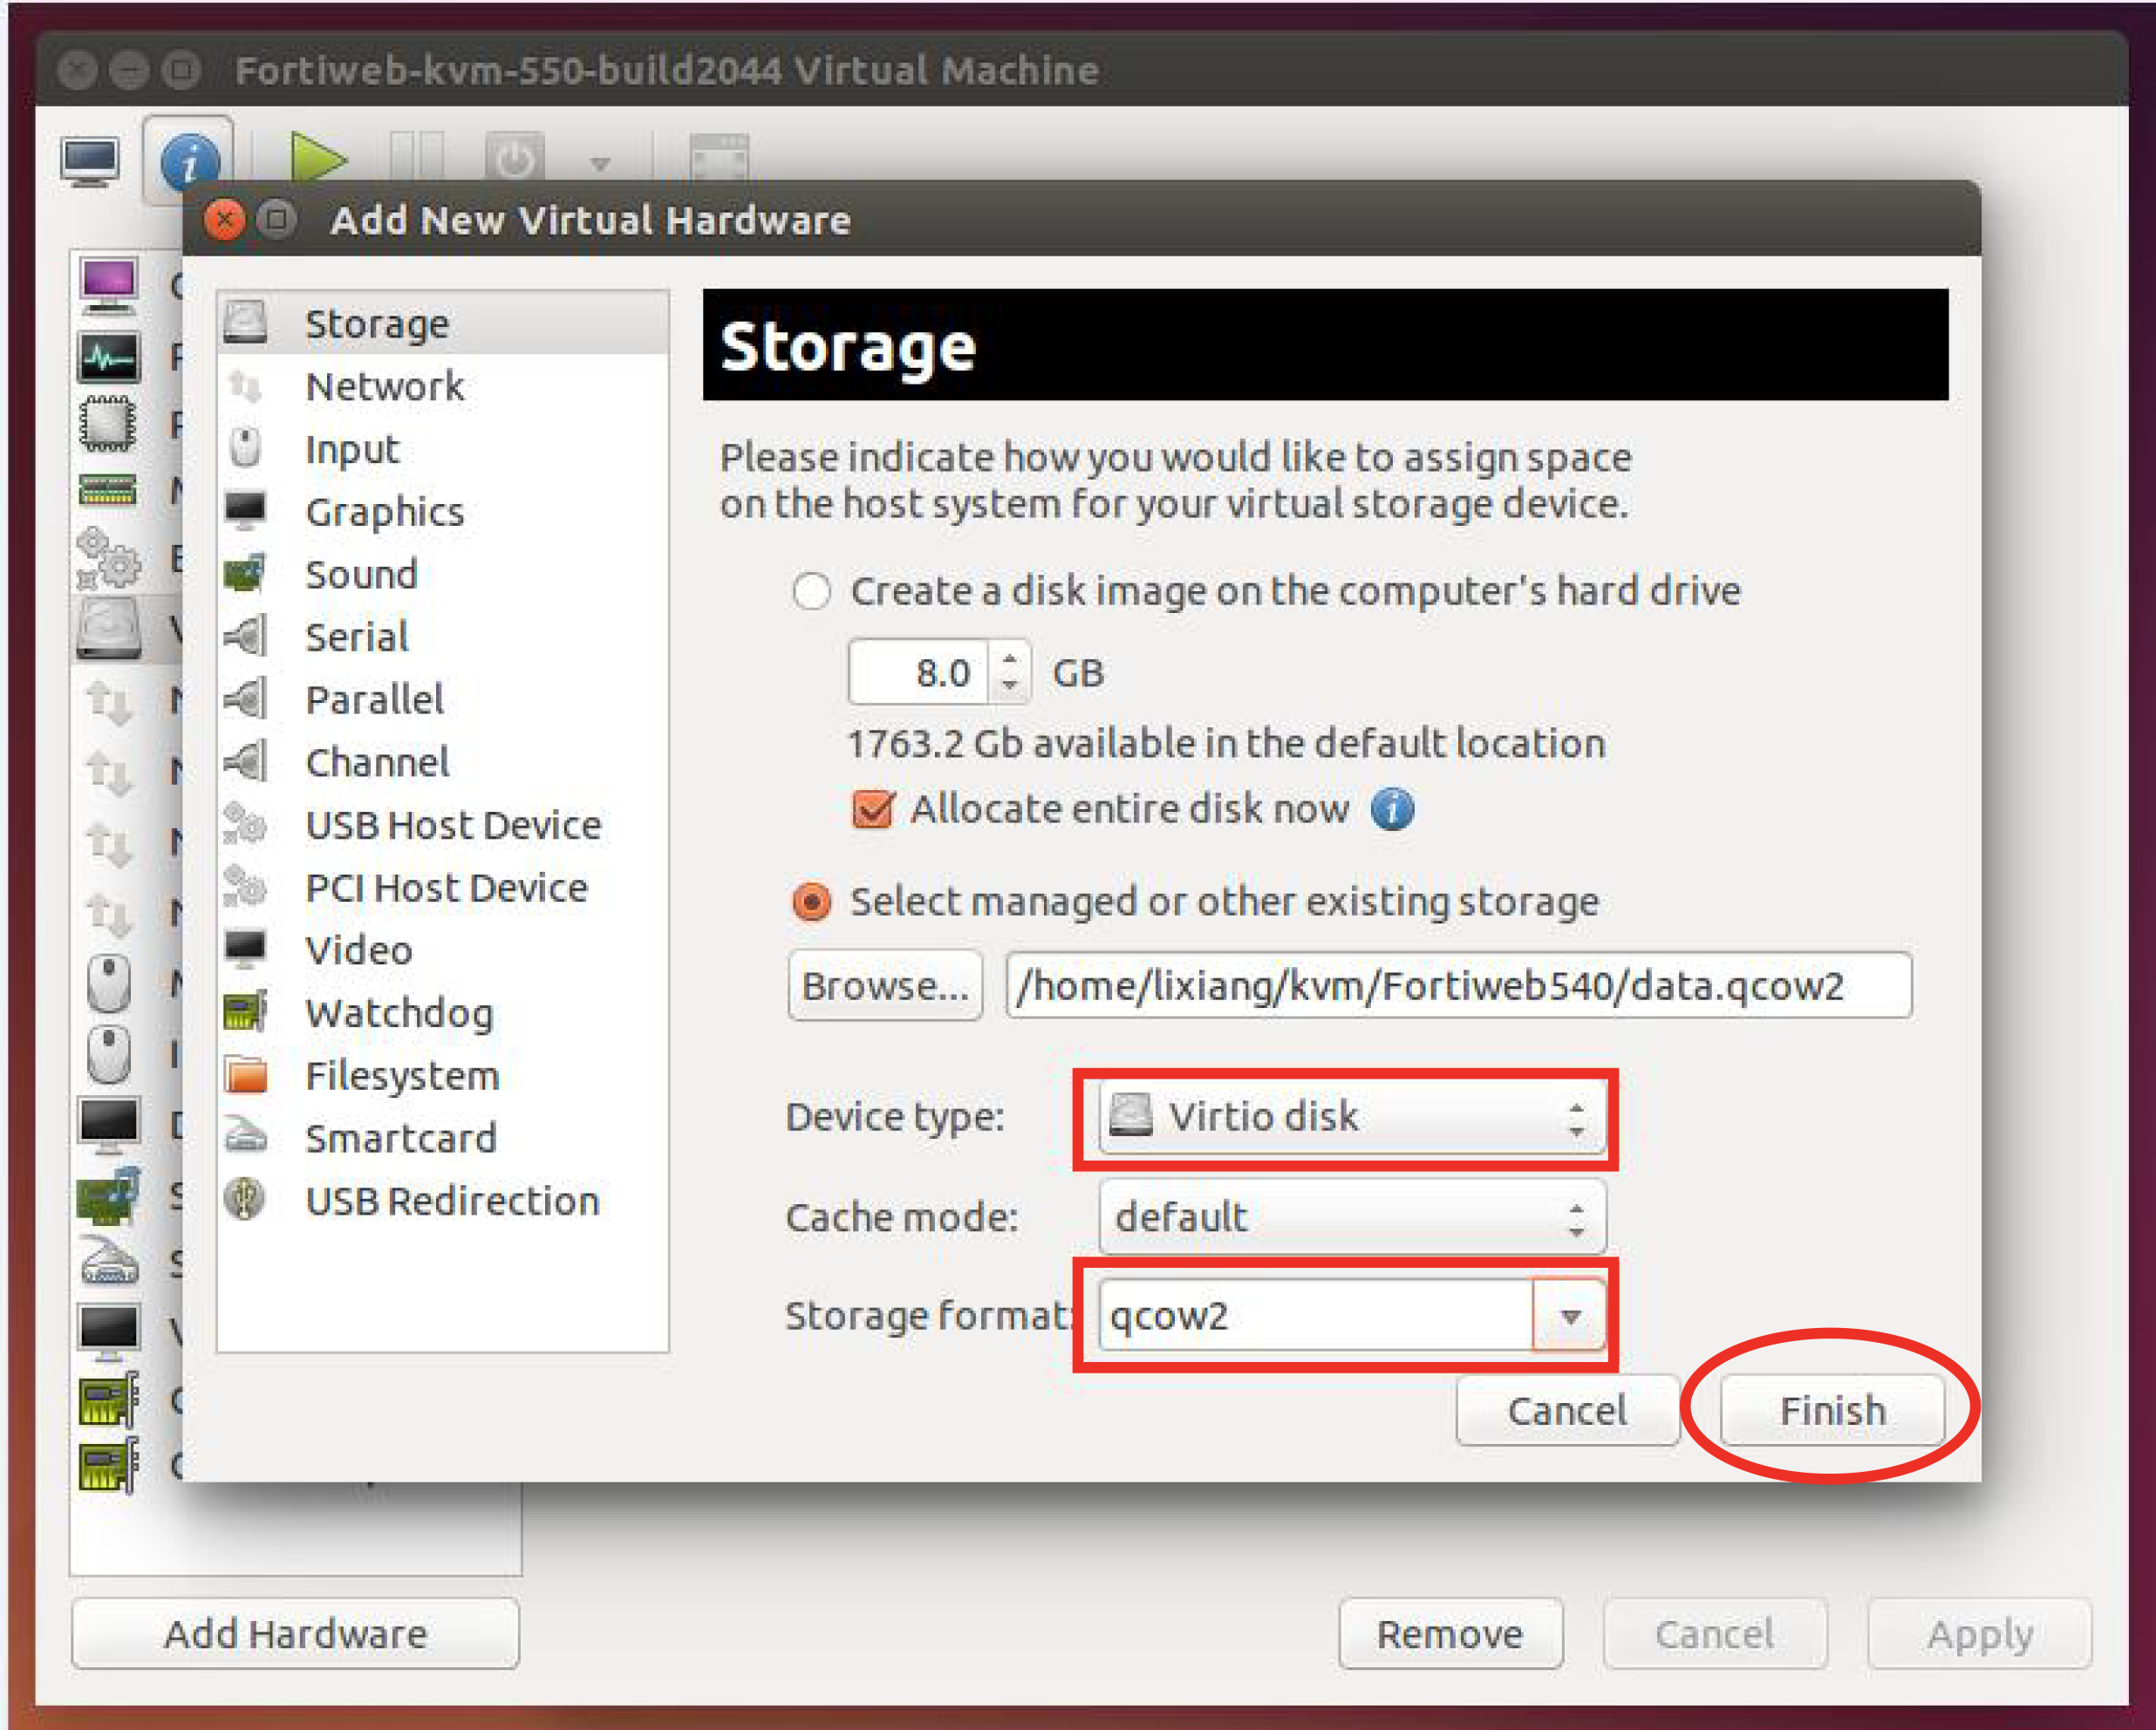
To attach the log disk to a KVM VM
For KVM deployments, you remove an existing virtual disk from the new VM before you attach the disk detached from the original VM.
- In Virtual Machine Manager, double-click the new, FortiWeb 5.5 or later VM in the list of machines.
- Click Show virtual hardware details (the "i" button).
- Click VirtIO Disk 2, and then click Remove.
- Click Add Hardware.
- Click Storage, select Select managed or other existing storage, and then click Browse.
- Click Browse Local.
- Navigate to the log disk file for the original machine to select it, and then click Open.
- For Device type, select Virtio disk, for Storage format, select qcow2, and then click Finish.
- Start the new virtual machine.