
Creating the Map Structure
The map structure is organized hierarchically, starting with the largest entity: Site > Building > Floor.
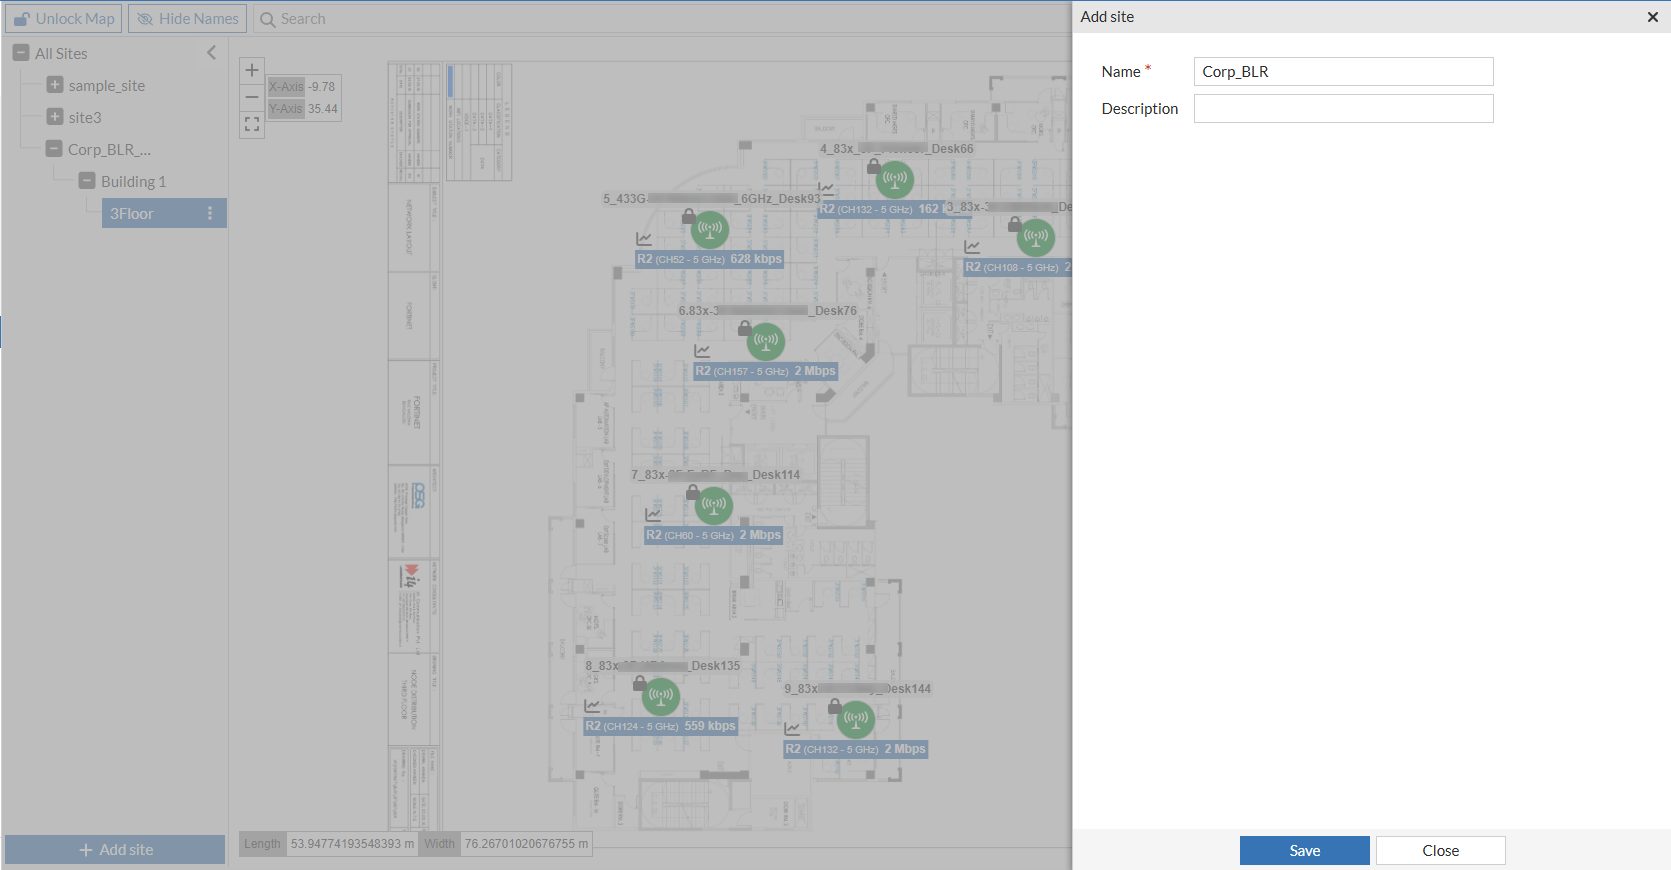
Adding a Site
A site is the top-level entity that contains multiple buildings.
-
Navigate to Wireless > Wi-Fi Maps.
-
Click Add site.
-
In the Add site pane, enter a Name and a Description.
-
Click Save. The new site will appear in the left pane under All Sites.
Note: To delete a site, click the Kebob menu (vertical ellipsis) next to the site and click Delete. Deleting a site will delete the entire hierarchy contained within that site.
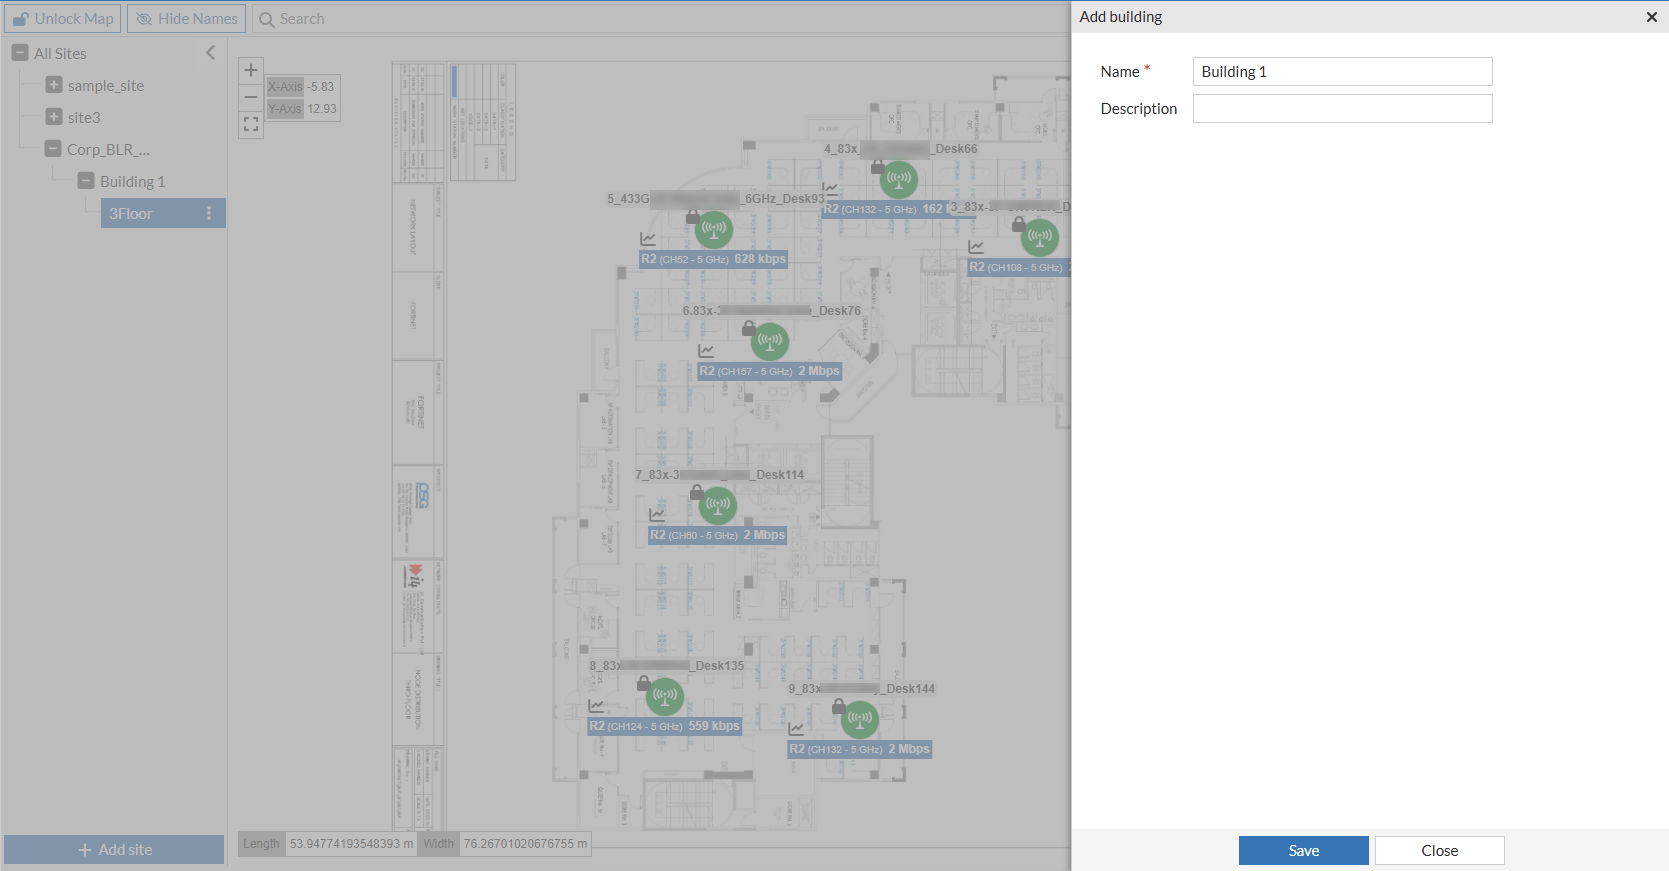
Adding a Building
A building is contained within a site and can have multiple floors.
-
On the left pane, select the site where you want to add a building.
-
Click the Kebob menu (vertical ellipsis) next to the site and click Add Building.
-
On the Add building pane, enter a Name and Description.
-
Click Save. The new building will appear under the selected site in the left pane.
Note: To delete a building, click the Kebob menu (vertical ellipsis) next to the site and click Delete. Deleting a building will delete the entire hierarchy contained within that building.
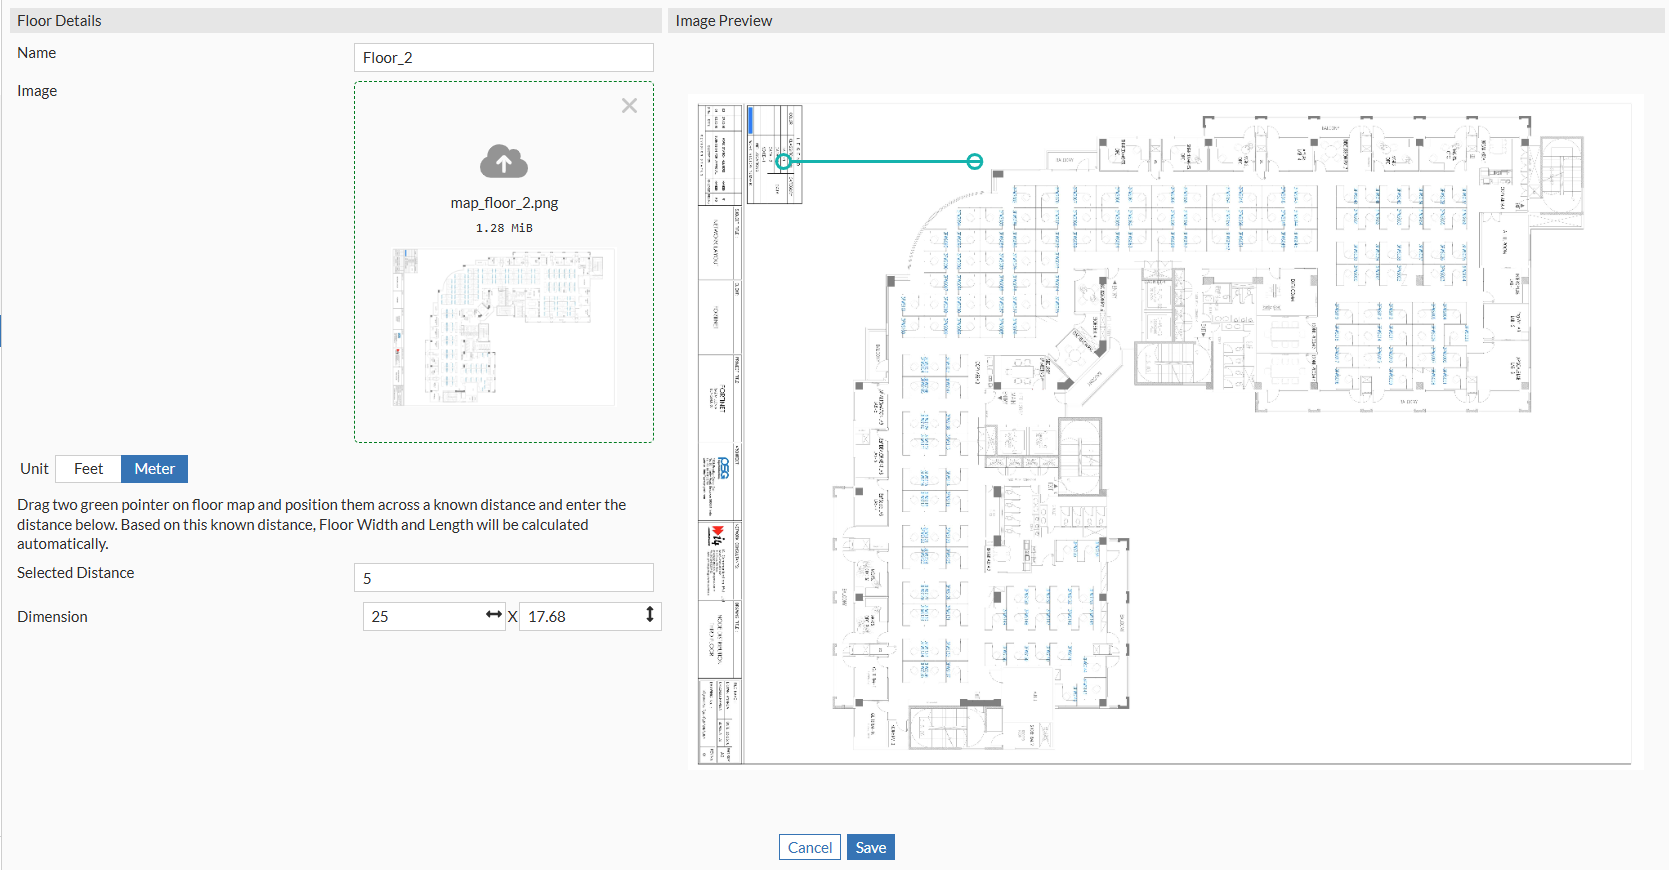
Adding a Floor
A floor is contained within a building and requires uploading a map image.
-
On the left pane, select the site and the building where you want to add a floor.
-
Click the Kebob menu (vertical ellipsis) next to the building and click Add Floor.
-
In the Floor Details section, enter a Name for the floor.
-
Upload the floor map file (must be in .jpg, .png, or .jpeg format).
-
Set the map scale:
-
In the Image Preview section, drag the green pointer to two points on the map with a known distance between them.

-
Under Floor Details, specify the Unit of measurement.
-
Enter the actual distance between the two selected points in the Selected Distance field. The system automatically computes and displays the correct map scale in the Dimension field.
-
Click Save. The new floor will appear under the selected site in the left pane.
-
Note: To delete a floor, click the Kebob menu (vertical ellipsis) next to the floor and click Delete. Deleting a floor will delete the entire hierarchy contained within that floor.