Importing the IDP certificate and metadata on the FortiAuthenticator
- Back on the FortiAuthenticator, go to Fortinet SSO Methods > SSO > SAML Authentication and import the IDP metadata and certificate downloaded earlier.
- Next, go to Fortinet SSO Methods > SSO > FortiGate Filtering and create a new FortiGate filter.
This will automatically fill the IDP fields (as shown in the example). Make sure to select OK to save these changes.

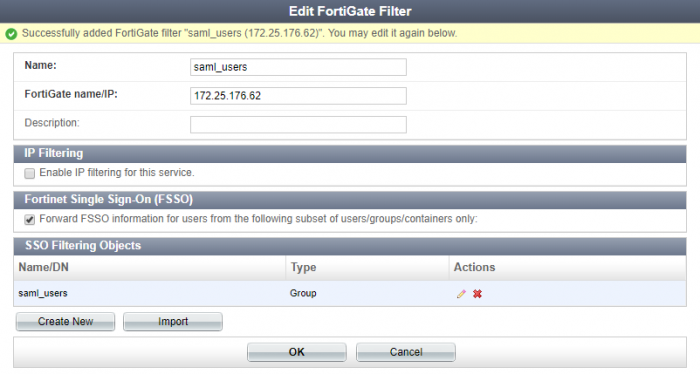
Enter a name and the FortiGate’s wan-interface IP address, and select OK.
Once created, enable Fortinet Single Sign-On (FSSO). Select Create New to create an SSO group filtering object (as shown already created in the example), and select OK to apply all changes.
Note that the name entered for the filter must be the same as the group name created for SAML users (saml_users). Failing to enter the exact same name will result in the SSO information not being pushed to the FortiGate.