
FortiView Top Source and Top Destination Firewall Objects monitors
The FortiView Source Firewall Objects and FortiView Destination Firewall Objects monitors leverage UUID to resolve firewall object address names for improved usability.
Requirements
To have a historical Firewall Objects-based view, address objects' UUIDs need to be logged.
To enable address object UUID logging in the CLI:
config system global
    set log-uuid-address enable
end
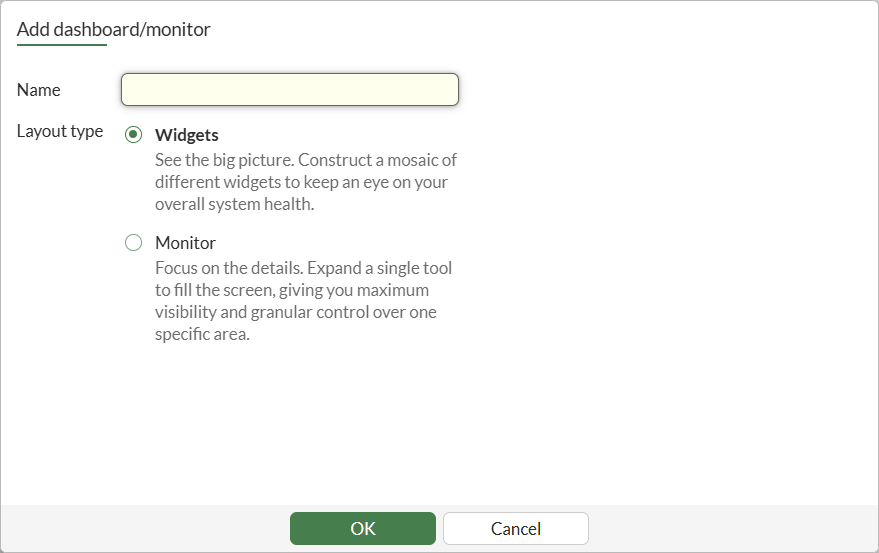
To add a firewall object monitor in the GUI:
-
Go to Dashboard > FortiView.
-
Click Add tab. The Add dashboard tab window opens.
-
Enter a name for the tab.
-
Select Monitor and click Choose monitor. The Add monitor pane is displayed.
-
In the Search field, type FortiView Destination Firewall Objects and click the Add button next to the dashboard name.
-
Beside FortiGate, click Specify and select the FortiGate(s) from the dropdown.
-
In the Data Source area, select Best Available Device or Specify. For information, see Using FortiView.
-
From the Time Period dropdown, select the time period. Select now for real-time information, or (1 hour, 24 hours, and 7 days) for historical information.
-
From the Sort By dropdown, select Bytes, Sessions, Bandwidth, or Packets.
-
Click OK.
-
Click OK. The monitor tab is added to the dashboard.
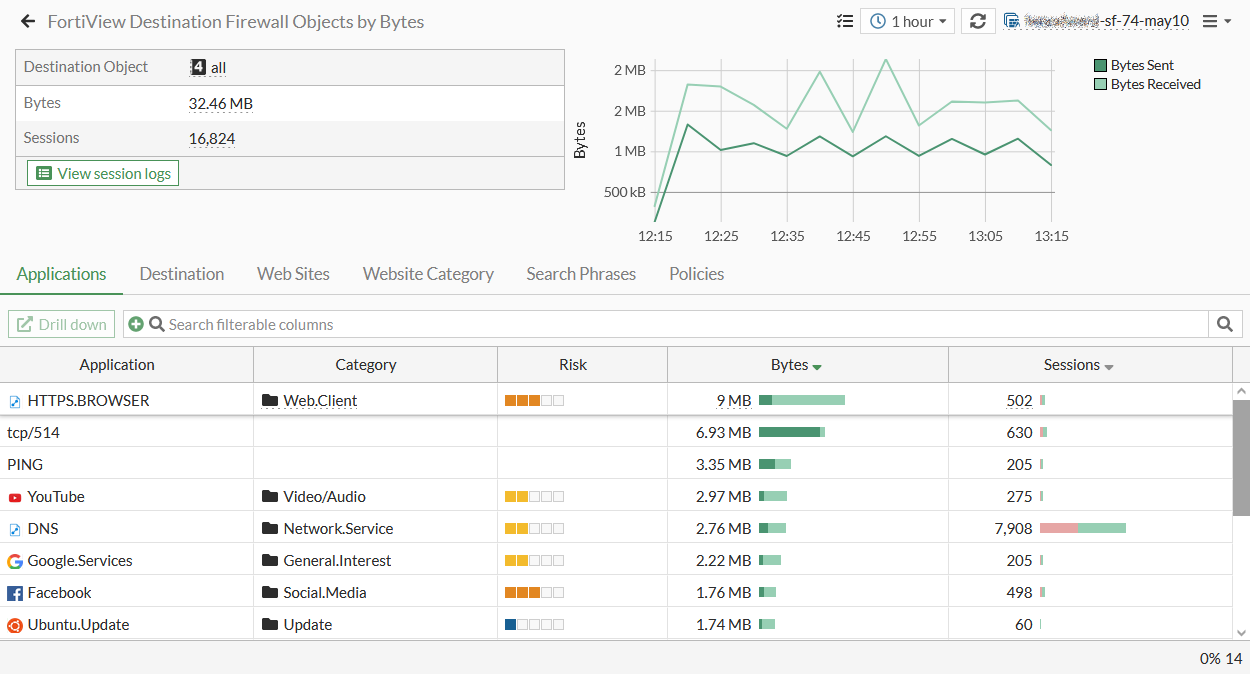
To drill down Firewall Objects:
-
Go to Dashboard > FortiView > FortiView Source Firewall Objects or FortiView Destination Firewall Objects to open the monitor.
-
Select any source or destination object and click Drill down.
-
Click the tabs to sort the sessions.
-
Select an entry, then click View session logs to view the session logs.