
Configuring FIC as Microsoft Entra external authentication service provider
In May 2024, Microsoft introduced the Entra ID external authentication method provider feature. An external authentication provider can integrate with Entra ID tenants as an external authentication method (EAM) provider, which can satisfy the second factor of MFA requirement.
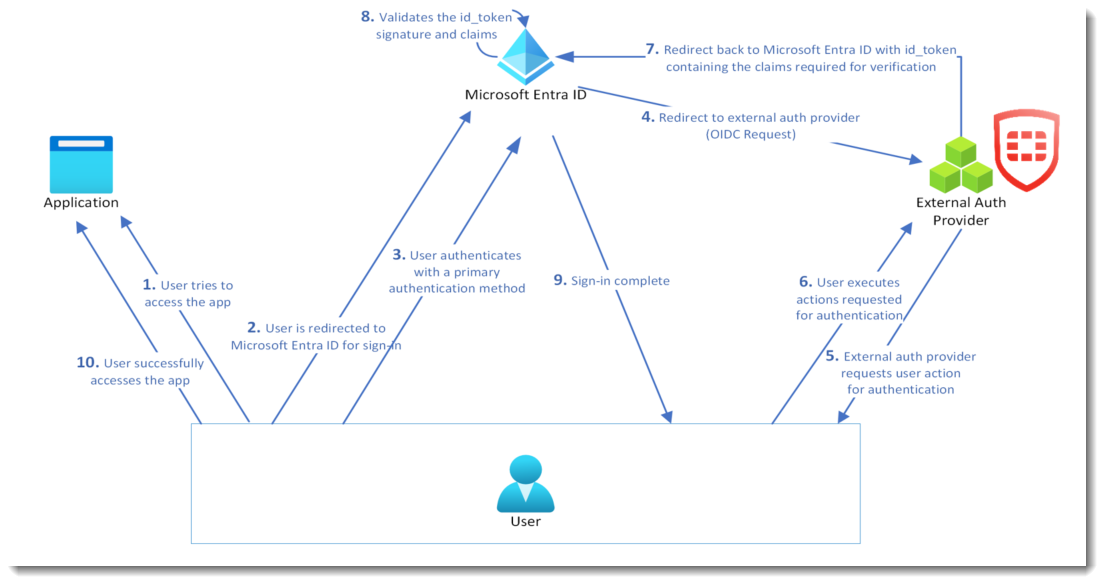
An EAM must be implemented on top of Open ID Connect (OIDC). This implementation requires at least three public-facing endpoints:
-
An OIDC discovery endpoint
-
A valid OIDC authentication endpoint
-
The public certificates of the EAM provider
The following diagram shows the network topology of the configuration:
Step 1: Adding FIC app in Entra admin center

-
Log into Microsoft Entra admin center.
-
Select Applications >App registrations.
-
Enter a unique name for the app.
-
For Redirect URI (optional), select None. (Note: The redirect URI will be generated on the FIC portal later.)
-
Click Register.

Upon successful registration, you will receive an Application (client) ID that Microsoft generated. Be sure to save the Application (client) ID as you will need it later in the configuration.
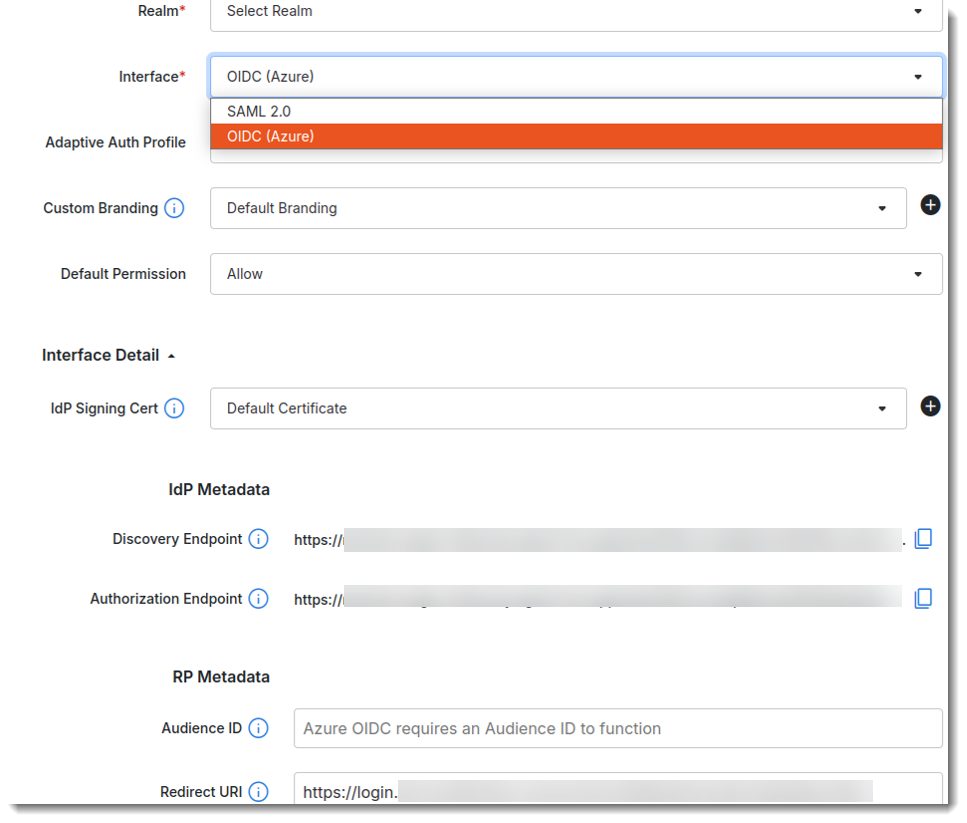
Step 2: Creating the Microsoft app on FIC portal
-
Select Applications > SSO.
-
Click Add SSO Application.
-
Name the Microsoft app.
-
For Realm, select the realm in which the end users of the Microsoft app reside.
-
For Audience ID, enter the Application (client) ID that you have saved in Microsoft Entra admin center.
-
For Redirect URI, enter the default Microsoft URI.
-
Make the other entries and/or selections on the page.
-
Click Next.
-
Follow the prompts onscreen to complete the configuration.
|
|
|
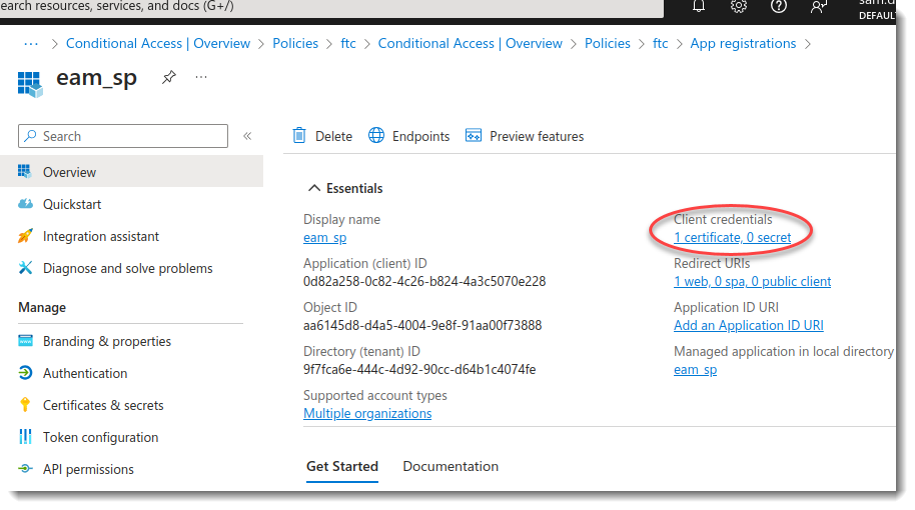
Step 3: Updating the FIC app in Entra admin center
-
In Microsoft Entra admin center, select Applications > App registrations > All Applications.
-
Locate the FIC app, click to open it, and make the desired updates to its Client credentials and Redirect URI.
-
To add client credentials, go to Certificates and upload the public key downloaded from the FIC portal.
-
To add Redirect URI, go to Redirect URI, click Add a platform, choose Web Applications, and enter the authorization endpoint generated from the FIC portal.
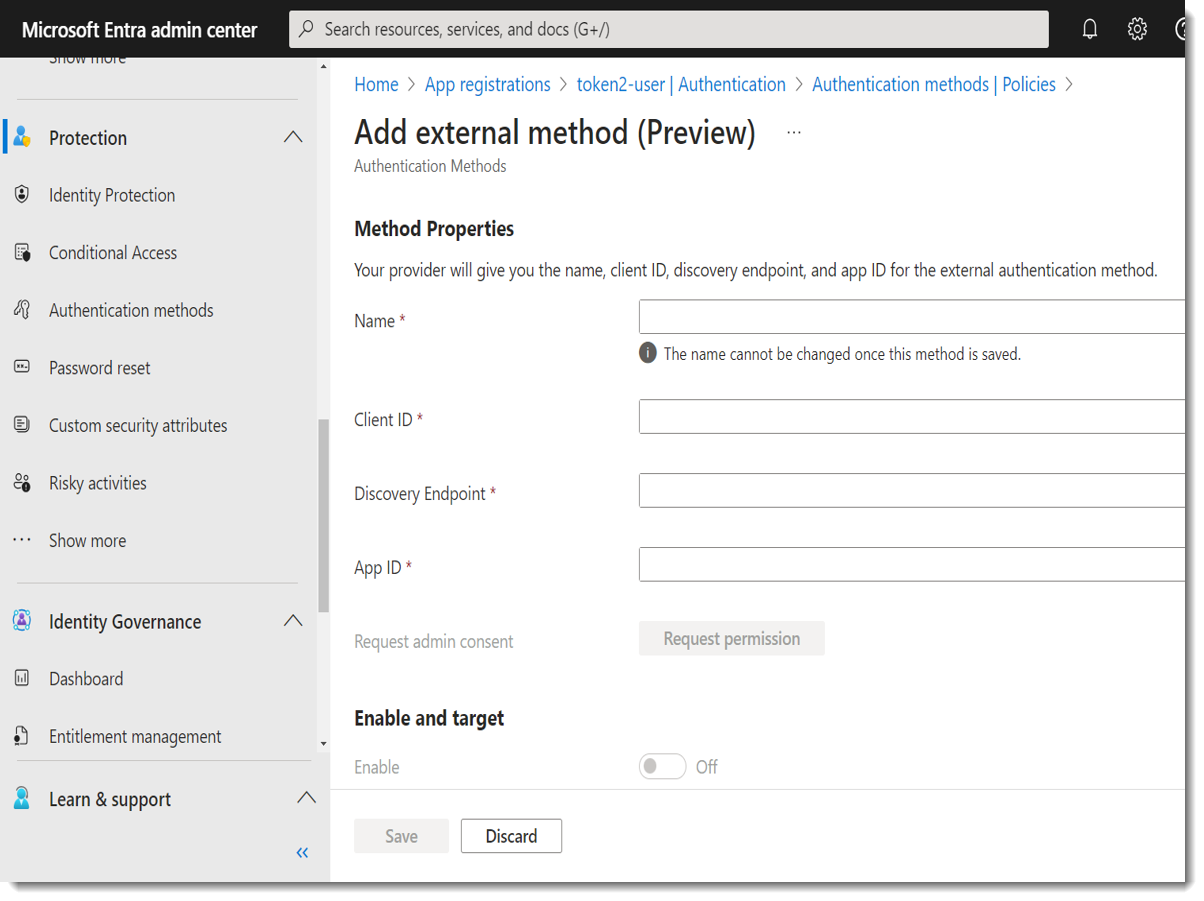
Step 4: Registering FIC as Entra MFA external method provider
-
In Microsoft Entra admin center, select Protection -> Authentication methods -> Policies -> Add external method(Preview).
-
For Client ID, enter the Application ID generated from the FIC portal.
-
For Discovery Endpoint, enter the discovery endpoint generated from the FIC portal.
-
For App ID, enter the Application (client) ID generated from Microsoft.
-
Upon securing the permission, enable Enable and target.
|
|
|
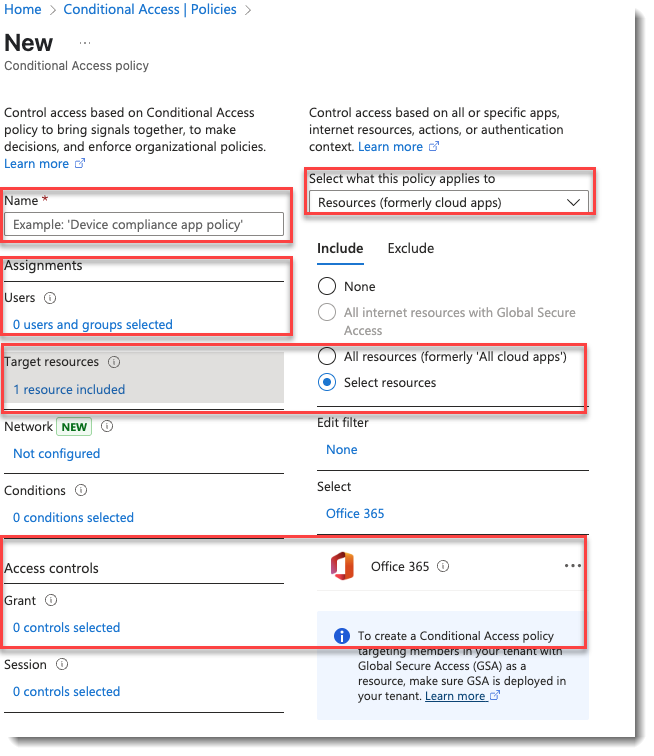
Step 5: Setting Conditional Access policy to assign users to EMA
-
Select Protection -> Conditional Access -> Policies.
-
Create a new policy, and assign users or groups to it. For Target resources, select All resources (formerly 'All cloud apps') or Selected resources. (Note: If you choose Selected resources, you must select one, for example, Office 365.)
-
For Access Controls, select Grant access > Require multifactor authentication.
-
Set Enable policy to On.
|
|
Make sure to create a new user in FIC with the same username as the preferred username for the target user in Microsoft Entra admin center for identification. |