


Step 3: Upload VHD Image
Use one of the below options.
Option 1: Microsoft Storage Explorer
-
Using Microsoft Storage Explorer, upload the new fixed.vhd file directly to the resource group. Refer to Microsoft documentation for instructions.
https://docs.microsoft.com/en-us/azure/virtual-machines/disks-use-storage-explorer-managed-disks
Option 2: AzCopy tool
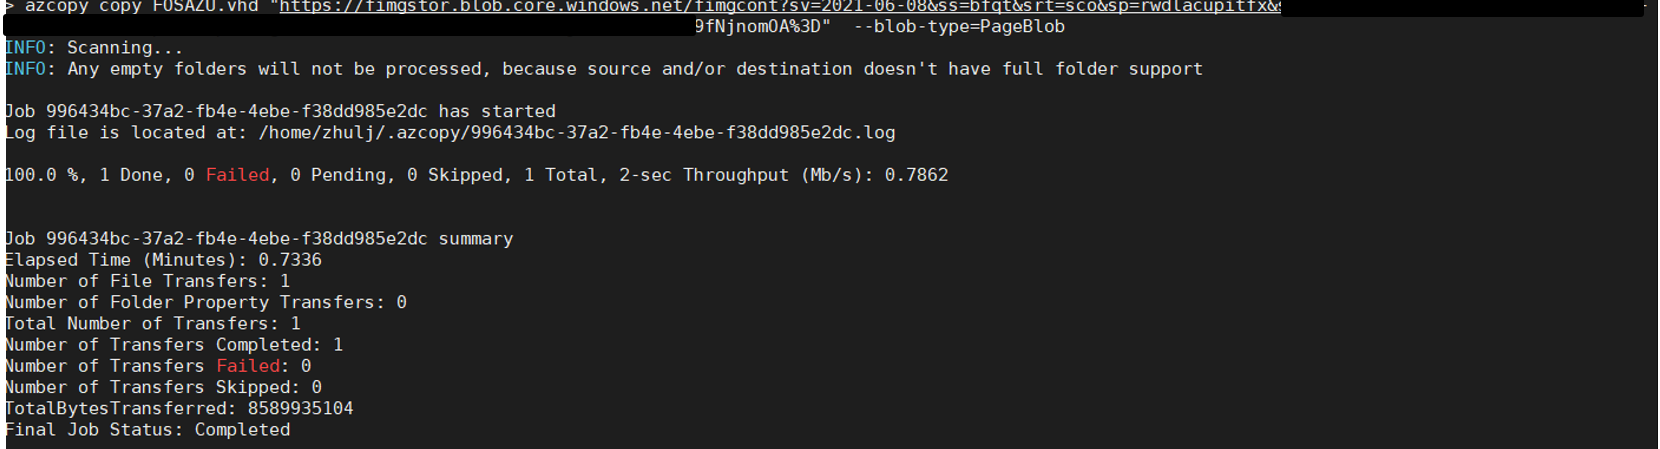
Upload vhd file via “azcopy” tool. Reference
https://docs.microsoft.com/en-us/azure/storage/common/storage-ref-azcopy-copy
-
In the local machine CLI, get the azcopy:
wget -O azcopy_v10.tar.gz https://aka.ms/downloadazcopy-v10-linux && \
tar -xf azcopy_v10.tar.gz --strip-components=1
-
In the Azure Portal, obtain the SAS string:
a. Select Storage accounts.
b. Select Shared access signature in the second column (shown in yellow below).
c. In Allowed resource types, select Object, then click Generate SAS and connection string.
d. Scroll down and copy the SAS token from the generated string.

-
In the local machine CLI, run the command
azcopy login
-
Run the Azcopy command:
azcopy cp "/path/to/ <filename>.vhd " \
"https://[account].blob.core.windows.net/[container]/[path/to/blob][SAS string]" \
Example:
The uploaded .vhd file will now appear in the containers under the storage account.