
Creating a non-privileged account
To create the secret:
- Go to Secrets > Secrets.
- In the Secrets List, select Create.
The Create New Secret in: dialog appears.
- Select the folder where you intend to add the secret.
- Select Create.
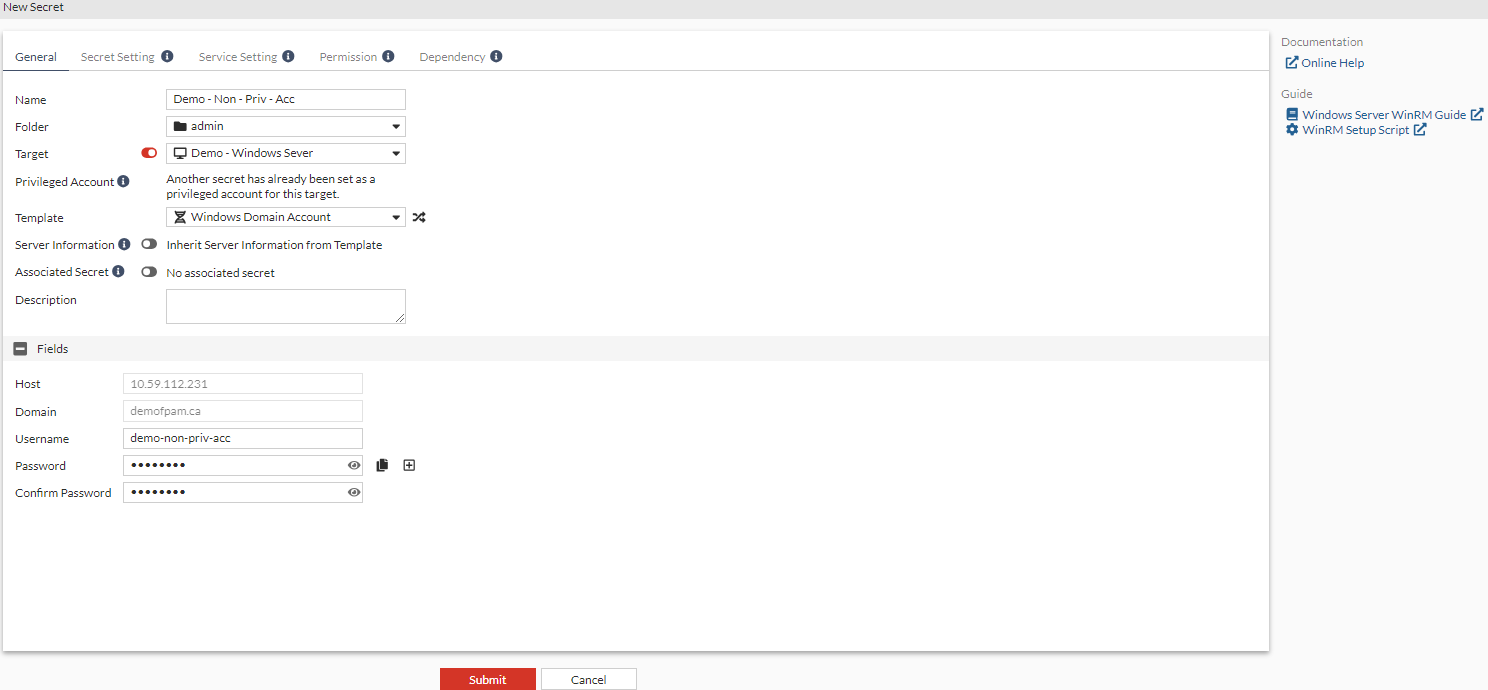
The New Secret window opens.
- Enter a name for the secret.
- From the Target dropdown, select the target that you created in Creating a target with server information as Windows.
- In Fields:
- Enter the user name.
- Enter the password.
- Reenter the password to confirm.
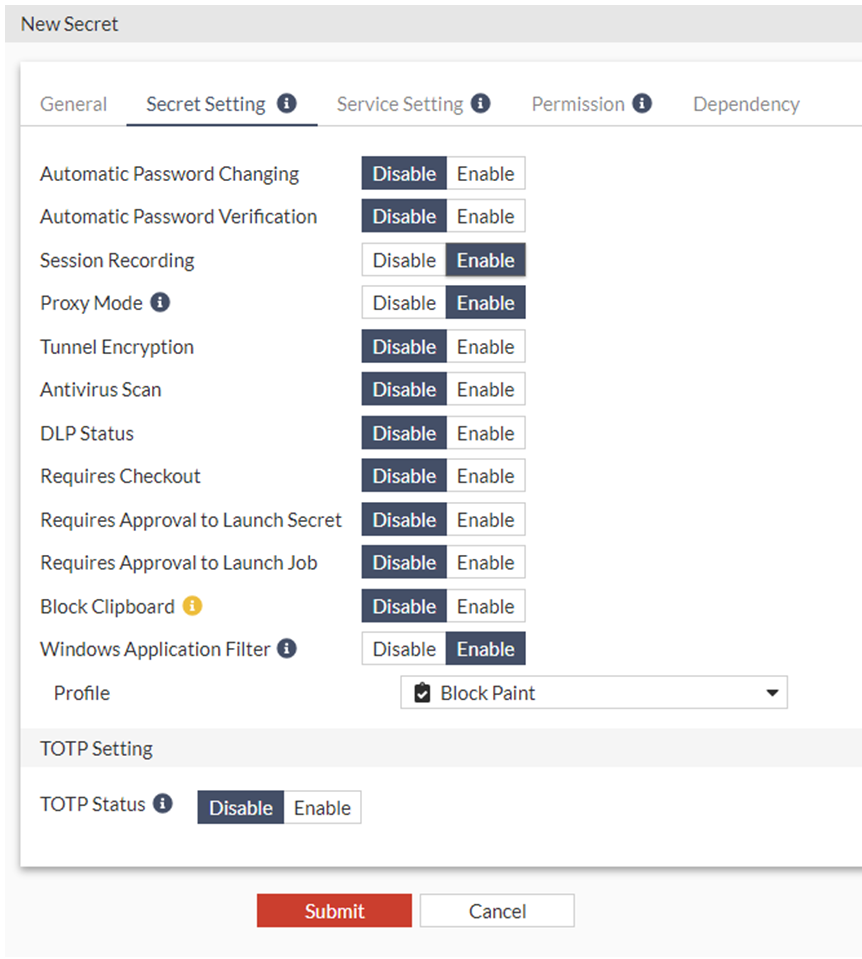
- Go to the Secret Setting tab.
- Enable Session Recording.
- Ensure that Proxy Mode is enabled.
- Enable Windows Application Filter and from the dropdown select the Windows application filter created in Creating a Windows application filter profile.
- Click Submit.
The above secret can be created in the CLI using the following commands CLI:
 config secret database
  edit 5
   set name "Demo - Non - Priv - Account"
   set target "Demo - Windows Server"
   set target-privilege-account enable
   set folder 1
   set template "Windows Domain Account"
   set recording enable
   set proxy enable
   set winappfilter enable
   set winappfilter-profile "Block Paint"
   set rdp-service-status up
   set ldaps-service-status up
   set samba-service-status up
   config credentials-history
  end
  config field
   edit 1
    set name "Username"
    set value "demo-non-priv-acc"
   next
   edit  2
    set name "Password"
    set value "ENC jdiQCYRCdK9Hcxb1oyHpwaWGgltZZjI2N3ZFQA=="
   next
  end
 next
end