
Appendix F - Formatting and loading FortiProxy firmware image using TFTP
You can download and install FortiProxy firmware from a local TFTP server via the BIOS, under CLI control. This is useful in cases such as when the OPEN DEVICE BOOT FAILED message appears on console.
|
|
Installing firmware from a local TFTP server under console control will reset the FortiProxy unit to factory default settings. Consider backing up the configuration before starting the formattingprocess. See Configuration backups and reset. |
Prerequisites
-
A null modem, or RJ-45 to DB9 console cable, supplied with the FortiProxy unit
-
An Ethernet RJ45 cable
-
A terminal client, such as a PC running HyperTerminal (Windows)
-
A TFTP server
To format and load FortiProxy firmware image using TFTP:
-
Download the FortiProxy firmware and verify the MD5 checksum:
-
Go to https://support.fortinet.com.
-
Click Login to log in to the Fortinet Support website.
-
From the Support > Downloads menu, select Firmware Download.
-
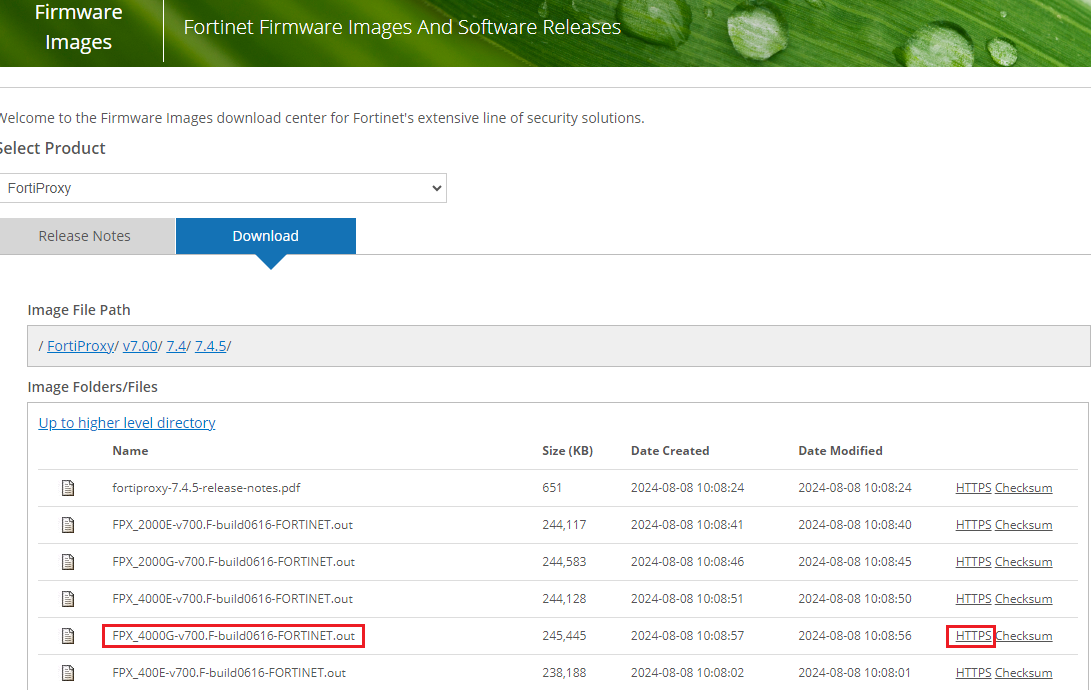
In the Select Product dropdown menu, select FortiProxy.
-
On the Download tab, navigate to the FortiProxy firmware file for your FortiProxy model or VM platform in the Image Folders/Files section.
-
Click HTTPS to download the desired firmware.
-
-
Download the TFTP server from here and install it on the computer. Make sure the bitness of the TFTP installer matches that of the computer, such as tftp64 for a 64-bit computer.
-
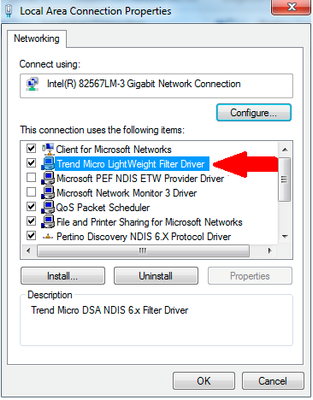
Disable Windows firewall or any other 3rd party packet filtering application (e.g. Trend Micro LightWeight Filter Driver).
-
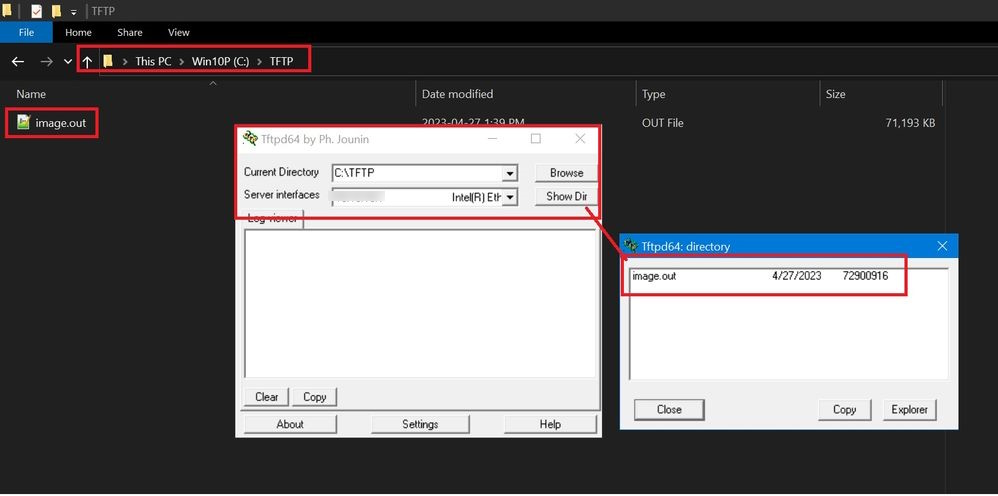
Create a directory and name it as something like
TFTP. -
Move the FortiProxy image to that directory.
-
Rename the image file to
image.out. -
Set the system's ethernet interface IP (can be from any subnet), subnet mask, and default gateway (local IP address that is set on FortiProxy). This example uses the following:
-
IP address: 172.18.20.86
-
Subnet mask: 255.255.255.0
-
Default gateway: 172.18.20.86
-
-
Connect the computer to the FortiProxy unit using the null modem cable. See the FortiProxy Quick Start Guide for detailed instructions.
-
Restart the FortiProxy.
-
When the console displays
Press any key to display configuration menu..., press any other key.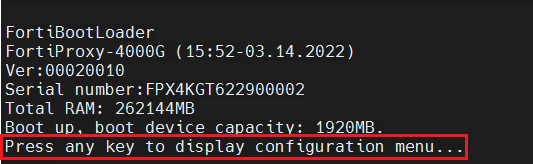
-
When a list of choices with individual letters of the alphabet appears, press
Fto format the device. The device will reboot after the formatting is complete.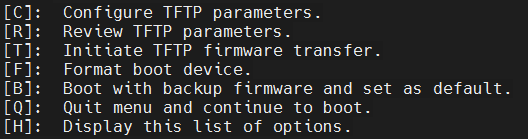
-
When a list of choices with letters appear, press
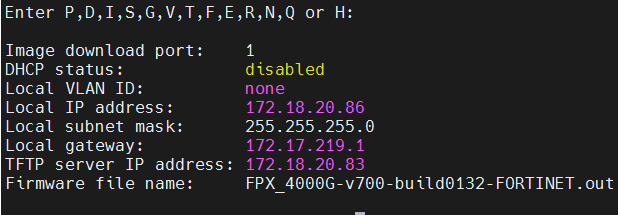
Rto review TFTP parameters.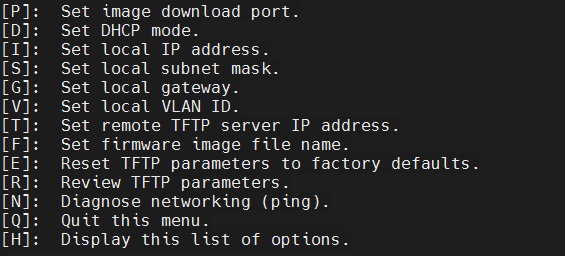
-
Once again, when a list of choices with letters appears, press
Cto configure TFTP parameters.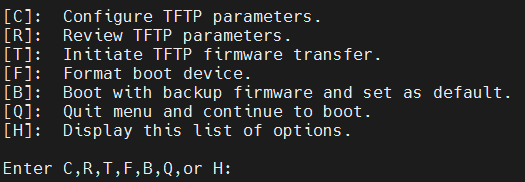
- Change the parameters to match the TFTP server configuration using the following provided options:
[P]: Set firmware download port.
[D]: Set DHCP mode.
[I]: Set local IP address.
[S]: Set local subnet mask.
[G]: Set local gateway.
[V]: Set local VLAN ID.
[T]: Set remote TFTP server IP address.
[F]: Set firmware file name.
[E]: Reset TFTP parameters to factory defaults.
[R]: Review TFTP parameters.
[N]: Diagnose networking(ping).
[Q]: Quit this menu.
[H]: Display this list of options.
The following are examples of configuring the local IP address, TFTP server IP address, and firmware file name:


-
When the configuration is complete, press
Tto initiate the TFTP firmware transfer.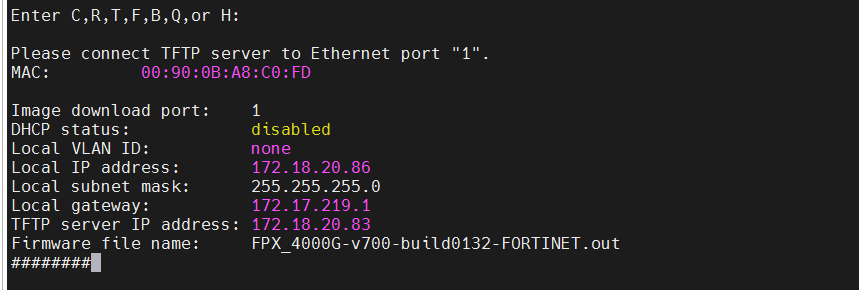
-
After the transfer is complete, follow the prompts to finish the formatting process and login using the default credentials.
