HA with Multiple Databases Deployment Guide
Configuring Microsoft SQL database clustering
Configuring Microsoft SQL database clustering
To configure Microsoft SQL database clustering:
- Configure DBSRV-1 as the primary node:
- On DBSRV-1, execute the SQL Server installer that you downloaded. The installer file downloads additional files, which you extract at a later point.
- Select New SQL Server failover cluster installation.
- An installation wizard launches. Proceed through the wizard:
- On the Instance Configuration page, enter the computer name for the cluster in the SQL Server Network Name field. This is tied to the Microsoft SQL virtual IP address (VIP), which you configure later.
- In the example, Default instance is selected. If desired, you can select Named instance. Click Next.
- On the Cluster Disk Selection page, select the desired virtual disk. Click Next.
- On the Cluster Network Configuration page, configure the database VIP. Click Next.
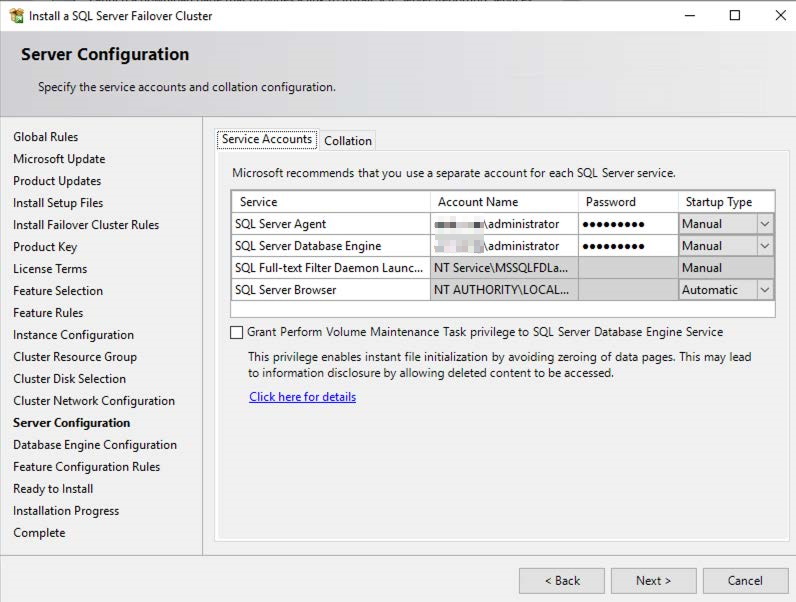
- On the Server Configuration page, configure the relevant account for services and processes to use. This example uses an Active Directory (AD) administrator account. Using a service account is recommended in a production environment. Click Next.
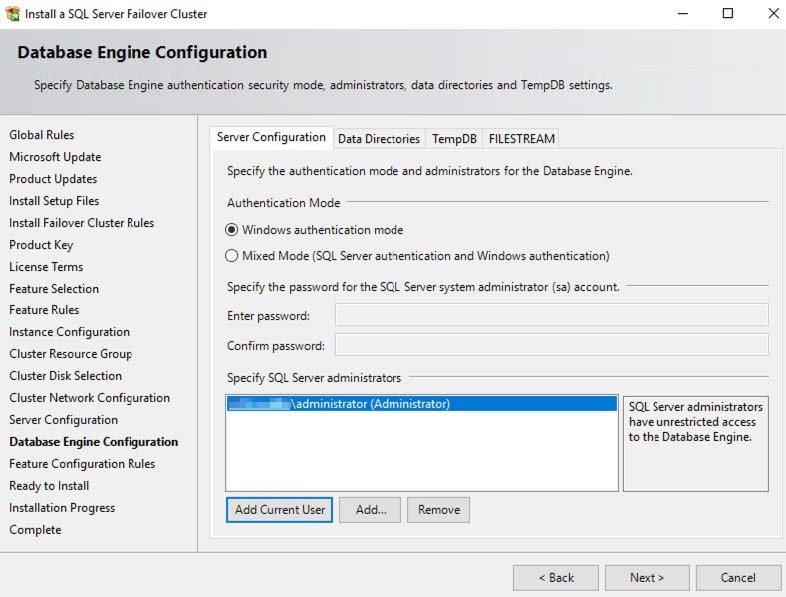
- On the Database Engine Configuration page, configure the account to use as the database engine administrator. This example uses AD authentication mode. Click Next.
- Continue through the wizard to install SQL Server.
- On the AD server, you can view that a computer account is created and that it is tied to the database VIP.
- On DBSRV-2, execute the SQL Server installer that you downloaded.
- Select Add node to a SQL Server failover cluster.
- Verify the configuration:
- On any database server, in Failover Cluster Manager, go to Roles. Verify that DBSRV1 is the SQL server current primary node.
- Ensure that the database cluster status shows as running.
- If desired, bring down DBSRV-1 to ensure that the failover happens.

Configuring Microsoft SQL database clustering
To configure Microsoft SQL database clustering:
- Configure DBSRV-1 as the primary node:
- On DBSRV-1, execute the SQL Server installer that you downloaded. The installer file downloads additional files, which you extract at a later point.
- Select New SQL Server failover cluster installation.
- An installation wizard launches. Proceed through the wizard:
- On the Instance Configuration page, enter the computer name for the cluster in the SQL Server Network Name field. This is tied to the Microsoft SQL virtual IP address (VIP), which you configure later.
- In the example, Default instance is selected. If desired, you can select Named instance. Click Next.
- On the Cluster Disk Selection page, select the desired virtual disk. Click Next.
- On the Cluster Network Configuration page, configure the database VIP. Click Next.
- On the Server Configuration page, configure the relevant account for services and processes to use. This example uses an Active Directory (AD) administrator account. Using a service account is recommended in a production environment. Click Next.
- On the Database Engine Configuration page, configure the account to use as the database engine administrator. This example uses AD authentication mode. Click Next.
- Continue through the wizard to install SQL Server.
- On the AD server, you can view that a computer account is created and that it is tied to the database VIP.
- On DBSRV-2, execute the SQL Server installer that you downloaded.
- Select Add node to a SQL Server failover cluster.
- Verify the configuration:
- On any database server, in Failover Cluster Manager, go to Roles. Verify that DBSRV1 is the SQL server current primary node.
- Ensure that the database cluster status shows as running.
- If desired, bring down DBSRV-1 to ensure that the failover happens.


