HA with Multiple Databases Deployment Guide
Installing SQL and enabling always on HA
Installing SQL and enabling always on HA
To install SQL and enable always on HA:
- Configure an always on high availability group on DBSRV-1:
- On DBSRV-1, execute the SQL Server installer that you downloaded.
- Select New SQL Server stand-alone installation or add features to an existing installation.
- In the example, Default instance is selected. If desired, you can select Named instance. Click Next.
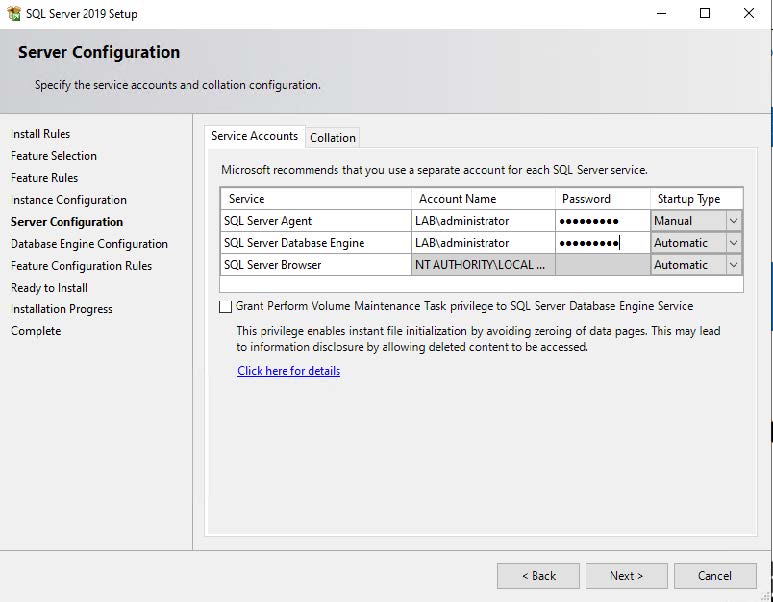
- On the Server Configuration page, configure the relevant account for services and processes to use. This example uses an Active Directory LAB\administrator account. Using a service account with appropriate permissions is recommended in a production environment. Click Next.
- On the Database Engine Configuration page, configure the account to use as the database engine administrator. This example uses mixed mode. Click Next.
- Continue through the wizard and complete SQL Server installation.
- Run the SQL Server Configuration Manager and double-click the SQL Server (MSSQLSERVER) service to open the Properties dialog.
- On the Always On Availability Groups tab, select Enable Always On Availability Groups. The Windows Server Failover Cluster field is autopopulated with the EMS cluster name. Click OK, and restart the SQL Server service.
- If using EMS 7.0.7 or an earlier version, on the FILESTREAM tab, do the following:
- Select Enable FILESTREAM for Transact-SQL access.
- Select Enable FILESTREAM for File I/O access.
- In the Windows share name field, enter MSSQLSERVER.
- Select Allow remote clients access to FILESTREAM data.
- On DBSRV-2, repeat steps 1-4 to complete the always on availability group configuration.
Installing SQL and enabling always on HA
To install SQL and enable always on HA:
- Configure an always on high availability group on DBSRV-1:
- On DBSRV-1, execute the SQL Server installer that you downloaded.
- Select New SQL Server stand-alone installation or add features to an existing installation.
- In the example, Default instance is selected. If desired, you can select Named instance. Click Next.
- On the Server Configuration page, configure the relevant account for services and processes to use. This example uses an Active Directory LAB\administrator account. Using a service account with appropriate permissions is recommended in a production environment. Click Next.
- On the Database Engine Configuration page, configure the account to use as the database engine administrator. This example uses mixed mode. Click Next.
- Continue through the wizard and complete SQL Server installation.
- Run the SQL Server Configuration Manager and double-click the SQL Server (MSSQLSERVER) service to open the Properties dialog.
- On the Always On Availability Groups tab, select Enable Always On Availability Groups. The Windows Server Failover Cluster field is autopopulated with the EMS cluster name. Click OK, and restart the SQL Server service.
- If using EMS 7.0.7 or an earlier version, on the FILESTREAM tab, do the following:
- Select Enable FILESTREAM for Transact-SQL access.
- Select Enable FILESTREAM for File I/O access.
- In the Windows share name field, enter MSSQLSERVER.
- Select Allow remote clients access to FILESTREAM data.
- On DBSRV-2, repeat steps 1-4 to complete the always on availability group configuration.


