


Setting up the FortiEDR Threat Hunting Repository
The FortiEDR Threat Hunting feature (described in Threat Hunting) requires the set up of the Threat Hunting repository, which includes the following steps:
- Creating a Virtual Machine
- Installing an Operating System ISO
- Installing a FortiEDR Repository software ISO
- Configuring the Threat Hunting Repository Monitoring console
- Backing up Threat Hunting Repository data
- Activating the Threat Hunting Repository Monitoring console
Prerequisites
- A license with access to the Threat Hunting feature.
- The FortiEDR Central Manager is installed.
- The system requirements listed in Appendix C – ON PREMISE DEPLOYMENTS must be met.
Creating a Virtual Machine
To create a virtual machine:
- Create a new virtual server. For example, by selecting File > New Virtual Machine…., then selecting Create a new virtual machine and clicking NEXT.

- Enter the desired virtual machine name. For example, FortiEDR-TH-Repository and click NEXT.
- Enter the virtual machine settings, as follows:
- In the Select storage step, select the storage where the virtual machine disk should be stored on and click NEXT.
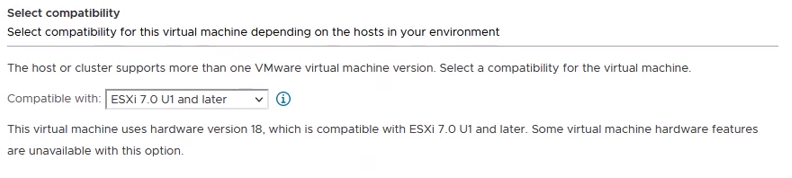
- In the Select Compatibility step, select ESXi 7.0 U1 and later and click NEXT.
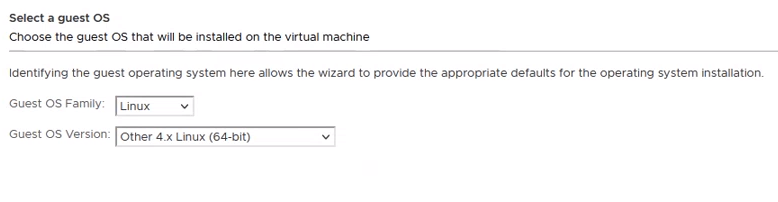
- At the Select a guest OS step:
- In the Guest OS family field, select Linux.
- In the Guest OS version field, select Other 4.x Linux (64-bit).
- Click Next. The following displays:
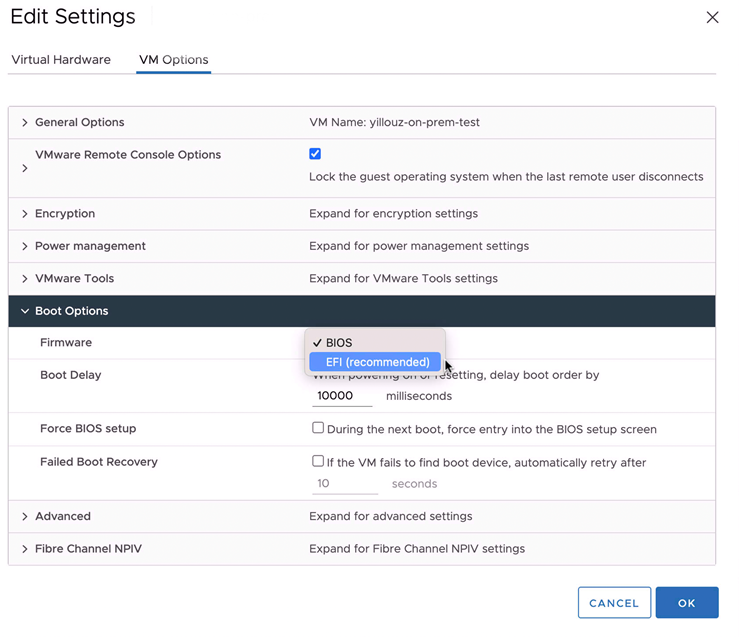
- In the Virtual Machine Boot Options, select BIOS under Firmware, and click OK.
- In the Customize hardware step, do the following:
- Enter the values for CPU, Memory, and New Hard disk fields as specified in Prerequisites. It is highly recommended to use SSD for hard disk.
- Add an OS disk in the New Hard disk:
- Enter the OS disk size in GB, as specified in Prerequisites.
- In the Disk Provisioning field, it is recommended to select Thick Provision.
- Add a DATA disk in the New Hard disk:
- Enter the DATA disk size in GB, as specified in Prerequisites.
- In the Disk Provisioning field, it is recommended to select Thick Provision.
- In case the previous disk hasn’t been installed as SSD, define another SSD DATA disk of a size as specified in Prerequisites.
- In the New Network field, choose VMXNET3.
- Select Finish to complete the creation of the virtual machine.
Installing an Operating System ISO
To install an operating system ISO:
- Select the newly created virtual machine and click Launch Remote Console.
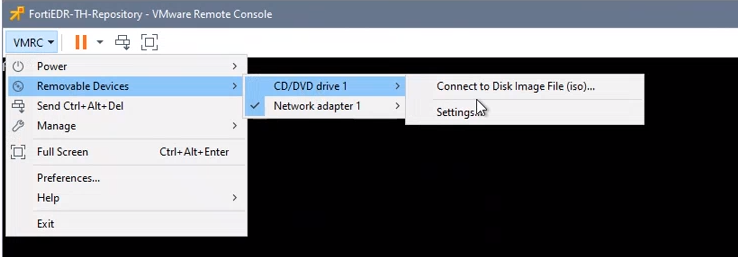
- In the VMRC menu, select Removable Device > CD/DVE drive 1 > Connect to Disk Image File (iso)….
- Select the FortiEDR_Repository_OSInstaller ISO file and click Open. Make sure that the ISO remains mounted.

Another option instead of completing the two steps described above is to upload the ISO from the VMWare datastore (this is possible if the ISO has already been uploaded there).
- Restart the Virtual Machine. The virtual machine starts and the following menu is displayed:

- Select the Install Node option.
- Configure the timezone of the VM using the following command:
export TIMEZONE=Area/Location, where Area/Location is the time zone value from the tz (timezone) database used by Linux and other Unix systems as defined here.
The default timezone UTC will be used if this step is skipped. The timezone can only be set here once and cannot be changed after the installation.
- Log in using the rancher user (without the password) and run the following commands in order to start the K8S node installation:
sudo su –
bash /k3os/system/install_k3os.sh
- When prompted with the following, enter the number depending on the virtual machine (node) you are installing:

- Enter
1if you are installing one single virtual machine (node) with fewer than 15000 seats or if you are installing the first virtual machine (node) of the three for 15000 to 30000 seats. - Enter
2if you are installing the second or third virtual machine (node) of the three for 15000 to 30000 seats.
- Enter
- Complete the k3os installation by providing the following parameters:

- When prompted to enter the SSH password, enter the password to be used for the rancher user. A strong password must be entered.
- At the Use DHCP (yes/no) prompt, enter no.
Using DHCP causes a malfunction of the FortiEDR Repository server so that it is in an Offline state after the installation. When prompted, enter the IP, Mask and Gateway details of the virtual machine.
- At the Do you want to change the default Pod network CIDR's prompt, enter yes or no depending on your needs. The default Kubernetes internal Pod network is
10.42.0.0/16.- If you enter yes, provide the desired Pod network subnet in
x.x.0.0/16format when prompted. - If you enter no, make sure the default Pod network CIDR does not overlap with your existing networks.
- If you enter yes, provide the desired Pod network subnet in
- At the Do you want to change the default Service network CIDR's prompt, enter yes or no depending on your needs. The default Kubernetes internal Service network is
10.43.0.0/16.- If you enter yes, provide the desired Service network subnet in
x.x.0.0/16format when prompted. - If you enter no, make sure the default Service network CIDR does not overlap with your existing networks.
- If you enter yes, provide the desired Service network subnet in
- When prompted to enter node IP, enter an IP depending on the virtual machine (node) you are installing:
- If you are installing one single virtual machine (node) with fewer than 15000 seats or if you are installing the first virtual machine (node) of the three for 15000 to 30000 seats, enter the virtual IP address.
- If you are installing the second or third virtual machine (node) of the three for 15000 to 30000 seats, enter the virtual IP address you defined for the first virtual machine (node).
- When prompted to enter subnet mask, provide the virtual machine subnet mask.
- When prompted to enter DNS, provide the DNS details.
- When asked, read the settings provided and approve or reject them.
- When prompted to select an operation, approve the default (1. Install to disk) by pressing
Enter. - To select the sda disk as the OS disk, select 1.
- At the Config system with cloud-init file prompt, enter
y. - When prompted to provide a Cloud-init file location (file path or http URL), enter
edr.yaml. - When prompted to continue, enter
y.
The image below provides a preview of the parameters you entered for a master virtual machine (node).

- Wait for the installation to complete which may take a while. The Virtual Machine restarts automatically after the installation.
- If you have 15000 to 30000 seats, define two additional virtual machines (nodes) by repeating the steps in Creating a virtual machine and the previous steps in Installing an Operating System ISO for each node. Otherwise, skip to the next step.
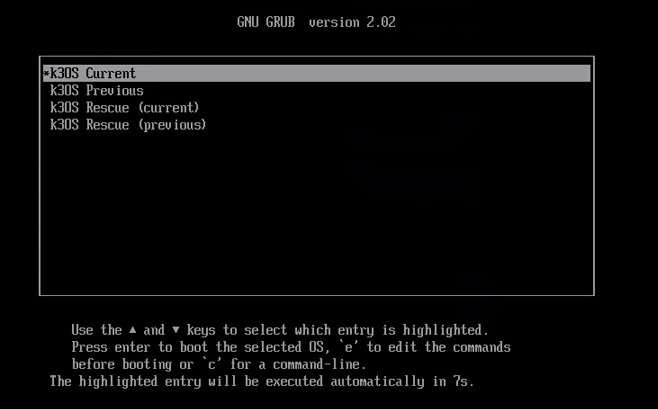
- In the menu, select the default option k30S Current and press Enter.
The system will start. This might take a few minutes while OS data is copied to the Virtual Machine.
- Log in with the
ranchername and the password set previously. - Run the
sudo su -command.
- Verify the installation is successful by running the
kubectl get nodescommand and checking that the status of edr-repo-master1 is Ready, as shown below. If you installed three nodes, verify that the status of the other two nodes are Ready as well.
Installing a FortiEDR Repository software ISO
To install the FortiEDR Repository Software ISO:
- Launch the FortiEDR_RepositoryInstaller ISO file:
- From the VMRC menu, select Removable Device > CD/DVD drive 1 > Connect to Disk Image File (iso)....
- Select the FortiEDR_RepositoryInstaller ISO file and click on Open. If the ISO has already been uploaded to the VMware datastore, you can also upload the ISO from there.
If mounting the new ISO appears to freeze the system, check if there is a prompt to disconnect the existing ISO. If yes, select yes to disconnect the existing ISO and then try mounting the new ISO again by repeating steps a and b.
- From the VMRC menu, select Removable Device > CD/DVD drive 1 > Connect to Disk Image File (iso)....
- Run the following command:
bash /k3os/system/install_edr2.shSelect init (1) for a new installation.
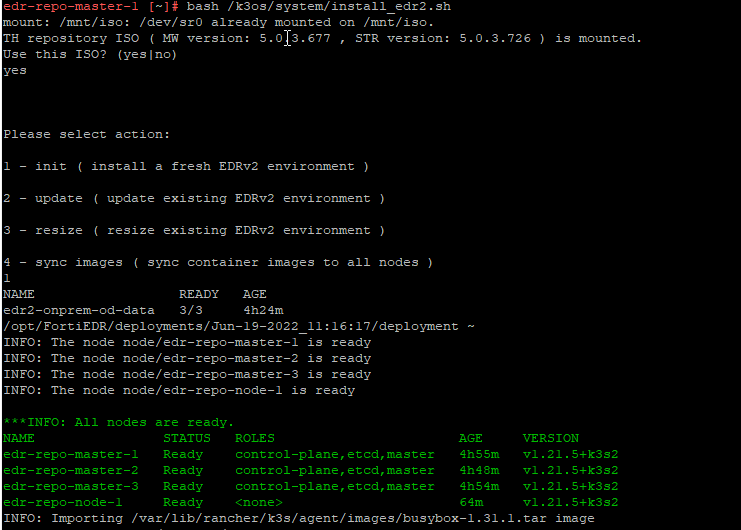
The node is being synchronized, which might take 10 to 15 minutes. If you installed three nodes, you will be prompted for the SSH password for each node.

Existing virtual machine specifications (CPU and RAM) are being validated. If one is found to be lower than the minimum requirements for proper functioning of the FortiEDR Repository, the following warning appears:

Wait until required docker images import from ISO to local image storage (might take few minutes).
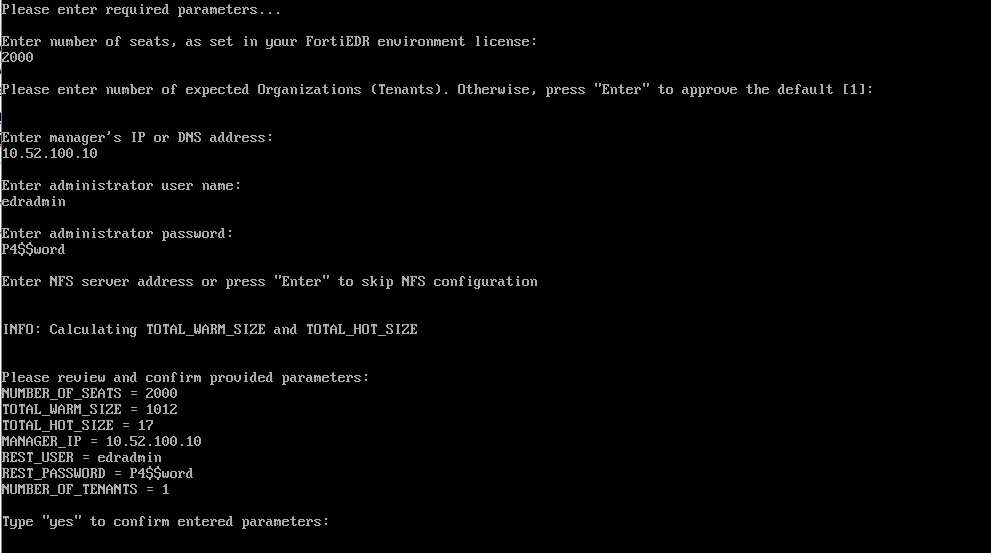
- Complete the FortiEDR Repository software installation by providing the following parameters:
- When prompted to enter the number of seats, enter the number of seats of your FortiEDR License (workstations and servers).
- When prompted to specify whether the repository will be used by a Managed Security Service Provider (MSSP), enter
yesif you are going to define organizations, ornoif you are not.
If you entered
yesin the previous question, provide the number of expected organizations (meaning Tenants).- When prompted for the FortiEDR Manager details, provide its IP and the credentials of one of the FortiEDR Console administrators that have Rest API permissions.
Make sure that the Threat Hunting repository does not block outbound traffic to port 443 on Central Manager. - Review the displayed configuration. Type yes to approve it or if the parameters are not correct, press Enter to restart the configuration process. The installation may take several minutes.
Configuring the Threat Hunting Repository Monitoring console
To configure and access the Threat Hunting Repository Monitoring console:
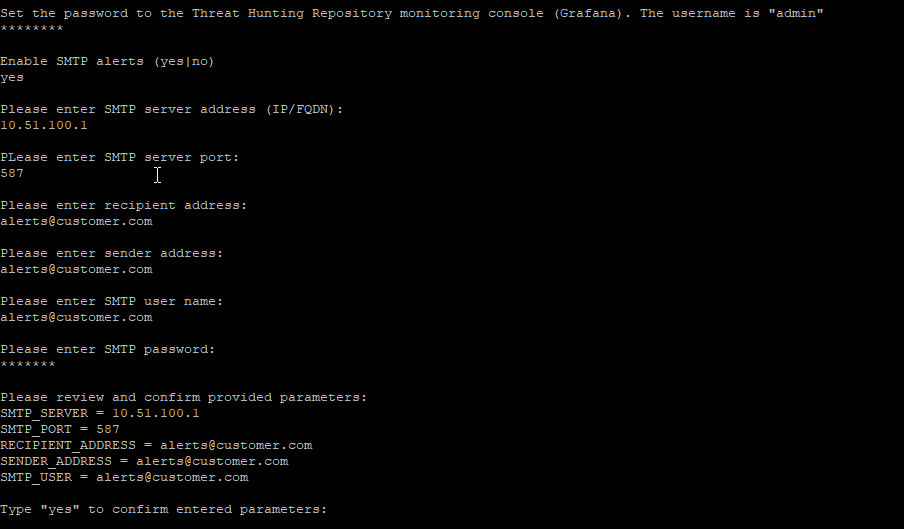
- When prompted, provide the password to be used for the Threat Hunting Repository monitoring console (Grafana) login. Note that the password should be a combination of letters and digits.
- When asked whether to enable SMTP alerts, enter
yesif you want to receive alert emails triggered by the Threat Hunting Repository monitoring. Otherwise, enternoand skip to step 7. - When prompted, provide the following information of the SMTP server:
- Details of the SMTP server (IP or FQDN, and port)
- Email address to send the alerts
- Email sender address
- Username and password required for the SMTP server access
- When prompted, review the provided details and confirm.
Backing up Threat Hunting Repository data
Fortinet recommends that you back up the data stored in the Threat Hunting Repository database by replicating it to a NFS server, which can be used in for disaster recovery.
|
|
|
To enable backup of data, provide details about the backup storage in the CLI:
- At the prompted question, enter
yes. - When prompted, enter the NFS server address.
- When prompted, enter the NFS share path to which the data will be replicated.

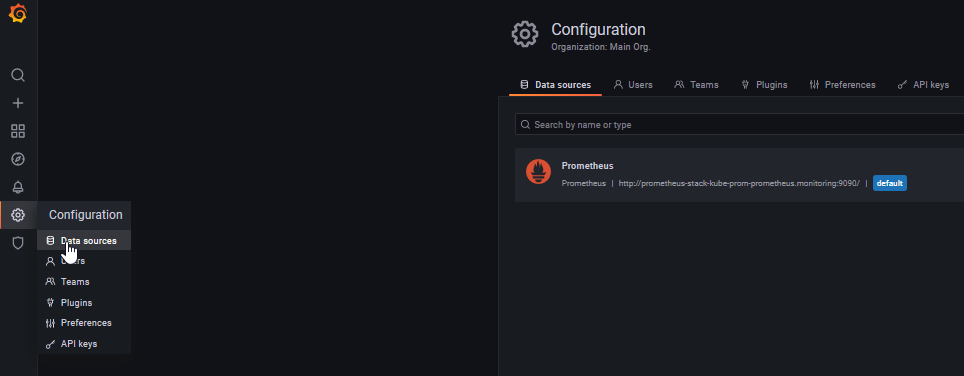
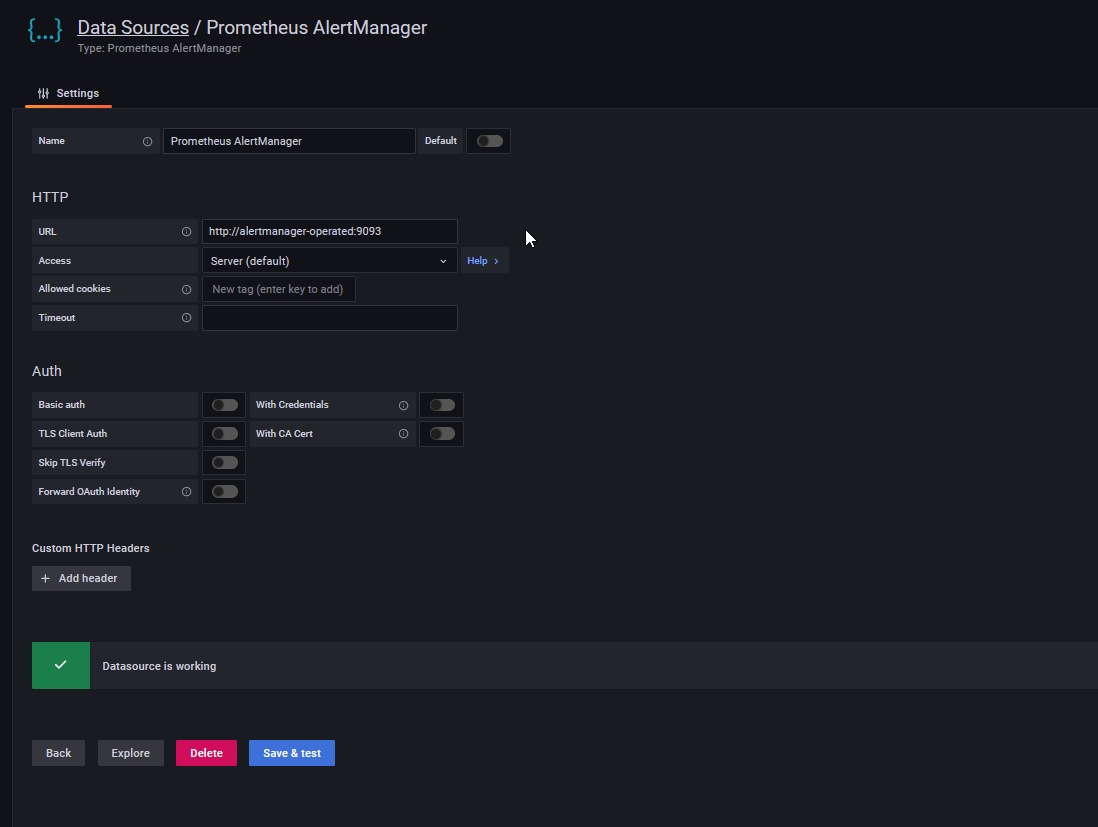
Activating the Threat Hunting Repository Monitoring console
- Visit
http://<TH IP>:3000.
- Enter the user and password that you provided during the initial installation setup.
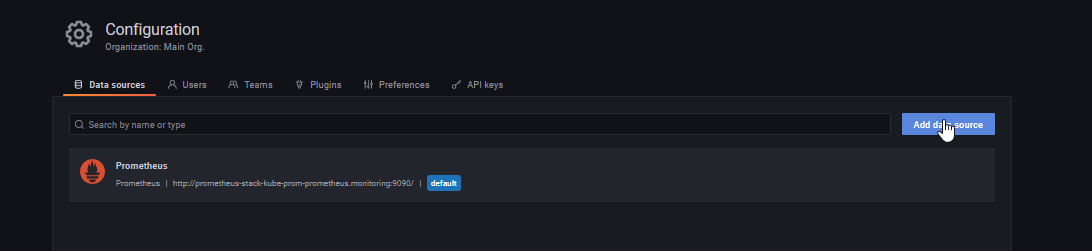
- Go to Configuration > Data sources.
- Click Add data source.
- Select Prometheus AlertManager.
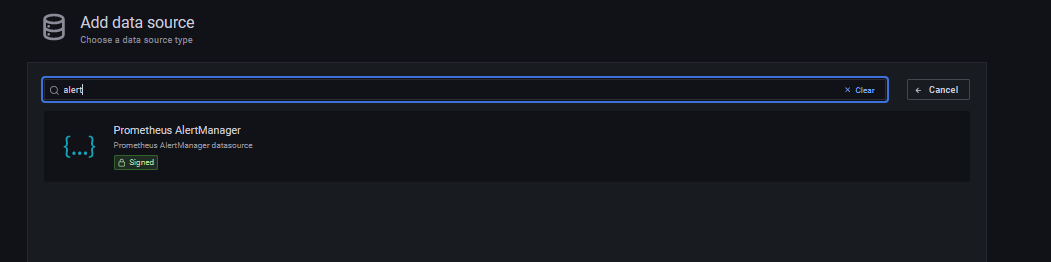
- In the URL field, enter
http://alertmanager-operated:9093. - Click Save & test.
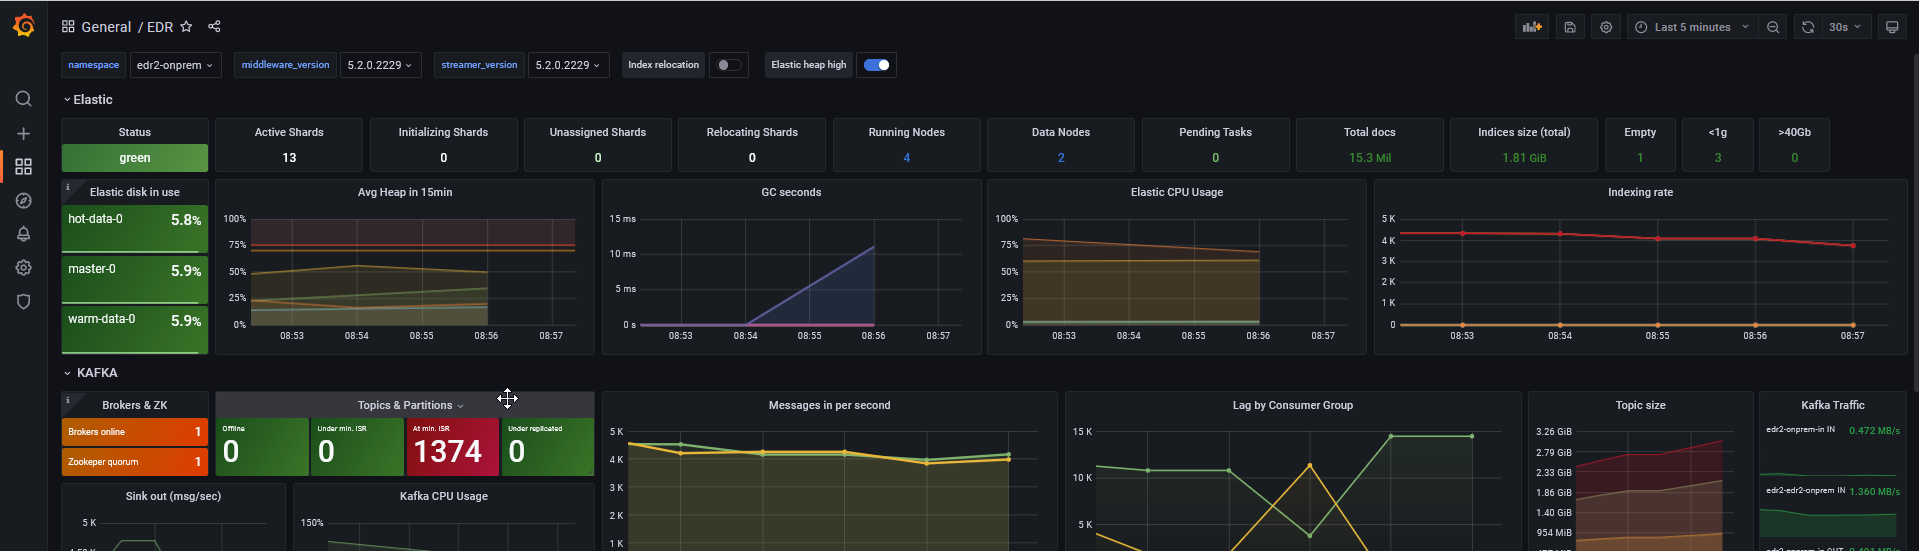
- Under Dashboards > Manage:

- Open the EDR dashboard to view the current status of threat hunting.
- Open the Alerts dashboard to view alerts triggered by the Threat Hunting Repository monitoring system.
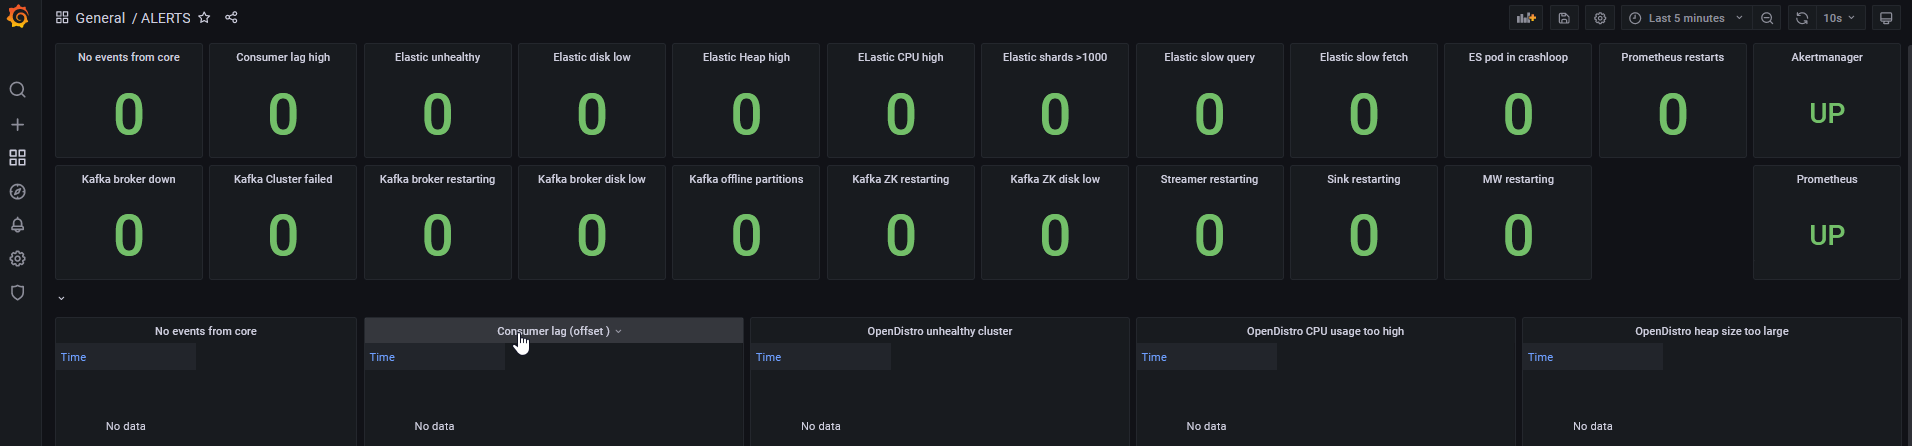
The following table lists all the alerts and the mitigation methods.
Alert
Mitigation
No events from core Verify that all Cores are an running by using the FortiEDR Manager. Consumer Lag (offset) Contact Fortinet Support. OpenDistro Unhealthy Cluster OpenDistro CPU usage too high OpenDistro heap size too large OpenDistro too many shards per node OpenDistro slow search query OpenDistro slow search fetch OpenDistro disk usage ES pod in crashloop Kafka Offline Partitions Kafka broker is down Kafka cluster failed Kafaka broker restart rate high Kafka broker disk low ZooKeeper disk low Streamer restart rate high StreamerSink restart rate high ZooKeeper restart too often Streamer MAX HPA Streamer unreached desired HPA Middleware restart rate high
- Open the EDR dashboard to view the current status of threat hunting.