


WiFi Location Map
This feature allows you to upload custom maps or floor plans and then place FortiAP units on the map. Wifi Maps show real-time status and alerts for the FortiAP units on the map. This features gives you an intuitive view of the location and status of each FortiAP unit on the map.
To set up WiFi Maps:
- Obtain a floor plan or map of where FortiAP units are located.
- Go to WiFi & Switch Controller > WiFi Maps and click Add Map.

- Click Upload and specify a map in PNG, JPEG, or GIF format to be uploaded.
- Enter the Map name, for example, Level-2.
- If you want, enable Image grayscale to change a color map to grayscale.
- Set Image opacity to specify map transparency.

- Click OK.
After setting up a WiFi map, you can place FortiAP units on the map.
- At the top left, click the lock icon to modify the map; and then click the Unplaced AP(s) icon to display the list of unplaced APs.

- Drag and drop each FortiAP unit onto its location on the map.

- When all FortiAP units have been placed on the map, click the lock icon.
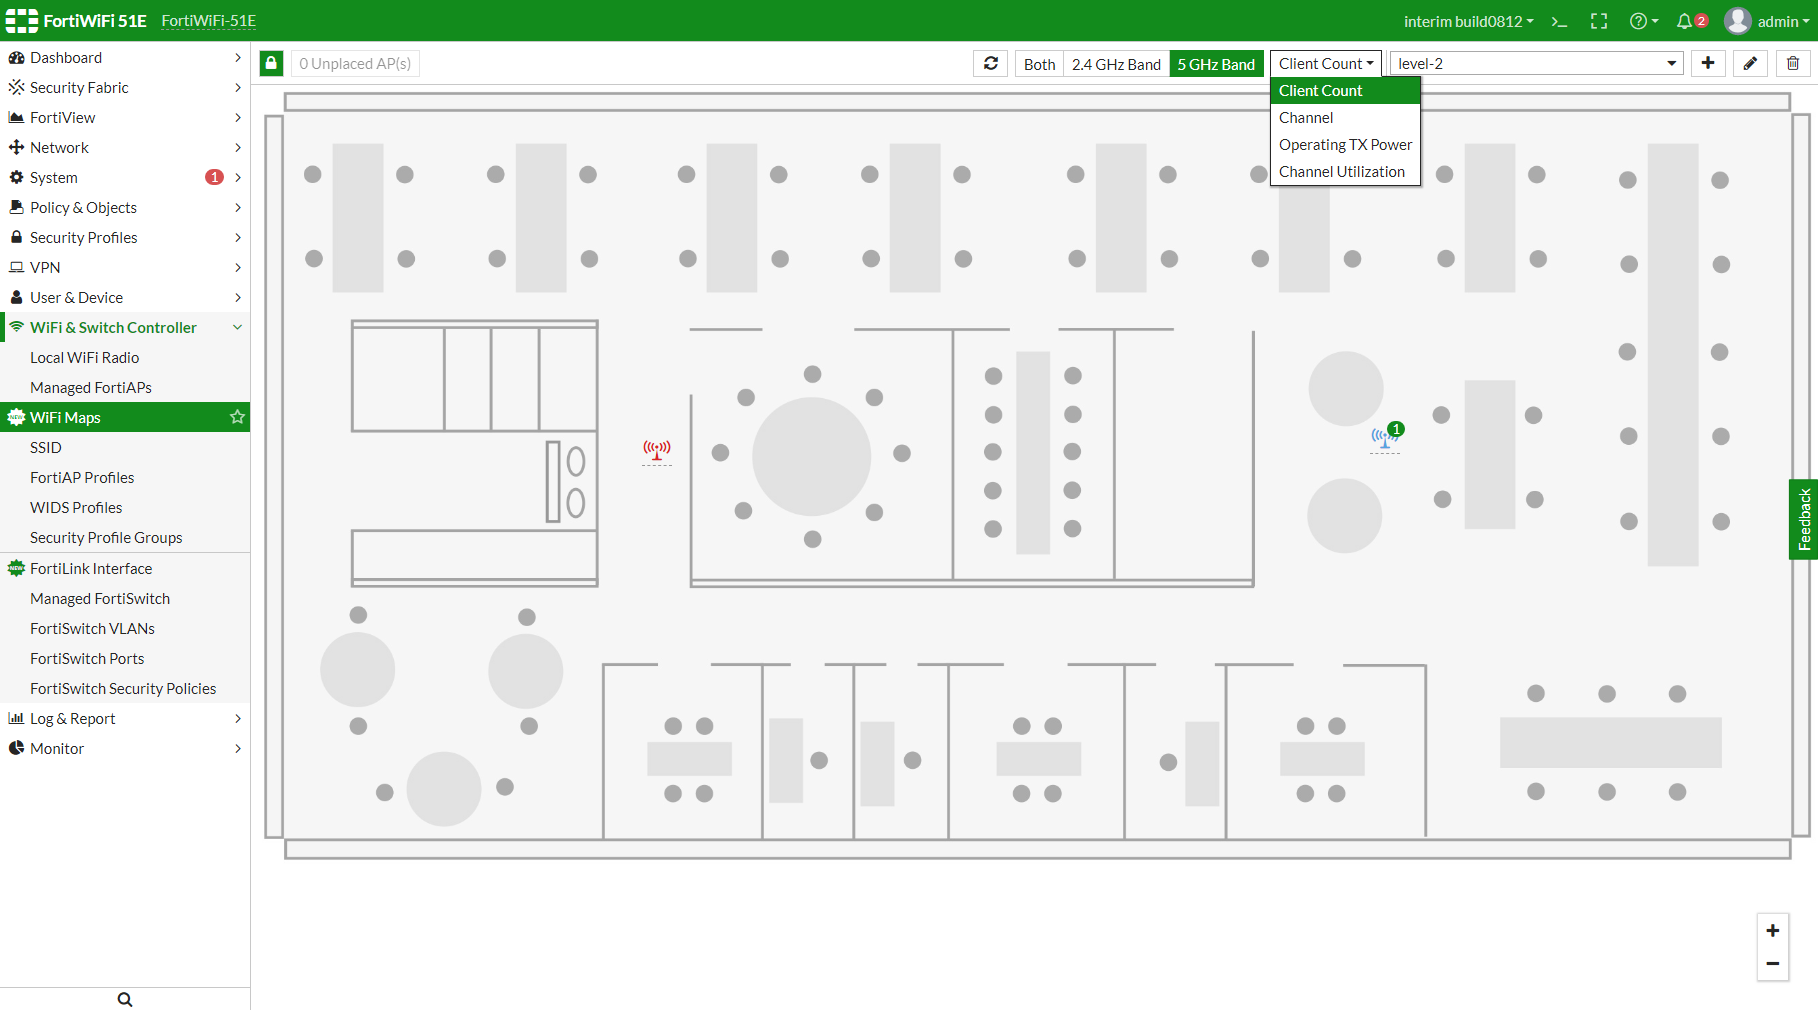
The WiFi map shows where each FortiAP unit is located.
To view a FortiAP unit's operating data, hover over that FortiAP icon.
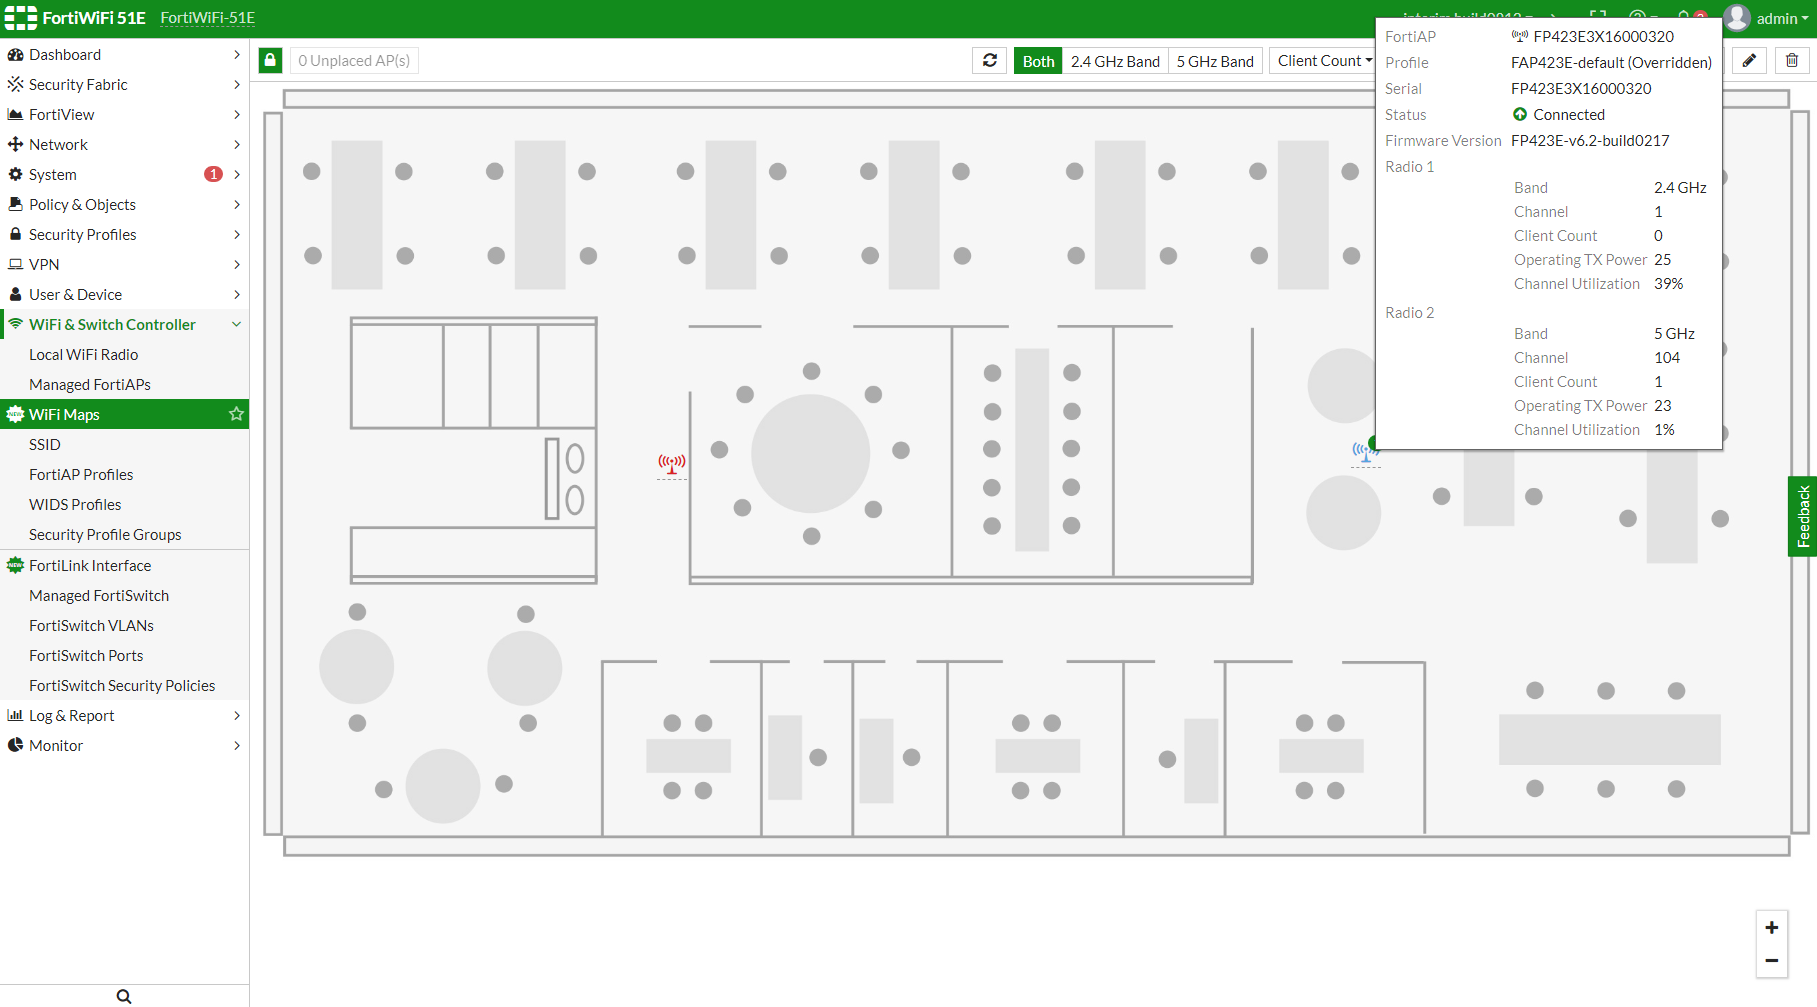
To view a FortiAP unit's detailed operating data, click that FortiAP icon.

In Wifi Maps, you can select to show the 2.4 GHz or 5 GHz band or both. You can also show numerical operating information such as client count, channel, radio TX power, and channel utilization.
You must use the GUI to upload WiFi maps.
To configure WiFi map settings using CLI commands, see the following examples:
config wireless-controller region
edit "Level-2"
set grayscale enable
set opacity 40
next
end
config wireless-controller wtp
edit "FP423E3X16000320"
set region "Level-2"
set region-x "0.660498"
set region-y "0.442825"
next
end