


Configuring FortiClient EMS connection
To configure FortiClient EMS connection:
- Go to Network > Fabric Connectors.
- In the Core Network Security pane, select FortiClient EMS and then select Edit.
Alternatively, double-click FortiClient EMS.
The New Fabric Connector window opens.
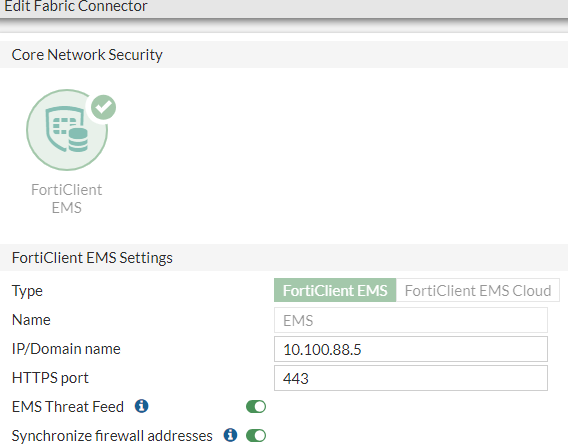
- In the FortiClient EMS Settings pane:
- In Type, ensure that FortiClient EMS is selected.
- In Name, enter
EMS. - In IP/Domain name, enter the IP address for the FortiClient EMS, i.e.,
10.100.88.5. - In HTTPS port, ensure the default value is used, i.e.,
443. - Leave EMS Threat Feed and Synchronize firewall addresses as enabled.

Enabling EMS Threat Feed allows FortiPAM to pull FortiClient malware hash from FortiClient EMS.
Enabling Synchronize firewall addresses allows synhronizing firewall addresses for all EMS tags.
- Click OK.
- FortiPAM attempts to verify the EMS server certificate, but fails.

Before FortiPAM can verify the EMS server certificate, you must authorize FortiPAM on the EMS server.
- Click OK.
- Click Cancel.
- Log in to the EMS server on: https://10.100.88.5.
Fabric Device Authorization Requests prompt appears.
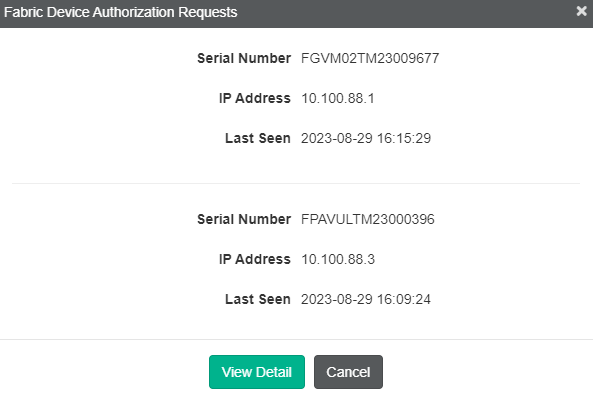
- Select View Detail.
- From the list, select the FortiPAM device authorization request and select Authorize from the top.
- In FortiPAM, go back to Network > Fabric Connectors.
- Double-click FortiClient EMS.
- In the Edit Fabric Connector window, click Authorize in FortiClient EMS Status.
Verify EMS Server Certificate window appears.

- In the Verify EMS Server Certificate window, select Accept to accept the certificate from the EMS-side.
FortiPAM is now successfully connected to the EMS server.

- Click Close.