


Verifying access for IT administrator user Mark Gilbert
This section demonstrates logging in to a PC in different networks: on-net, in the branch, and remotely, using the IT administrator account Mark Gilbert. The user experience is the same irrespective of the network because access is based on the administrator account role. We then attempt to log in to FortiPAM and access a target from within FortiPAM.
The topology diagram below highlights the PC under different networks:

To verify access:
- Log in to the PC as IT administrator Mark Gilbert on-net, off-net, or off-fabric.
- Open FortiClient:
- In the Zero Trust Telemetry page, enter the server address
ems.forti-arbutus.localand click Connect.On-net and Off-fabric devices resolve the IP address to
10.100.88.5.Off-net devices resolve the IP address to
10.100.64.112.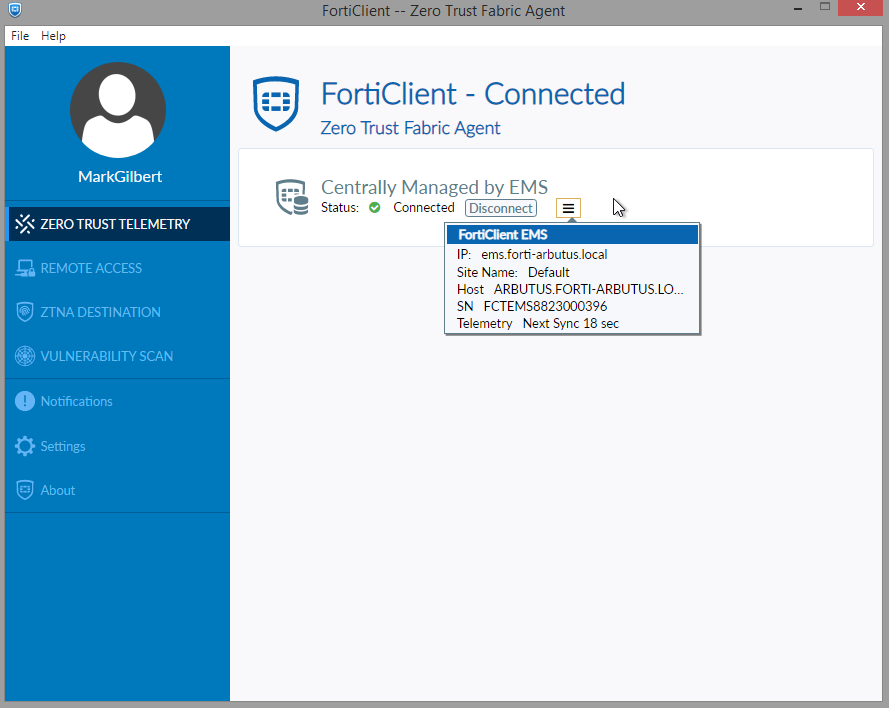
Once connected, FortiClient receives updates from the EMS server.
- In the Zero Trust Telemetry page, enter the server address
- Verify the following on the FortiClient:
- Go to Settings and in Advanced, enable Enable Privileged Access Management.
- Ensure that the Local Server Port is
9191. - Click the MarkGilbert avatar on the top-left.
In Zero Trust Tags, various tags appear including Windows_Admin.
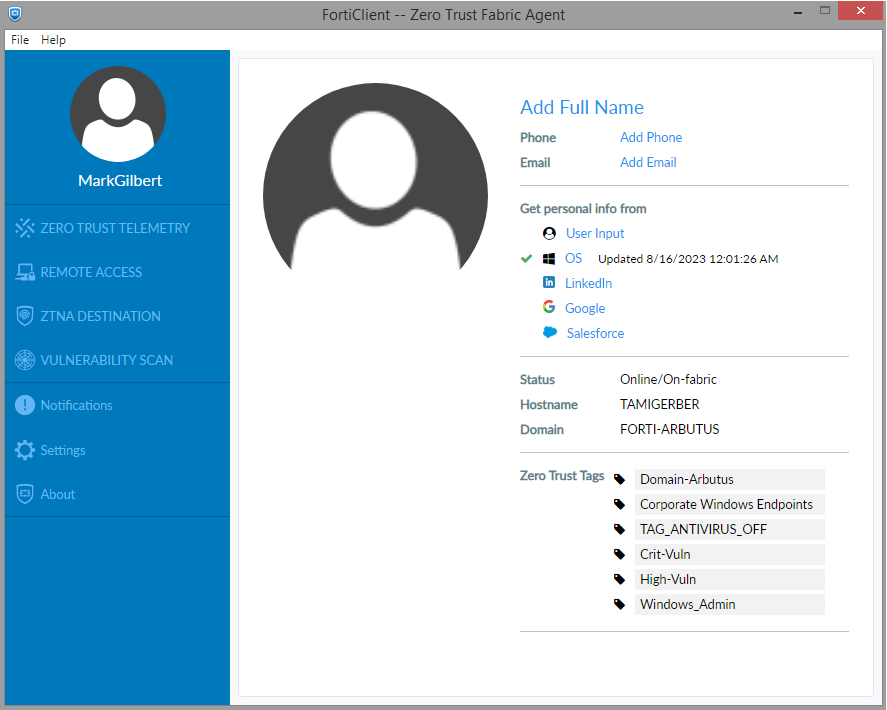
For Windows_Admin tag related information, see Applying ZTNA tags to FortiPAM_Default policy.
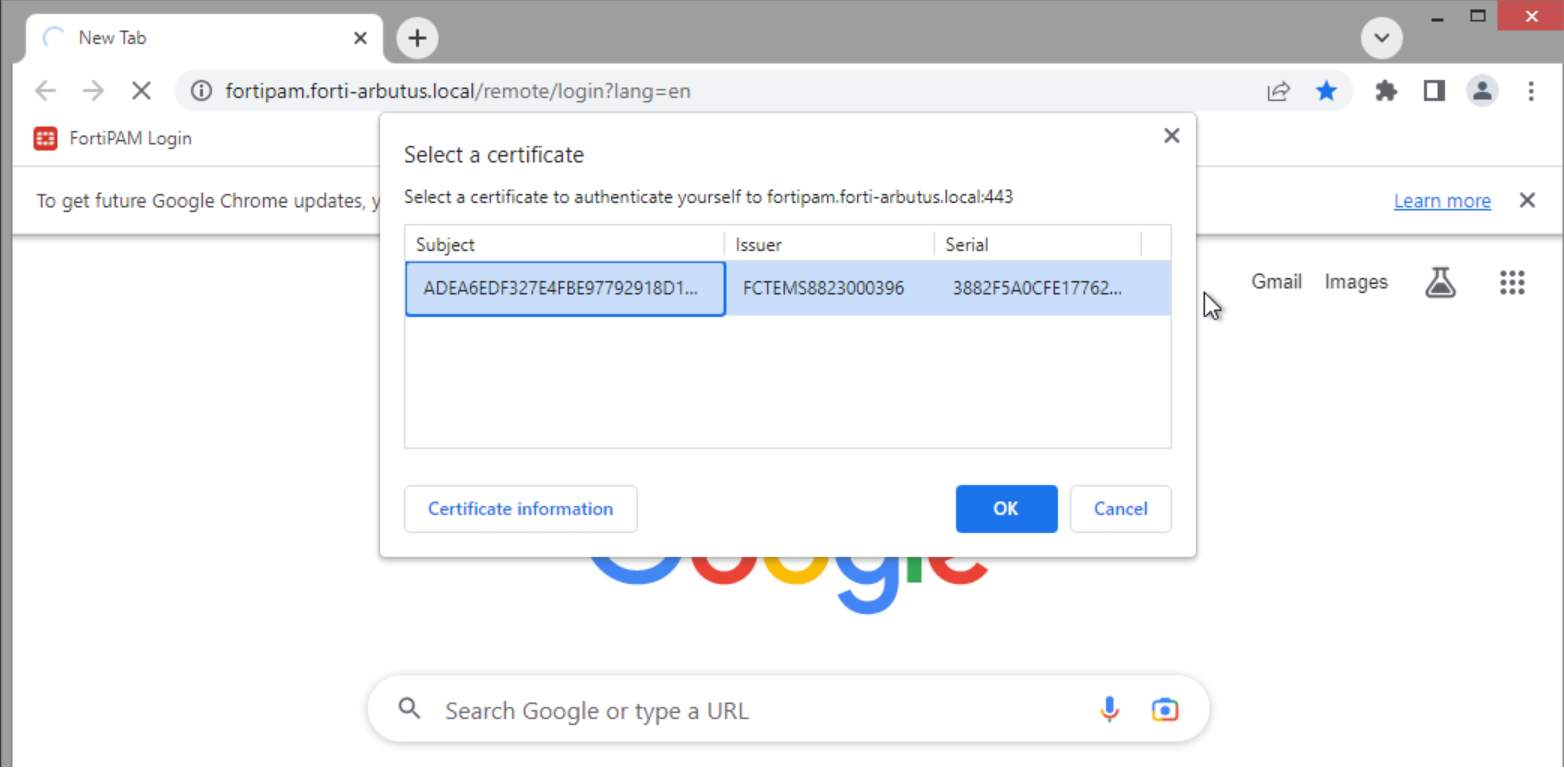
- Open Chrome web browser and from the shortcut bar, navigate to FortiPAM. This attempts to open the page
https://fortipam.forti-arbutus.local.On-net and Off-fabric devices resolve the IP address to
10.100.88.20.Off-net devices resolve the IP address to
10.100.64.113.
Do not use the incognito mode.
- In the Select a certificate window that appears, click OK to select the client certificate from FortiClient EMS.
Once the certificate check passes, FortiPAM performs a security posture check. If FortiPAM detects a connection from a PC with the Windows_Admin tag, the FortiPAM Login page appears.
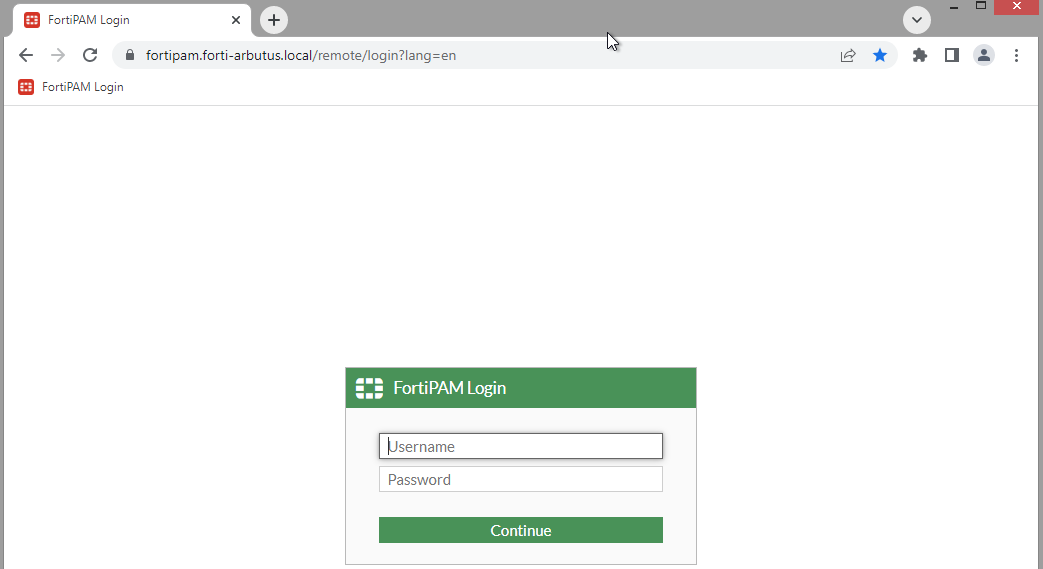

If you were to attempt to log in as a different user, e.g., TamiGerber from the Marketing user group, the certificate check fails. This is because TamiGerber does not include the Windows_Admin ZTNA tag.

- Log in to FortiPAM using the same credentials as the one in step 1.
- Go to Secrets > Secret List.

- Select an SSH secret and then select Launch Secret from the top.
The Launch Progress window opens.
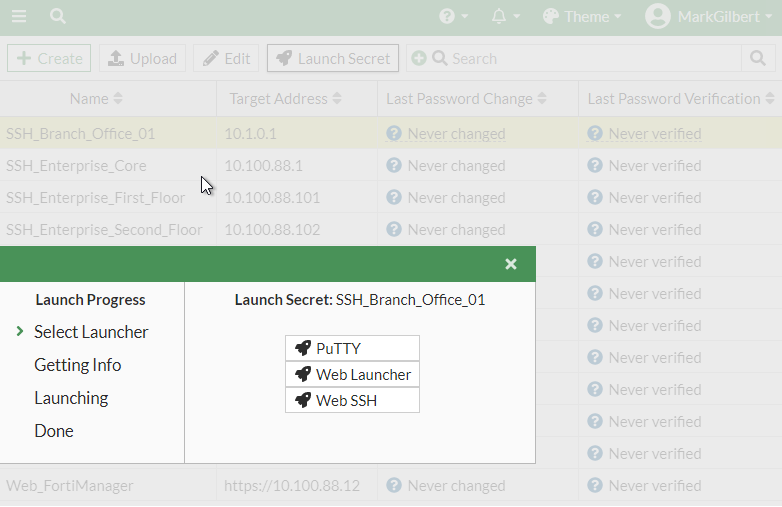
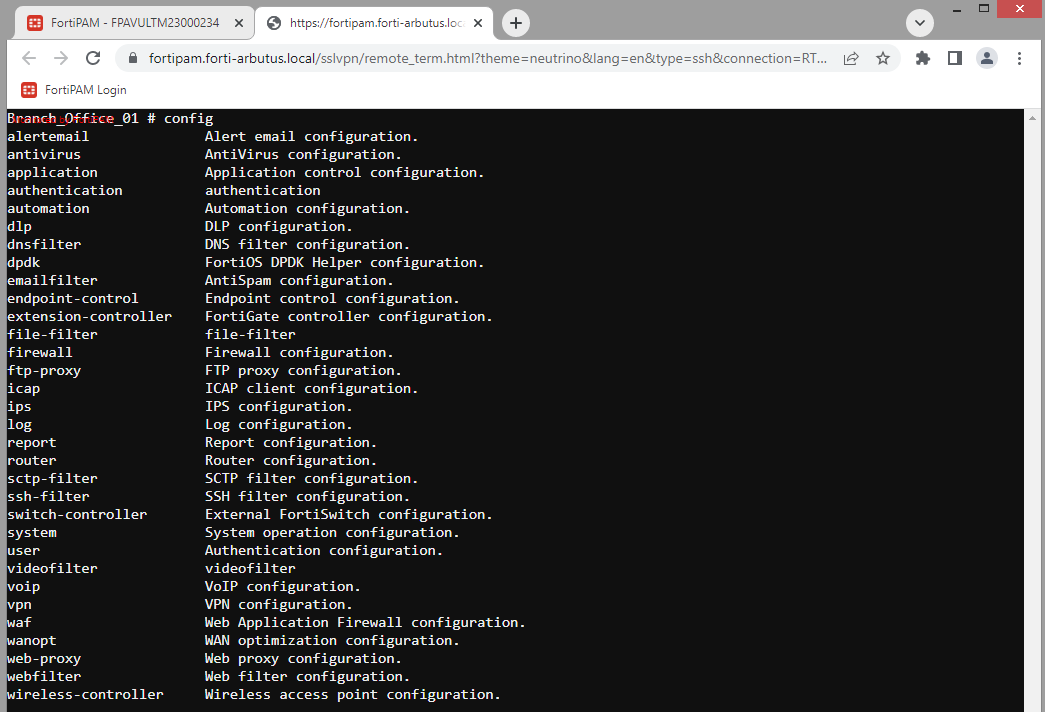
- Select Web SSH launcher.
This opens an SSH session to the target in a new tab using the credentials stored in FortiPAM.
You can enter CLI commands here.
-
Select a web secret and then select Launch Secret from the top.
A new browser tab opens and takes you to the target login page.

- Click the Username field and then click FortiPAM autofill credentials.
FortiPAM auto-fills the Username and Password fields with the credentials from FortiPAM.
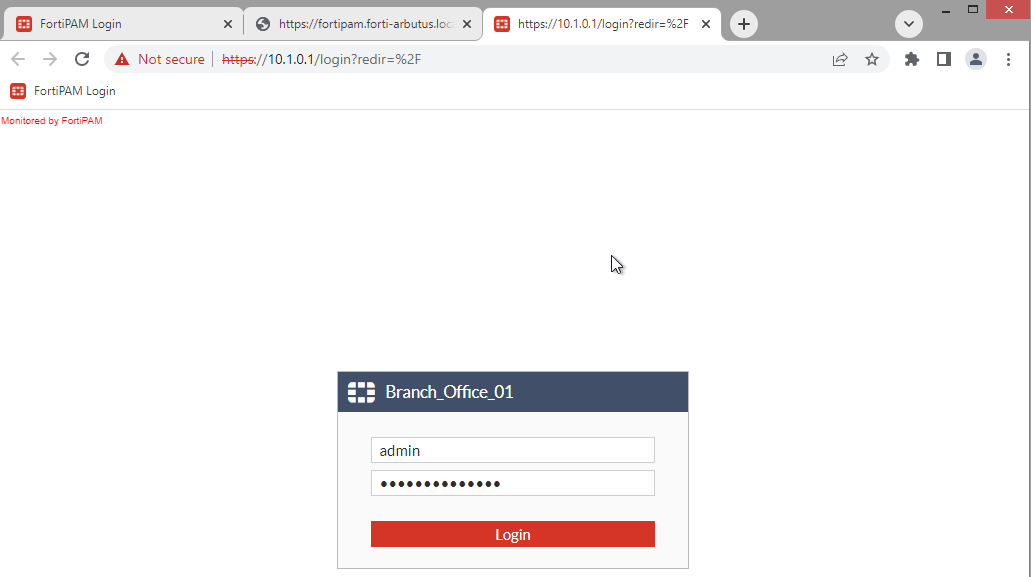
- Click Login.
- Once logged in, navigate to different pages to verify that the access was granted.
- Log out and close the browser tab when done.
- Repeat the verification steps by logging in with other PCs in different networks.