


Enable Send Logs in FortiGate
The first thing is to establish connection between FortiCNP and FortiGate to enable send logs to FortiAnalyzer/FortiManager. This allows FortiCNP OFTP(Odette File Transfer Protocol) server to communicate with FortiGate.
- In FortiCNP, Add New FortiGate page, copy the FortiCNP OFTP server address from step#1.
- Log into FortiGate with your admin account.
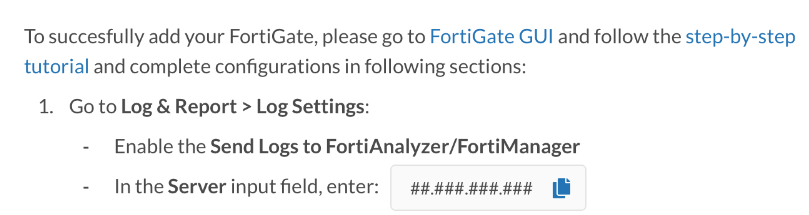
- Go to Log & Reports > Log Settings.
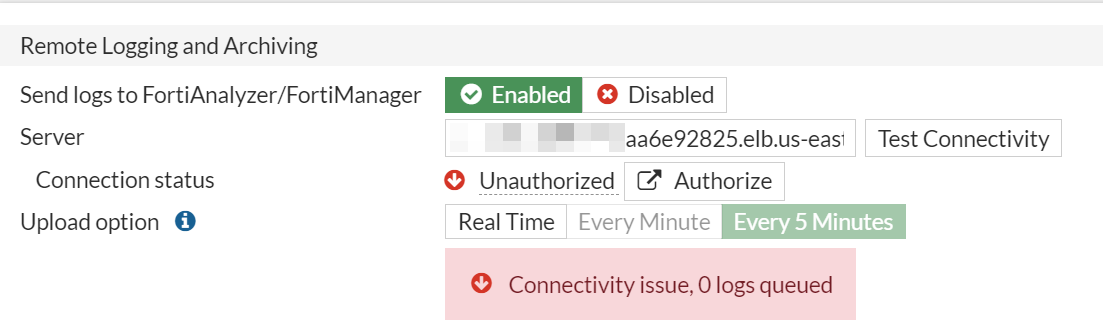
- Scroll down to Remote Logging and Archiving.
- Enable Send logs to FortiAnalyzer/FortiManager.
- In Server field paste the OFTP server address from FortiCNP.
- Disable Verify FortiAnalyzer certificate to stop verification on FortiAnalyzer certificate.
- Click Test Connectivity and check the Connection Status, it should be changed to Connected status.
- Scroll down to Log Settings, uncheck all items in Event Logging and Local Traffic Log, and click Apply.
- Open FortiGate CLI command
 and configure Fortianalyzer with the following commands:
#config log fortianalyzer setting
#set reliable enable
#end

Note:This is to prevent too many logs being sent to FortiCNP and only show IPS logs.
|
|
When clicked Test Connectivity in Log Settings, it may show "Unauthorized" status. This is due to the FortiGate device has not been added to FortiCNP yet. Please finish the onboarding process to add FortiGate device on FortiCNP, then come back to test the connectivity again.
|
Configure Log Settings Using FortiGate CLI mode
Alternatively, send log can be enabled through FortiGate's CLI mode.
Use the following command in FortiGate CLI mode to enable log settings.
#config log fortianalyzer setting
#set status enable
#set server <FortiCNP OFTP server IP>
#set enc-algorithm high-medium
#set upload-option realtime
#set reliable enable
#end
Test the connection using the following CLI command:
#execute log fortianalyzer test-connectivity