


FortiManager centrally manages ZTNA policies using tags retrieved from EMS server via Fabric Connector 7.0.3
In 7.0.3, FortiManager centrally manages ZTNA policies using the tags retrieved from the EMS server via Fabric Connector.
This topic includes the following sections:
- Creating an EMS connector on FortiManager
- Configuring a ZTNA server
- Using ZTNA tags in a policy
- Confirmation
Creating an EMS connector on FortiManager
To create an EMS connector in FortiManager:
- Go to Policy & Objects > Object Configuration > Fabric Connectors > Endpoint/Identity.
- Click Create New, and select FortiClient EMS from the dropdown menu.
- Fill in the EMS server details, and click OK.

To import tags from the EMS server:
- Edit your EMS connector in FortiManager.
- Click Apply & Refresh on the bottom of the page.
Any changes on the EMS server are dynamically populated on the FortiManager.

To view tags imported from the EMS server:
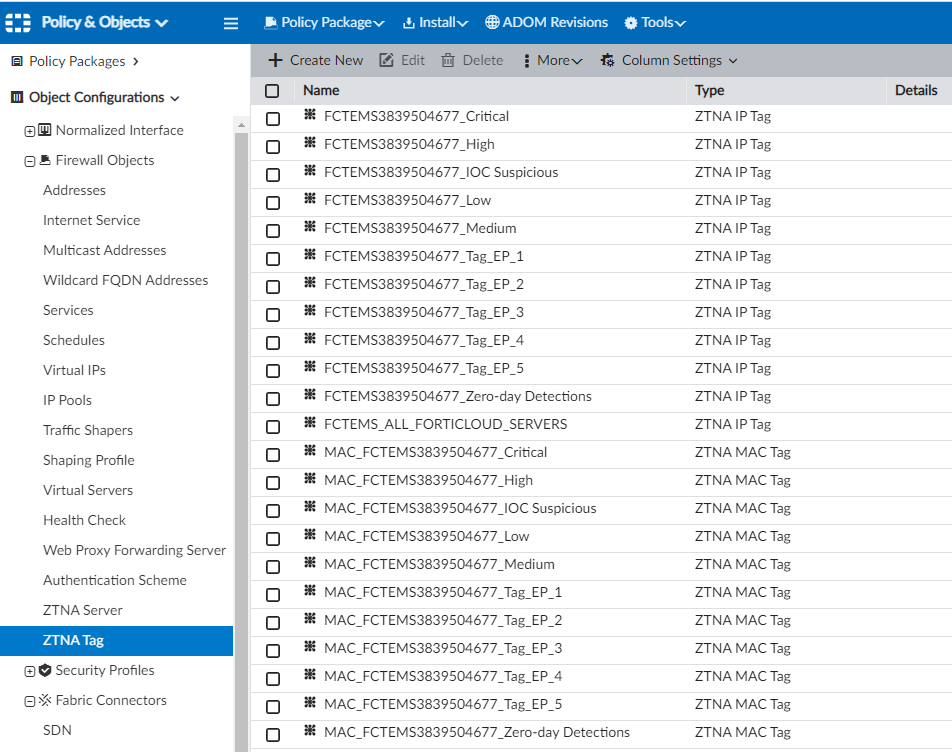
- Go to Policy & Objects > Object Configurations > Firewall Objects > ZTNA Tags.
You can see both the ZTNA IP and ZTNA MAC tags that are available on this page.
Configuring a ZTNA server
To configure a ZTNA server, you must define the access proxy VIP and the real servers to which clients will connect. The access proxy VIP is the FortiGate ZTNA gateway that clients make HTTPS connections to. The service/server mappings define the virtual host matching rules and the real server mappings of the HTTPS requests.
To configure a ZTNA server:
- Go to Policy & Objects > Object Configurations > Firewall Objects > ZTNA Server.
- Create a new ZTNA server, and enter the details for the server.
- Select an External Interface, enter the External IP address, and add the External Port to which the clients will connect.
- Select the Default Certificate. Clients are presented with this certificate when they connect to the access proxy VIP.

- Edit the service and server mapping.
- In the Service/Server Mapping table, click Create New.
- Set the Virtual Host to Any Host or Specify.
- Any Host: Any request that resolves the access proxy VIP will be mapped to your real servers. For example, if both
www.example1.comandwww.example2.comresolve to the VIP, then both requests are mapped to your real servers. - Specify: Enter the name or IP address of the host that the request must match. For example, if
www.example1.comis entered as the host, only requests towww.example1.comwill match.
- Any Host: Any request that resolves the access proxy VIP will be mapped to your real servers. For example, if both
- Configure the path as needed. The path can be matched by a substring, wildcard, or regular expression. For example, if the virtual host is specified as
www.example1.com, and the path substring ismap1, thenwww.example1/map1will be a match.

- Set the Virtual Host to Any Host or Specify.
- In the Servers table, click Create New.
- Enter the server IP address and port number.
- Set the server status, and click OK. You can add additional servers as required.

- In the Service/Server Mapping table, click Create New.
Using ZTNA tags in a policy
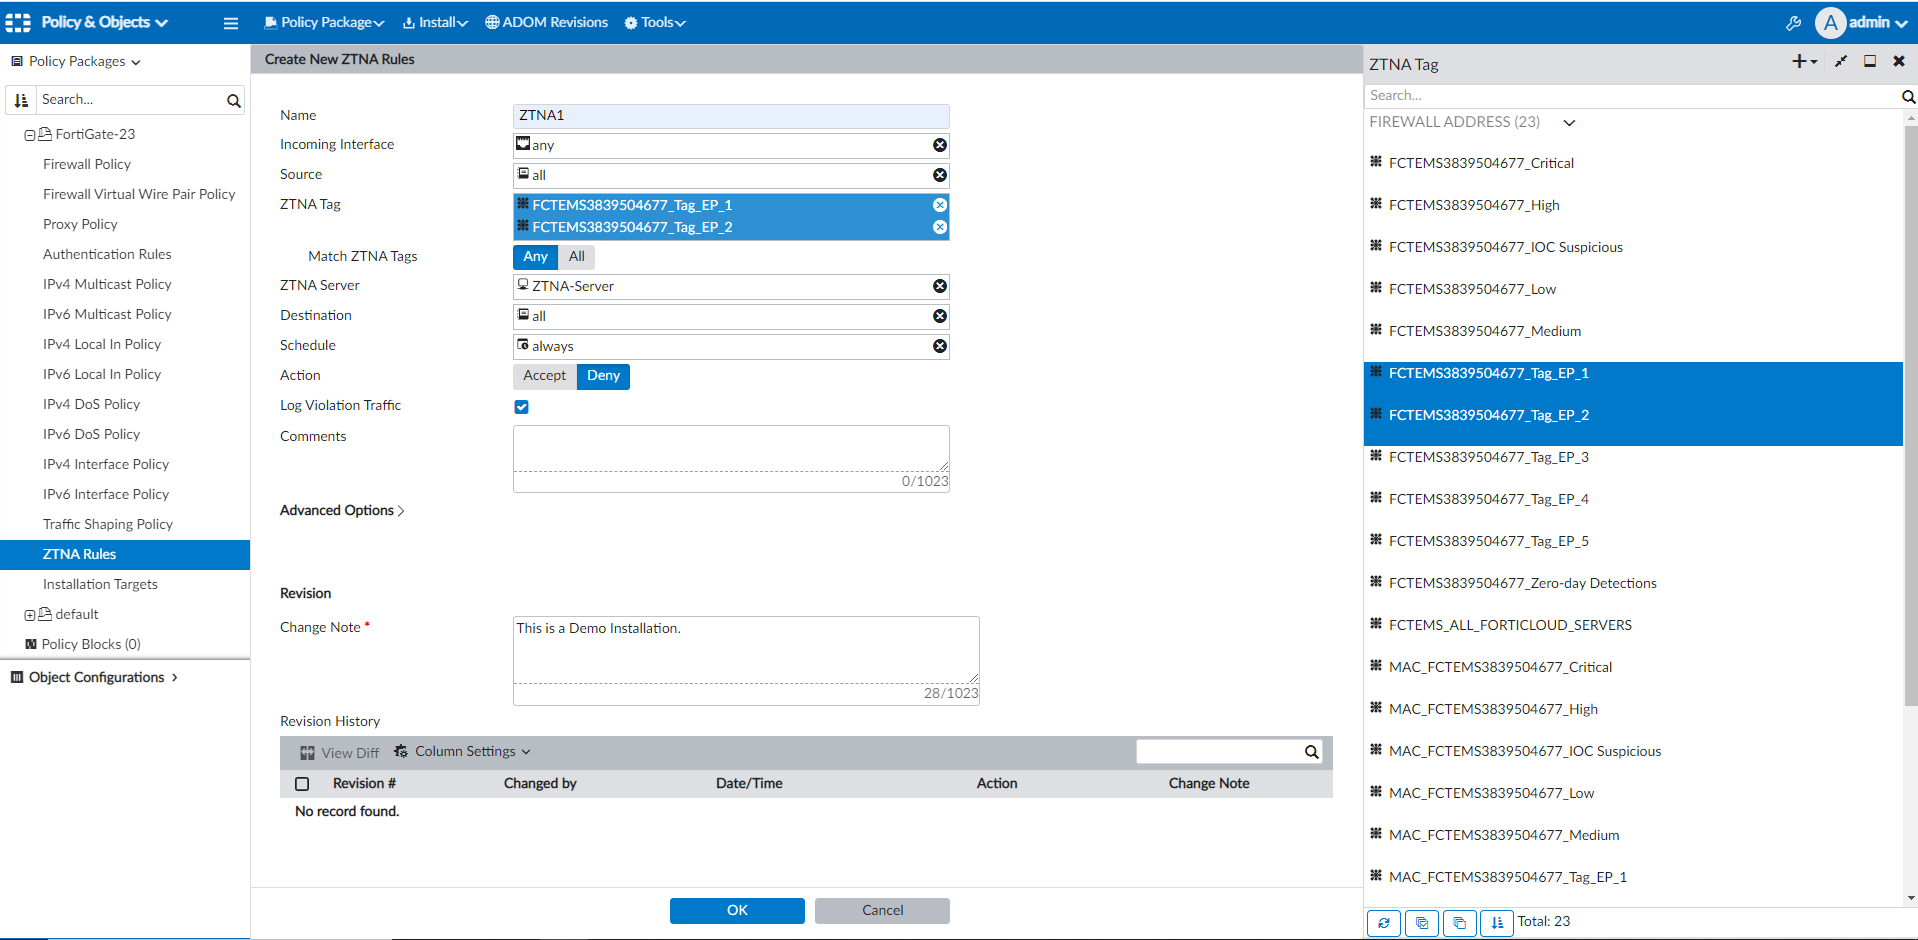
To use tags in a policy:
- Go to Policy & Objects > Policy Packages.
- Select the Policy Package where you would like to use the ZTNA tags.
- Navigate to ZTNA Rules under the Policy Package, and create or edit the ZTNA rule.
ZTNA Rules must be enabled in Tools > Display Options before it is visible in a policy package. - Fill in the details for the rule.
- Click the add icon next to ZTNA Tag to see and use tags in the policy.
- Once the policy is configured under ZTNA Rules, you can install the changes using the Device Manager > Install Wizard, and FortiManager will install the ZTNA rules to the FortiGate along with the EMS Server configuration including the Fingerprint from the EMS server.
Confirmation
To confirm on FortiGate:
- Login to the FortiGate device.
- Go to Security Fabric > Fabric Connectors > FortiClient EMS.
- Confirm the server details installed on the FortiGate are correct and that the panel shows the status as Connected.

- Go to Policy & Objects > ZTNA Rules, and confirm the policy was installed correctly.

To confirm on FortiClient EMS:
- Login to the FortiClient EMS server.
- Go to Administration > Fabric Devices.
The FortiGate should be present in this list in order to interact with the EMS server.