


Appendix J: Installation on AWS
FortiPAM installation on AWS and initial setup:
- Converting qcow2 to a RAW format for AWS import-image tool
- Creating an S3 bucket on AWS
- Uploading RAW file to the AWS S3 bucket
- Creating a snapshot from the RAW file in the AWS S3 bucket
- Creating AMI from the snapshot
- Configuring a security group
- Launching the FortiPAM instance from AMI
- Initial configuration
- Licensing
Converting qcow2 to a RAW format for AWS import-image tool
To convert qcow2 to a RAW format for AWS import-image tool:
- Unzip the
FPA_KVM_AWS-v100-buildxxxx-FORTINET.out.kvm.zipfile and locate thefortipam.qcow2file. - On a Linux machine, install
qemu-utilspackage to get theqemu-imgtool:$ sudo apt-get install qemu-utils
- Use
qemu-imgto convert the image into RAW format:$ qemu-img convert fortipam.qcow2 fortipam.raw
Creating an S3 bucket on AWS
To create an S3 bucket on AWS:
- Select Services and from the list on the left, go to Storage > S3.
- Select Create bucket.

The Create bucket page opens.
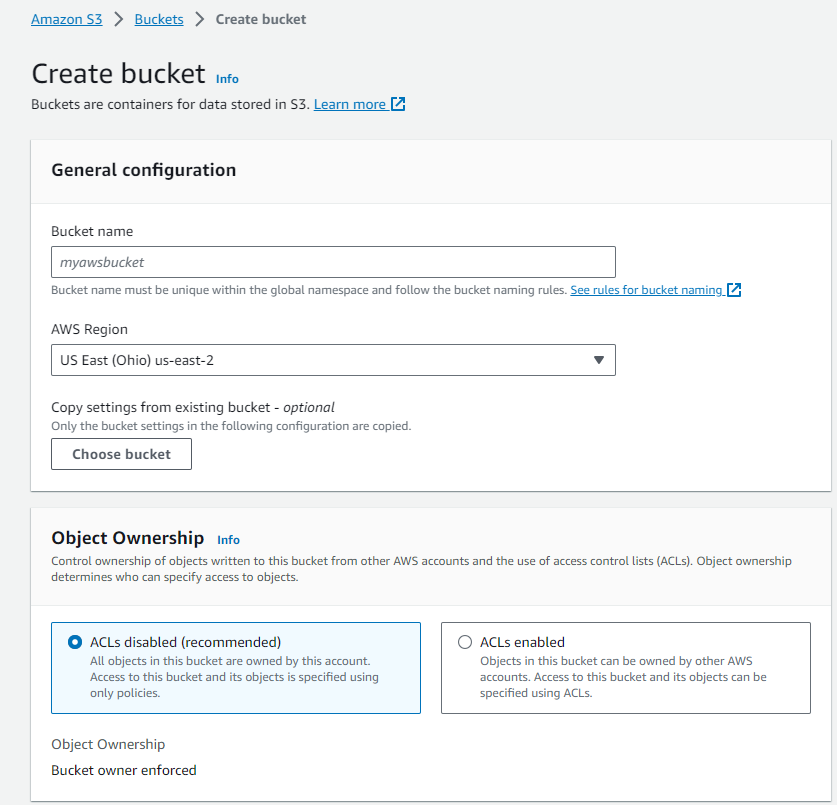
- In the General configurations pane, enter the following information:
Bucket name
The name of the bucket.
AWS Region
From the dropdown, select a region where the bucket is stored.
- Leave all other settings on default.
- Click Create bucket.
Uploading RAW file to the AWS S3 bucket
To upload RAW file to the AWS S3 bucket:
- Using the following command, install the AWS CLI :
$ sudo pip install awscli --ignore-installed six
- Using the following command, add your AWS credential to
~/.aws/config:aws_access_key_id=AKIA4I34XXXXXXXX aws_secret_access_key=ACR8XXXXXXXXXXXXXXXXXXXXX region = us-west-1
Note: Access key can be created from Security credentials in your IAM Account.

- Using the following command, copy the RAW image to the S3 bucket:
$ aws s3 cp fortipam.raw s3://fortipam-doc #fortipam-doc is the S3 bucket created earlier
Creating a snapshot from the RAW file in the AWS S3 bucket
To create a snapshot from the RAW file in the AWS S3 bucket:
- Create the
vmimportrole:- Create a JSON file
trust-policy.jsonwith the following content:$ vim trust-policy.json { "Version": "2012-10-17", "Statement": [ { "Effect": "Allow", "Principal":{"Service":"vmie.amazonaws.com" }, "Action": "sts:AssumeRole", "Condition": { "StringEquals":{ "sts:Externalid": "vmimport" } } } ] } - Using the following AWS CLI command, create the
vmimportrole:$ aws iam create-role --role-name vmimport --assume-role-policy-document file://trust-policy.json
- Create a JSON file
- Assign a policy for the S3 bucket:
- Create a JSON file
role-policy.jsonwith the following content:$ vim role-policy.json { "Version":"2012-10-17", "Statement":[ { "Effect": "Allow", "Action": [ "s3:GetBucketLocation", "s3:GetObject", "s3:ListBucket" ], "Resource": [ "arn:aws:s3:::disk-image-file-bucket", "arn:aws:s3:::disk-image-file-bucket/*" ] }, { "Effect": "Allow", "Action": [ "s3:GetBucketLocation", "s3:GetObject", "s3:ListBucket", "s3:PutObject", "s3:GetBucketAcl" ], "Resource": [ "arn:aws:s3:::fortipam-doc", "arn:aws:s3:::fortipam-doc/*" ] }, { "Effect": "Allow", "Action": [ "ec2:ModifySnapshotAttribute", "ec2:CopySnapshot", "ec2:RegisterImage", "ec2:Describe*" ], "Resource": "*" } ] } - Using the following AWS CLI command, assign a policy for the S3 bucket:
$ aws iam put-role-policy --role-name vmimport --policy-name vmimport --policy-document file://role-policy.json
- Create a JSON file
- Create a JSON file
container.jsonwith the following content:$ vim container.json { "Description": "fortipam image", "Format": "raw", "UserBucket": { "S3Bucket": "fortipam-doc", "S3Key": "fortipam.raw" } } - Using the following AWS CLI command, import the FortiPAM image:
 $ aws ec2 import-snapshot --description "fortipam" --disk-container file://container.json
 {
  "Description": "fortipam",
  "ImportTaskId": "import-snap-0b087779796478a51",
  "SnapshotTaskDetail": {
    "Description": "fortipam",
    "DiskImageSize": 0.0,
    "Progress": "0",
    "Status": "active",
    "StatusMessage": "pending",
    "UserBucket": {
      "S3Bucket": "fortipam-doc",
      "S3Key": "fortipam.raw"
    }
   },
   "Tags": []
  }
Importing the image may take some time. You can use the following AWS CLI command to monitor the progress of import:
$ aws ec2 describe-import-snapshot-tasks --import-task-ids import-snap-0b087779796478a51
{
 "ImportSnapshotTasks": [
   {
    "Description": "fortipam",
    "ImportTaskId": "import-snap-0b087779796478a51",
    "SnapshotTaskDetail": {
      "Description": "fortipam",
      "DiskImageSize": 2147483648.0,
      "Format": "RAW",
      "SnapshotId": "snap-0bda3d6b6d21f122c",
      "Status": "completed",
      "UserBucket": {
        "S3Bucket": "fortipam-doc",
        "S3Key": "fortipam.raw"
      }
    },
     "Tags": []
    }
   ]
  }
Creating AMI from the snapshot
To create AMI from snapshot:
- In the AWS console, from the Services menu, go to Compute > EC2.

- From the menu, go to Elastic Block Store > Snapshots and look for the snapshot ID.
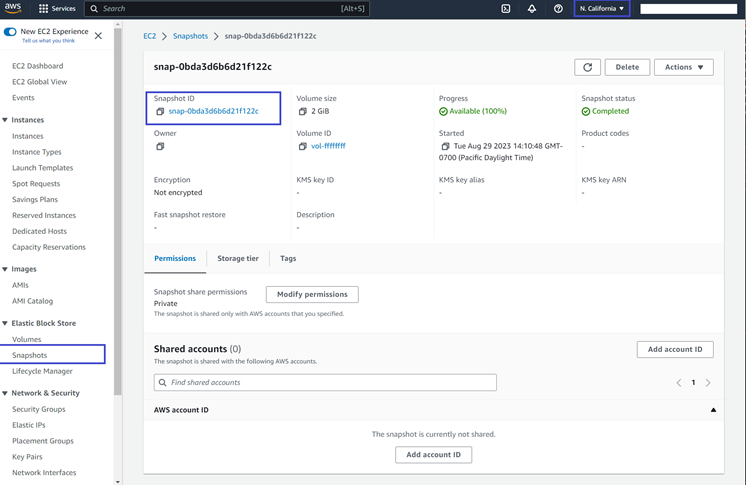

Alternatively, the
describe-import-snapshot-taskscommand used to Monitor the progress of FortiPAM image import can be used find the snapshot ID. - Using the following AWS CLI command, create a FortiPAM image:
$ aws ec2 register-image \
  --region us-west-1 \
  --name fortipam-uefi-tpm \
  --boot-mode uefi \
  --architecture x86_64 \
  --root-device-name /dev/sda1 \
  --block-device-mappings DeviceName=/dev/sda1,Ebs={SnapshotId= snap-0bda3d6b6d21f122c} \
  --tpm-support v2.0 \
  --ena-support
Configuring a security group
To configure a security group
- In the AWS console, search VPC and select VPC from the search result.
The VPC dashboard opens.

- In the VPC dashboard, select Security Groups.
The Security Groups window opens.
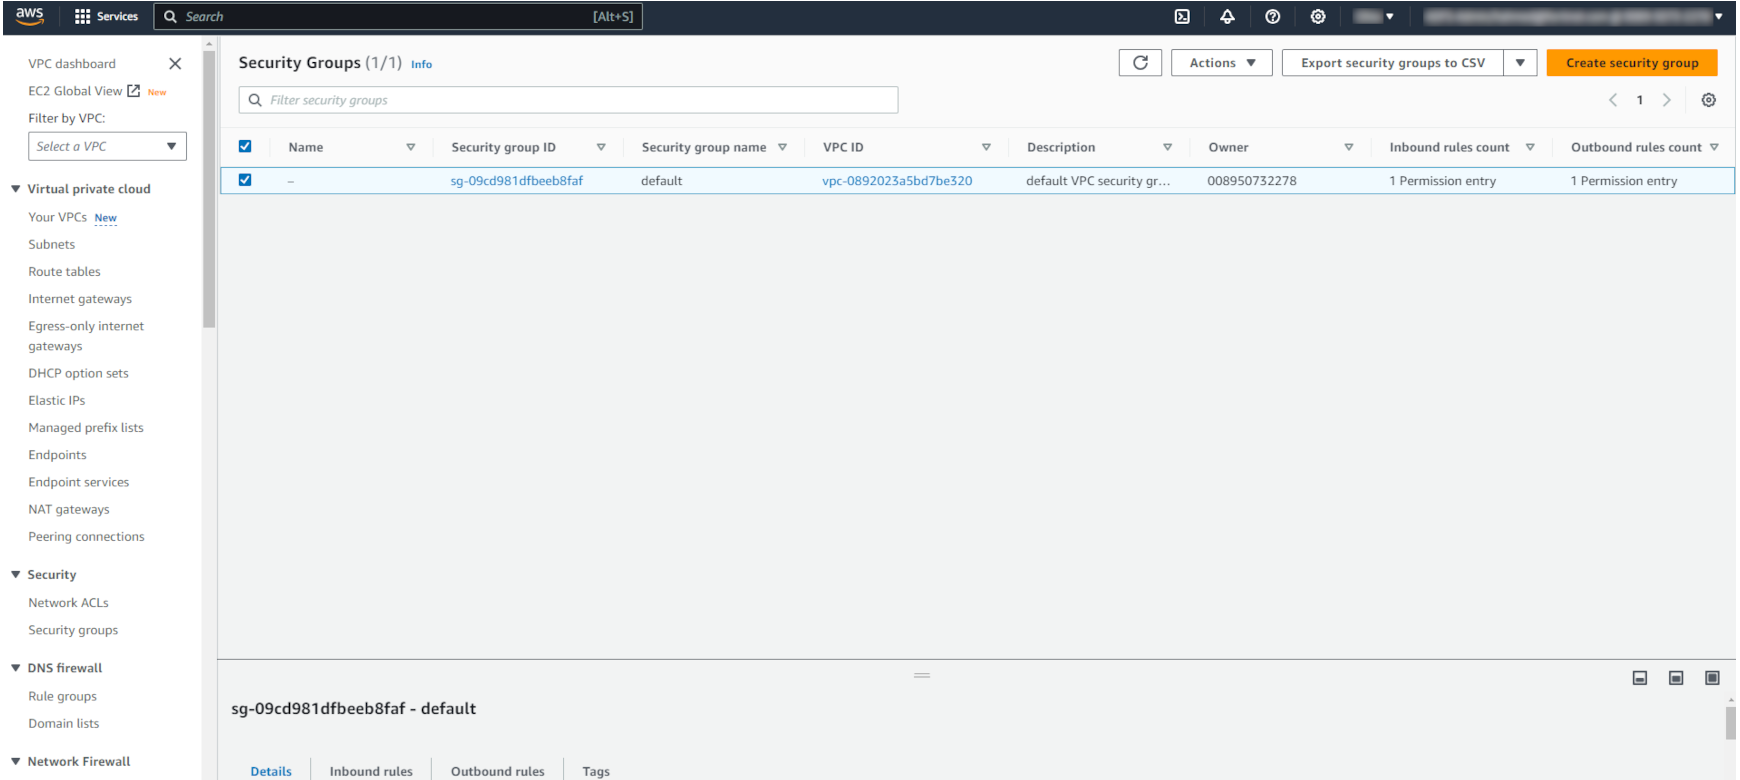
- In the Security Groups window, select Create security group.
The Create security group page opens.

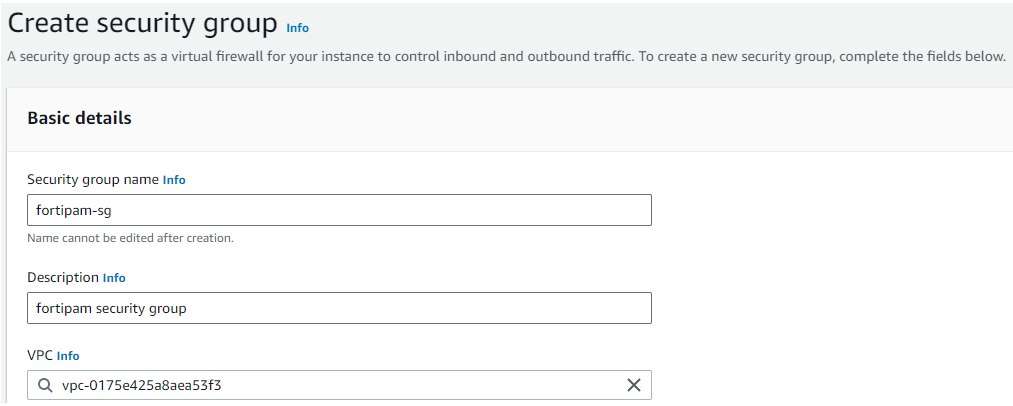
- In the Basic details pane, enter the following information:
Security group name
The name of the security group.
Note: The name of the group cannot be changed after creation.
Description
The description for the security group.
VPC
Search and select the VPC in which to create the security group.
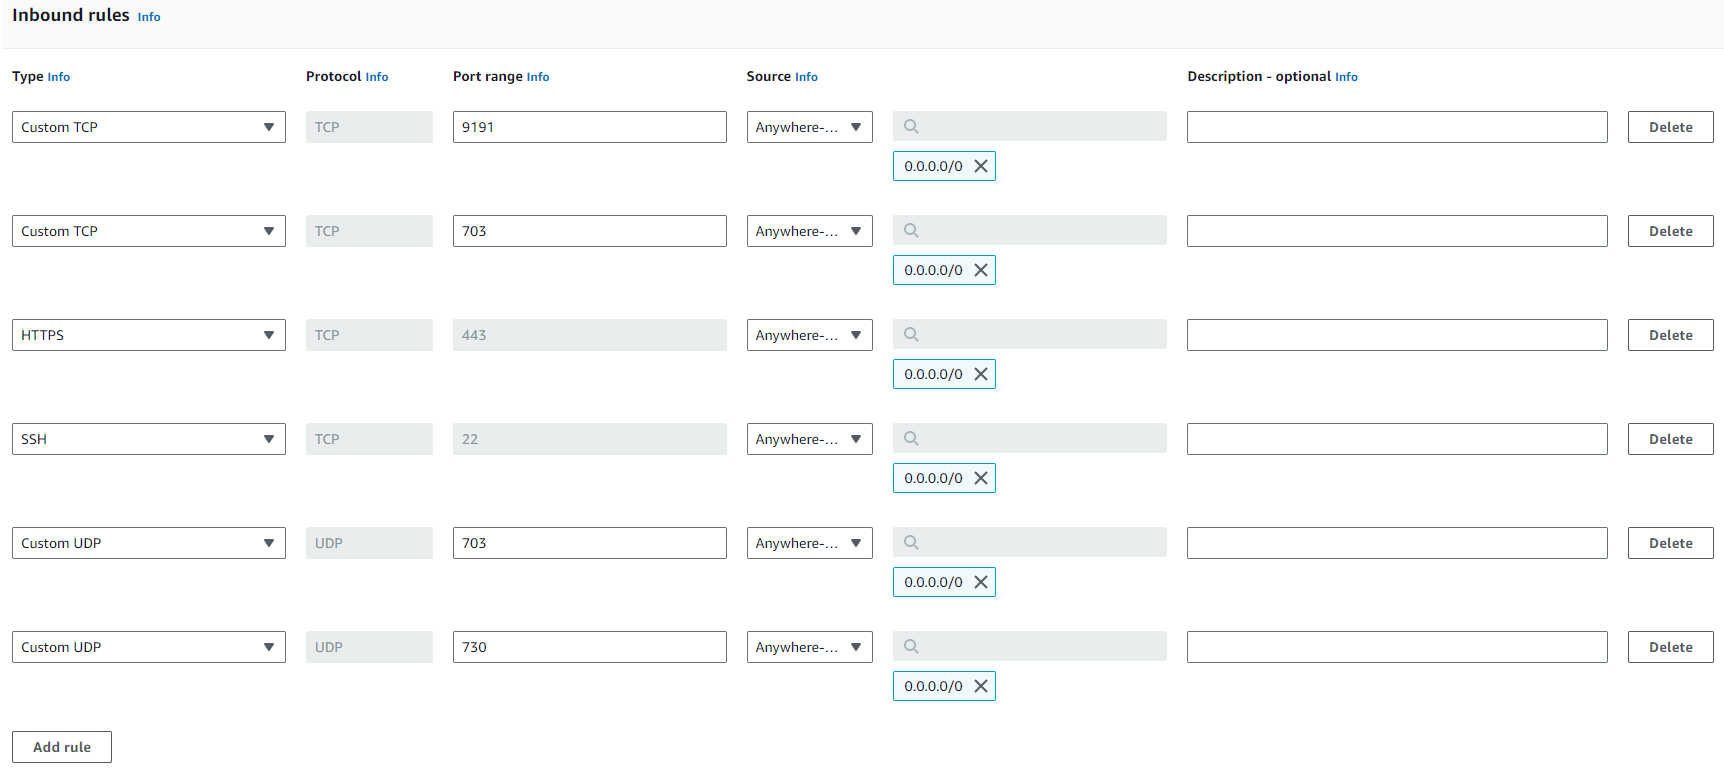
- In the Inbound rules pane, add the following inbound rules:
- Use the default outbound rule that allows all the traffic.
- Click Create security group.
Launching the FortiPAM instance from AMI
To launch the FortiPAM instance:
- In the AWS console, from the Services menu, go to Compute > EC2.
The EC2 Dashboard opens.

- Go to Images > AMIs and select Launch instance from AMI.
The Launch an instance page opens.
- In the Name and tags pane, enter the name for the instance.
- Ensure that the correct AMI is selected in the Application and OS Images (Amazon Machine Image) pane.

- In the Instance type pane, select m5.xlarge.

You must choose an instance type that supports EC2 Serial Console.
- In the Key pair (login) pane, from the dropdown, select Proceed without a key pair (Not recommended).
- In the Network settings pane:
- In Firewall (security groups), select Select existing security group.
- From the Common security groups dropdown, select the security group created in Configuring a security group.
- Optionally, click Edit in Network settings to add more interfaces and choose a subnet.
- In Configure storage pane:
- In the field for root volume, enter
2(in GB). - Select Add new volume, and in the field, enter
300(in GB) to add a new volume for the log. - Select Add new volume and in the field enter
1024(in GB) to add a new volume for video.
- In the field for root volume, enter
- Click Launch instance.
Initial configuration
- In the AWS console, search VPC and select VPC from the search result.
The VPC dashboard opens.
- In Virtual private cloud on the left, select Elastic IPs.
The Elastic IP addresses window opens.
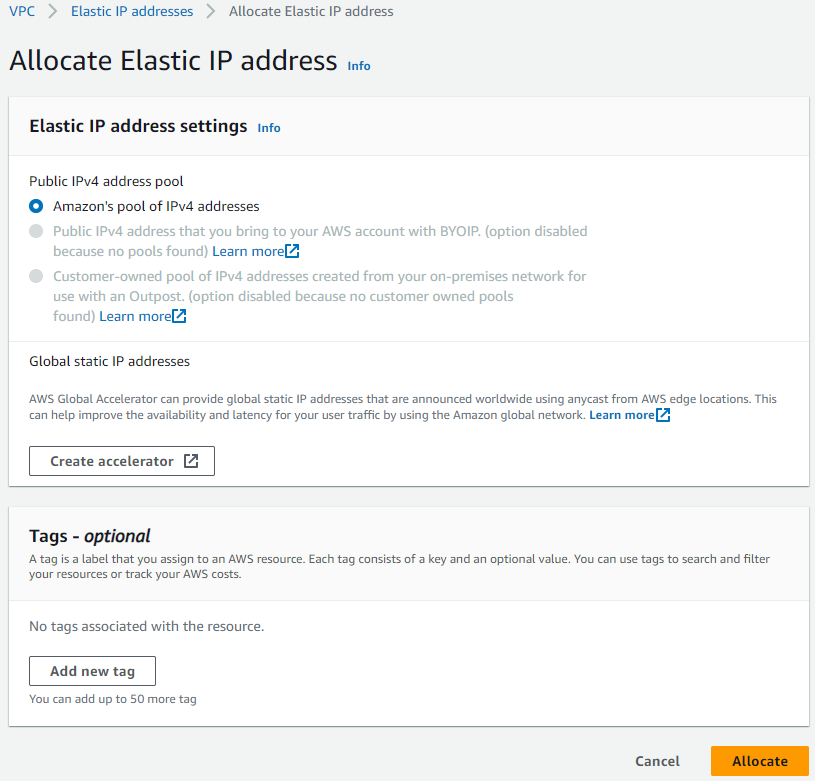
- In the Elastic IP addresses window, click Allocate to create a new public IP address.
- Select an IP address from the elastic IP addresses list, and from the Actions dropdown, select Associate Elastic IP address.
The Associate Elastic IP address page opens.
- In Resource type, select Network interface.
- In the Network interface dropdown, select a network interface.
- In the Private IP address dropdown, select a private IP address.

- Click Associate.
- In the AWS console, from the Services menu, go to Compute > EC2.
- In the EC2 Dashboard, go to Instances > Instances, select the FortiPAM instance from the list, and then select Connect.
- From the EC2 serial console tab, click Connect.

- Log in as the administrator with the AWS instance ID password.
- FortiPAM asks you to change your password. Enter a new password. Enter the password again to confirm.

- Use the following FortiPAM CLI commands to configure the port1, change mode from DHCP to static and set the IP address to the same as the private IP address in steps 4 to 8:
You can skip this step if FortiPAM is in standalone mode.
 config system interface
  edit "port1"
   set mode static #by default, set as dhcp
   set ip 172.31.100.15/24 #set to the private IP address assigned by AWS in step 7
  next
 end
The IP address set here is automatically copied to VIP.
- Use the following FortiPAM CLI commands to configure a static route if the interface is configured as static mode:
config router static
 edit 1
  set gateway 172.31.100.1
  set device port1
 next
end
- Optionally, use the following command to verify that you can access the public network:
execute ping update.fortiguard.net
You should receive an echo reply packet similar to the following:

Licensing
To successfully license FortiPAM:
-
Download the license file (
.lic), see Registering and downloading your license. - Upload the license file from the public IP address using SCP, see Uploading the license file using SCP.
-
After the boot up, the license status changes to valid.
You can check the license status using the following CLI command:
get system status

- Optional- Customize VIP if default VIP is not preferred:
 config firewall vip
  edit "fortipam_vip"
   set extip 172.31.100.15 #external visible virtual IP address
  next
 end
- You can now use your FortiPAM-VM deployed on AWS.
On a web browser, go to
https://<Public IP>to access the FortiPAM-VM GUI. This is the same IP address set up in step 4 above.