ZTNA automatic login using Microsoft Entra ID
When a user is logged in to an Entra ID domain on an endpoint then attempts to access zero trust network access (ZTNA) TCP-forwarding traffic, FortiClient automatically authenticates with the FortiGate using the Entra ID credentials. This simplifies the user experience by eliminating the need for manual authenticate.
This feature requires FortiOS 7.6.1 or a later version.
The following instructions assume that you have configured a FortiClient enterprise application in the Entra ID portal.
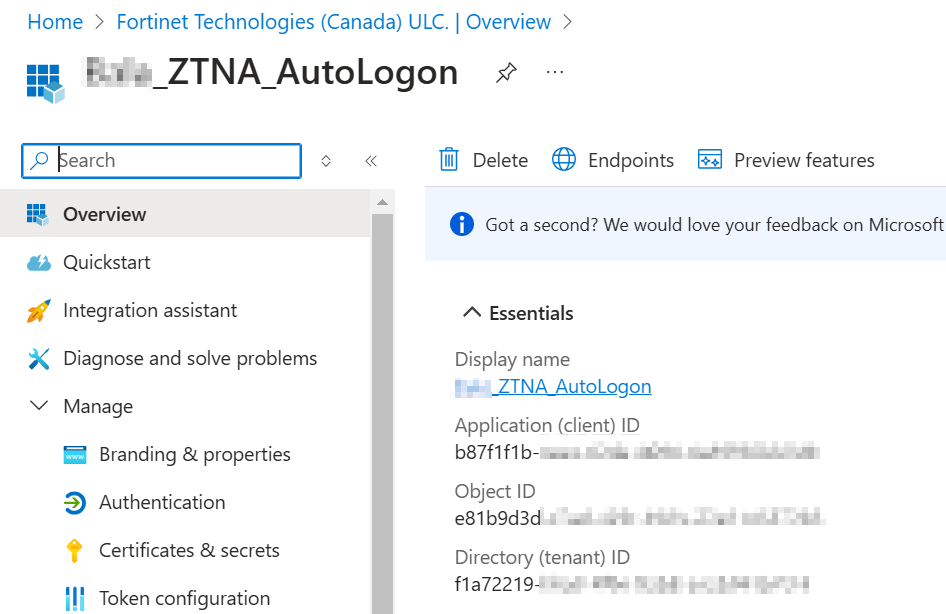
In this example, the application has the following values which you configure in the FortiClient ZTNA Destinations profile:
|
Entra ID portal field |
Corresponding FortiClient XML profile element |
Value |
|---|---|---|
|
Application (client) ID |
<client_id> |
b87f1f1b... |
|
Directory (tenant) ID |
<tenant_name> |
f1a72219... |
To configure ZTNA automatic login using Entra ID:
- In FortiOS, run the following commands to configure support for this feature. Lines bolded in the CLI sample highlight key commands to support this feature:
config user external-identity-provider edit "eip1" set type ms-graph set version v1.0 next end config user group edit "Autologon" set member "eip1" next end config authentication scheme edit "Autologon" set method entra-sso set external-idp "eip1" next end config authentication rule edit "Auth" set srcintf "port1" set srcaddr "all" set ip-based disable set sso-auth-method "Autologon" set web-auth-cookie enable next end - In EMS, configure support for this feature:
- Go to Endpoint Profiles > ZTNA Destinations.
- Create a new profile or edit an existing one.
- Enable Enable Azure Auto Login and specify the tenant name and client ID of the application used to connect with EMS that you collected from the Azure management console.
- Configure other options as needed. See ZTNA Destinations for more details.
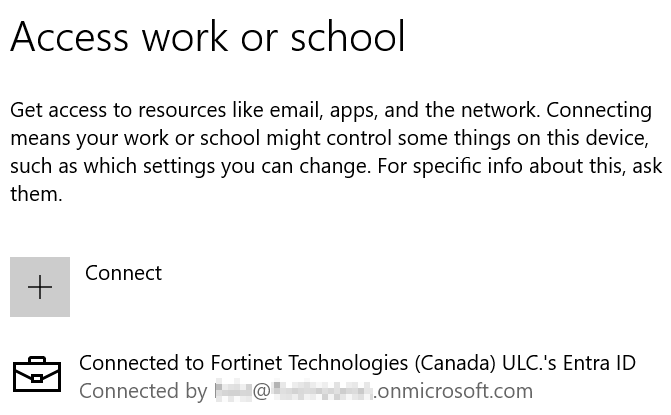
- Connect the endpoint to the Entra ID domain:
- Go to Settings > Access work or school > Join this device to Microsoft Entra ID.
- Log in with your Entra ID credentials.
- Confirm that the endpoint connected successfully.
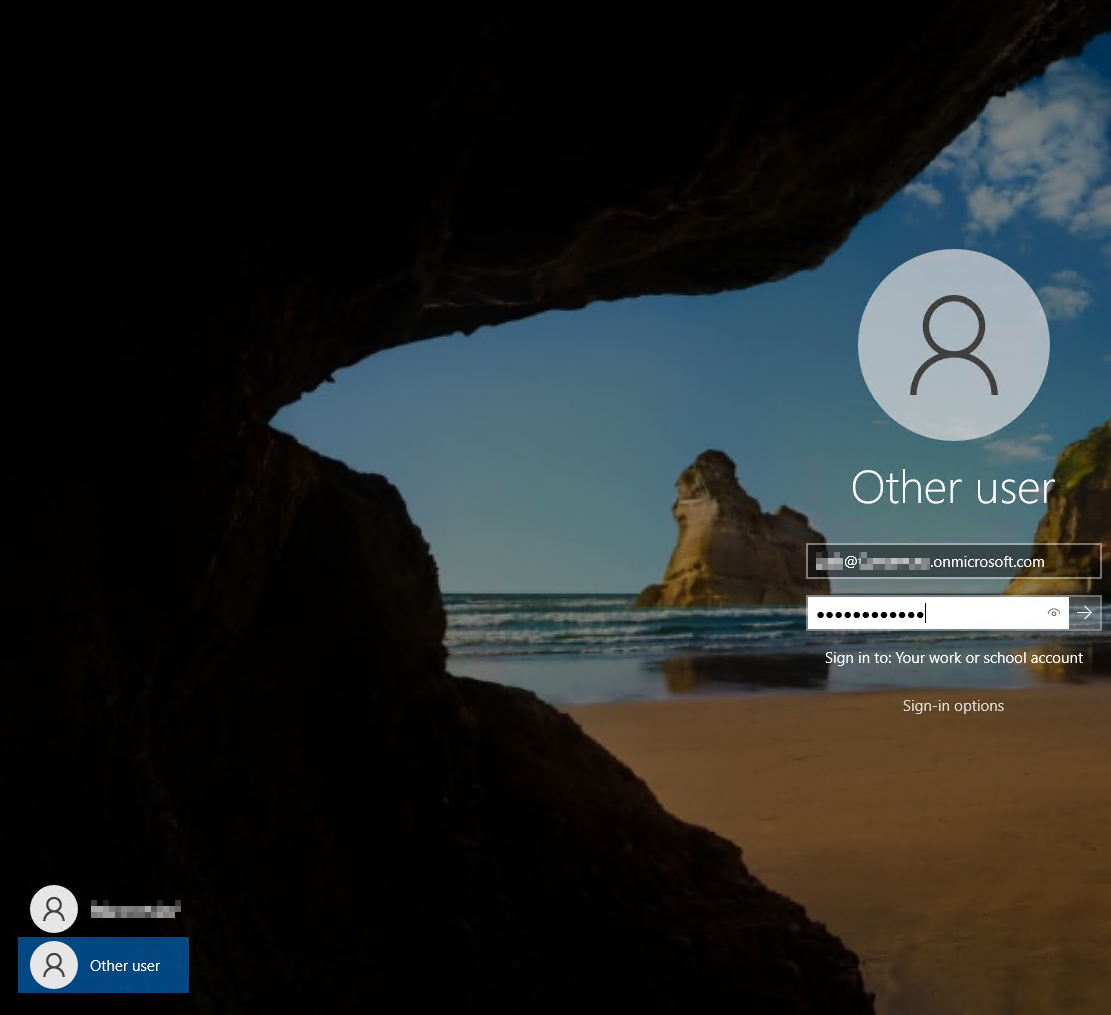
- Log out, then log in to Windows using the Entra ID credentials.
- Connect FortiClient to EMS.
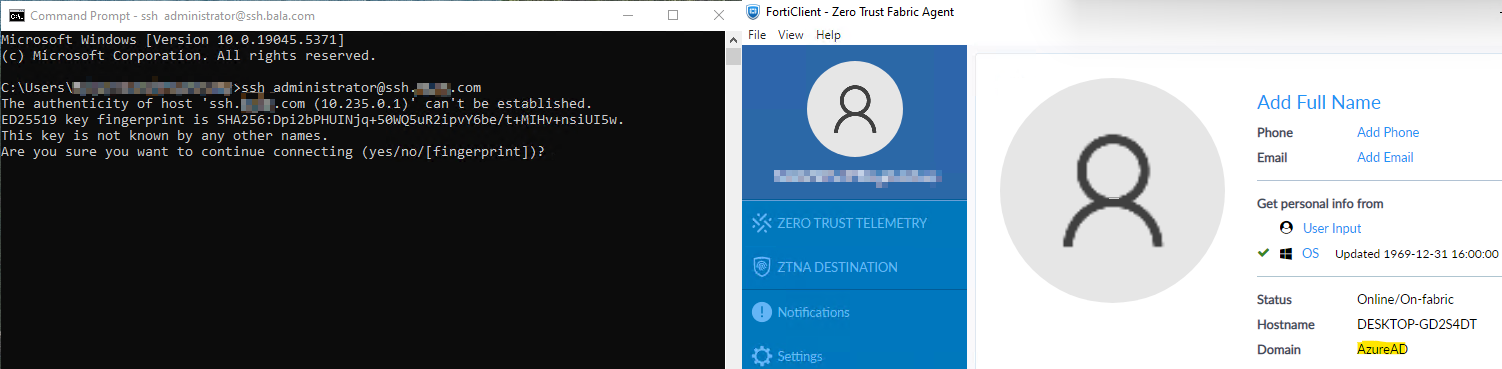
- Click the avatar. In the Domain field, confirm that the endpoint is joined to Entra ID (previously known as Azure Active Directory).
- Go to the ZTNA Destination tab to confirm that FortiClient received the desired ZTNA Destinations profile from EMS.
- Attempt to access a ZTNA destination. In this example, the user attempts to access an SSH TCP forwarding destination. The user can access the protected resource without authentication since FortiClient automatically authenticated with the FortiGate using the provided Entra ID credentials.