FortiADC Integration with One-Click GSLB
Perform the following steps to configure FortiGSLB. This section is split into two parts:
- New customers—for customers who are new to FortiGSLB.
- Returning customers—assumes you already know how to enable FortiGSLB.
New customers
Follow the steps to set up FortiGSLB for the first time.
Link the FortiADC to FortiGSLB
|
|
The FortiADC device must be registered. Check this under FortiADC > System > FortiGuard > Support Contract > Registration. |
- Enter fortiGSLB using your FortiCare account.
- Go into your individual FortiADC > Global > System > Settings > FortiGSLB. (For FortiADC releases 6.0 and above, go to FortiADC > Global > Security Fabrics > FortiGSLB) Click edit on the far right. Here you will connect FortiADC to FortiGSLB.
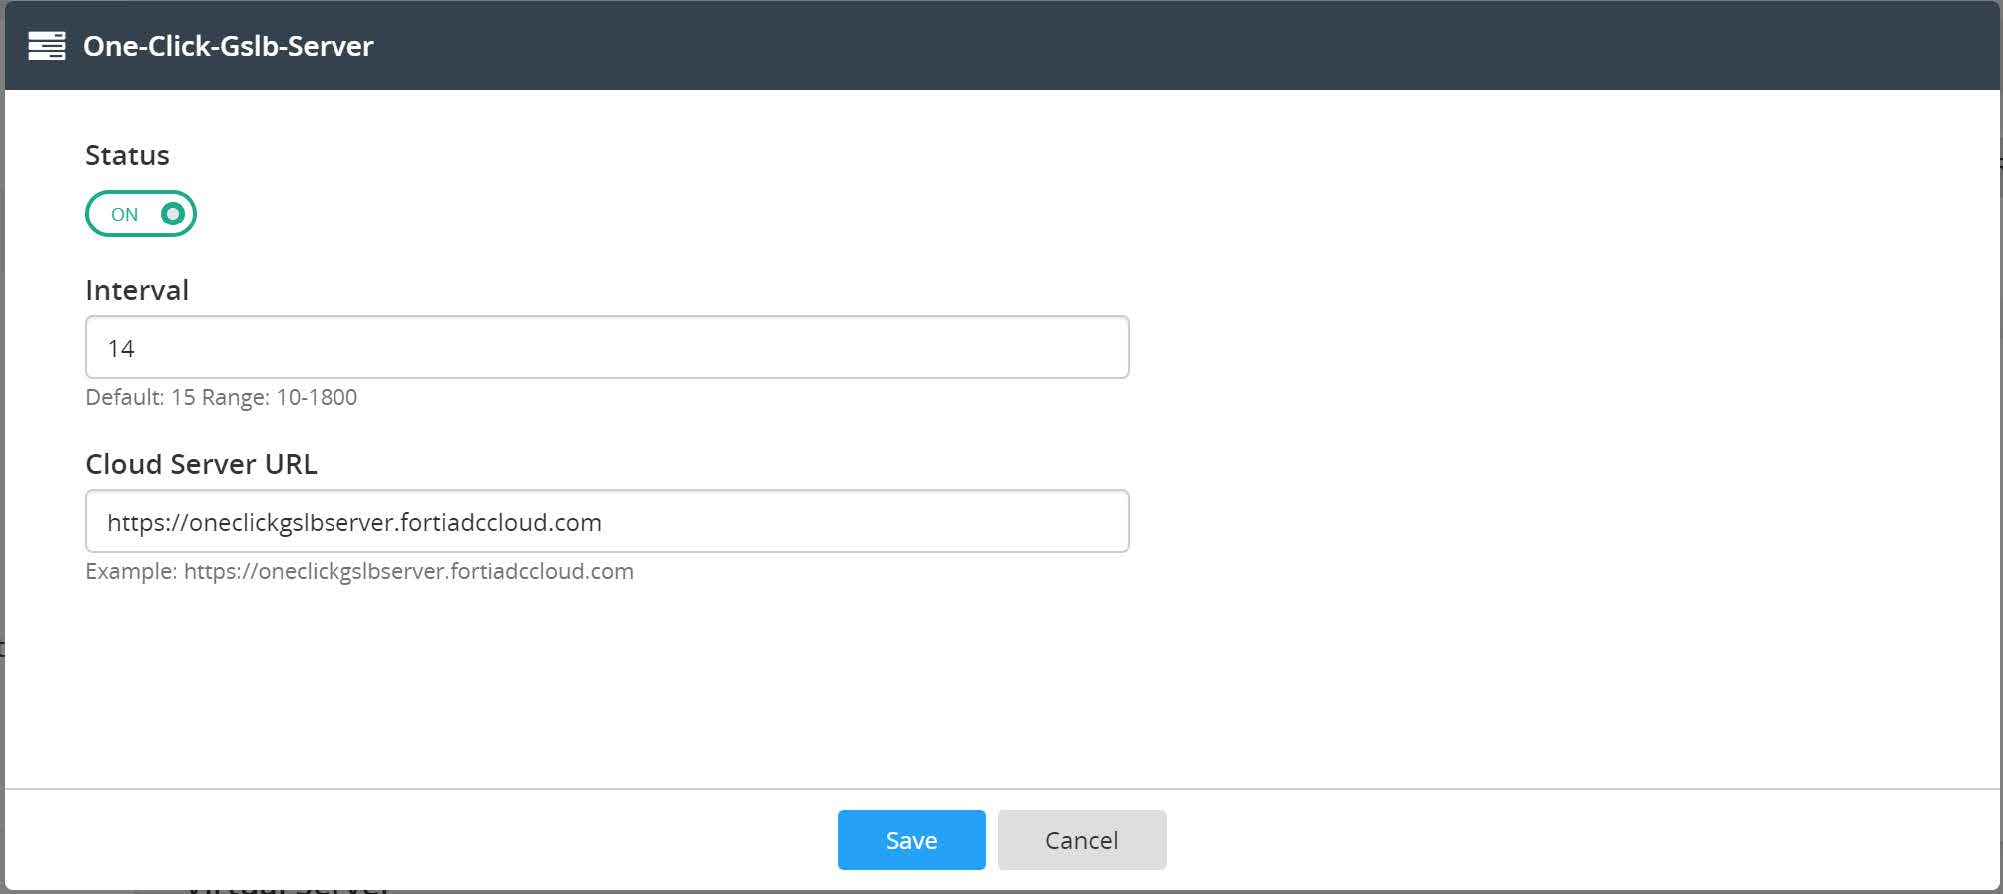
- Configure basic settings.
- Set status to on - on/off (enable/disable GSLB service)
- Set the interval to the default (15) - How often the FortiADC will attempt to connect to the One-Click Cloud Server.
- Set the Cloud Server URL to the default (https://1click.fortigslb.com) - URL of the One-Click Cloud Server.
- Click Save.


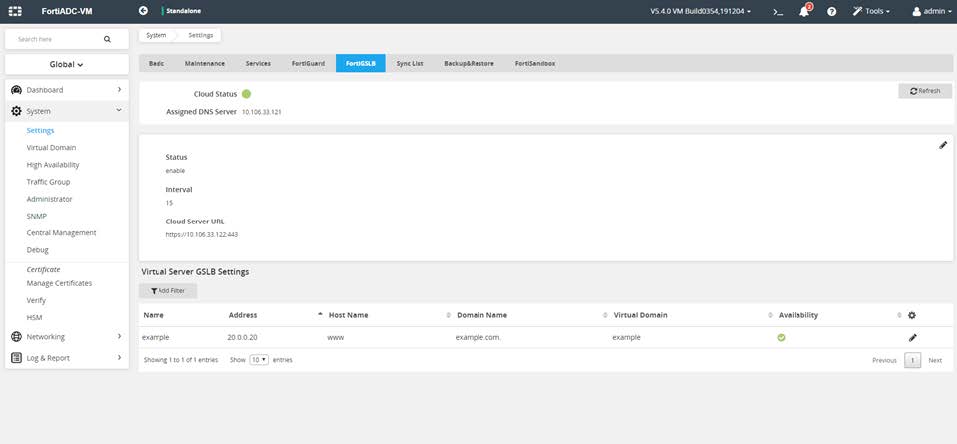
Ensure the Cloud Status on the top is green. Green means the connection has succeeded, whereas red indicates failure. The Assigned DNS Server shows the DNS server address. "Not assigned" means the DNS Server is not assigned.
If it is red, moving the cursor onto it will result in an error message showing up.
There may be some lag time. Refresh if necessary.
- Return to the one-click server in FortiGSLB, leaving the FortiADC. Refresh to see if your Organization now shows up on the Management Console dashboard. The default organization is Default. For information on the current dashboard, see the Overview section.
- Go to FortiADC > root > Server Load Balance > Virtual Server. Create a virtual server with FortiGSLB enabled and set the Host/Domain name. Go to General and enable the One Click GSLB Server. This will reveal the Host Name and Domain Name.

- After you save, the virtual server's information will show in Global > System > Settings > FortiGSLB (or Global > Security Fabric > Fabric Connectors > FortiGSLB for FortiADC releases 6.0 and above). Your virtual servers should show up at the bottom under Virtual Server. If configured correctly, the FortiADC will send the IP addresses, host name and domain name to FortiGSLB Cloud, which will then load-balance with these virtual servers.

If over 50 virtual servers have enabled FortiGSLB, we recommend using at least 30 seconds as FortiGSLB's interval.
See the virtual servers in GSLB
- Go to FortiGSLB and click into individual organization. In this example we are selecting the default organization, "default". We will see the virtual servers in GSLB cloud.
- In the individual organization, go to Fabric Connectors. The name is the FortiADC serial number. The type is FortiADC. The data center is the default or the first data center you already configured in Cloud. Click edit and you will see your virtual servers. Note: The load balancing may take a little while to start when the "green" is lit in the FortiADC.
- In Profiles >Pool you will see the automatically generated virtual server pools that the Cloud has done for you. Click edit on the far right to see the IP addresses of the virtual servers. They are pooled according to your PREFERRED method. See the Pool section for more information.
Returning customers
This section assumes that you have already enabled FortiGSLB and know how to create new virtual servers with FortiGSLB enabled.
To add more virtual servers into FortiGSLB and support certain services:
- Go to FortiADC > Server Load Balance > Virtual Server > edit Virtual Server > General > Enable One Click GSLB Server and enter Host/Domain Name.

- After you save, all the virtual servers that enabled FortiGSLB will show up in the list.

Further steps for modifications:
If you want to modify FQDN host/domain name or disable Virtual Server FortiGSLB function, there are two ways.
Method 1
Go to FortiGSLB to edit the virtual server that has already enabled FortiGSLB.
From FortiGSLB 2.0.0, FortiADC supports editing the virtual server directly inside the FortiADC FortiGSLB module.
You can edit the Virtual Server and modify One Click GSLB-related parameters. To do so, disable One Click GSLB server. The virtual server will disappear from FortiGSLB list afterwards.
Method 2
Go to FortiADC > Server Load Balance > Virtual Server > edit Virtual Server > General. You can modify the FQDN host/domain name or disable Virtual Server FortiGSLB function here.
How to transform FortiADC GSLB to FortiGSLB
| Data Center |
Global Load Balance > Global Object > Data Center |
Profiles > Data Center |
| Server |
Global Load Balance > Global Object > Server |
Fabric Connectors |
| Location |
Global Load Balance > FQDN Settings > Location List |
Profiles > Location |
| Virtual Server Pool |
Global Load Balance > FQDN Settings > Virtual Server Pool |
Profiles > Pool |
| FQDN |
Global Load Balance > FQDN Settings > Host |
GSLB Services |
| Zone |
Global Load Balance > Zone Tools > Zone |
DNS Services |
| Health Check |
Shared Resources > Health Check > Health Check |
Profiles > Health Check |
How to add an FQDN with FortiADC
Perform the following steps to add an FQDN with FortiADC.
- Create FQDN in GSLB services.
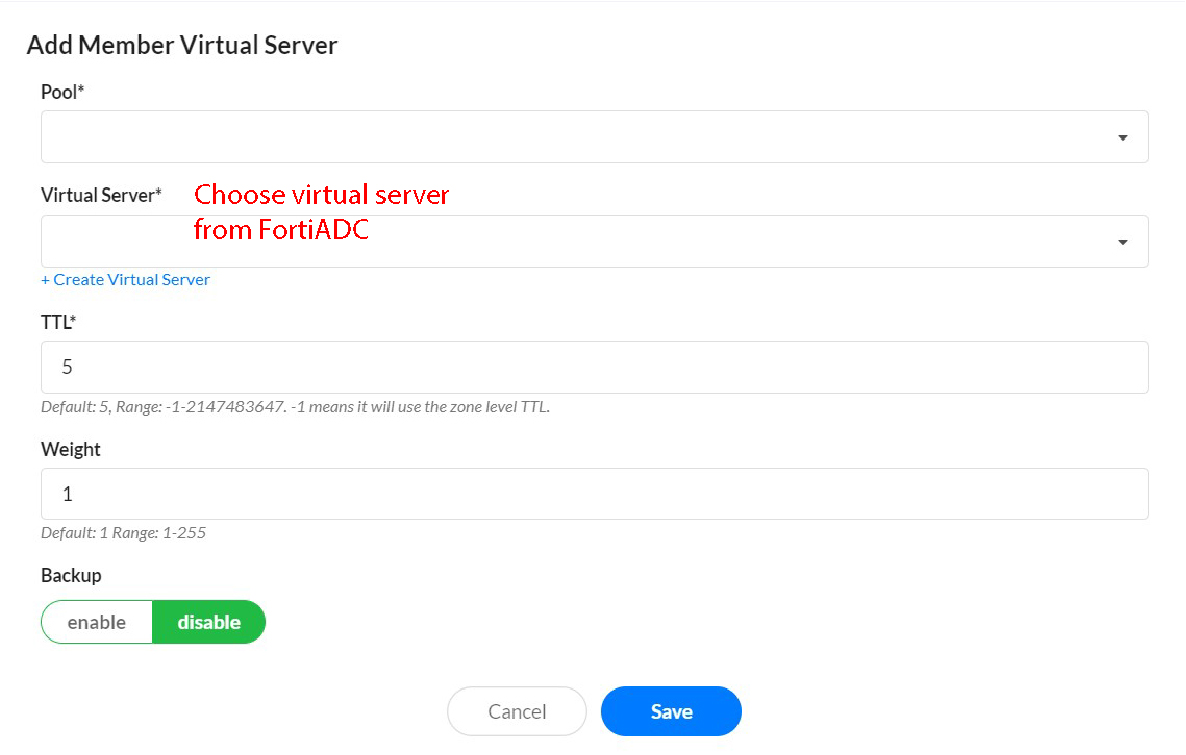
- Create FQDN member and create new Virtual Server Pool. Then choose the virtual server from FortiADC into Pool. The virtual server from FortiADC will now work in GSLB services.
- FortiADC virtual servers are synced to Cloud, so choose the correct virtual server when adding it into Pool.