


Create or edit a schedule
When you add security policies on a FortiProxy unit, those policies are always on, policing the traffic through the device. Schedules control when policies are in effect.
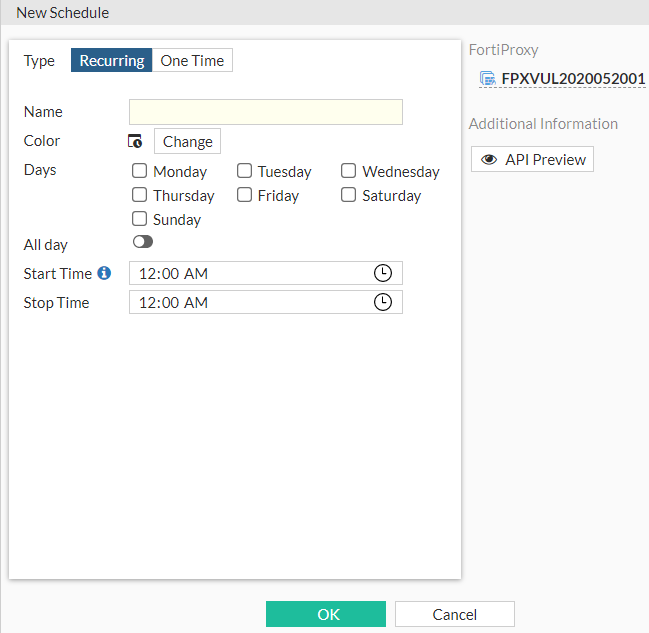
Select Create New > Scheduleto open the New Schedule window.
To open the Edit Schedule window, select a schedule and then click Edit.
Configure the following settings in the New Schedule window or the Edit Schedule window and then click OK:
|
Type |
Select Recurring or One- Time. |
|
Name |
Enter a name for the schedule. |
|
Color |
Click Change to choose a color for the icon. |
|
Days |
If you selected a recurring schedule, select the days of the week when the schedule will be active. |
|
All Day |
If you selected a recurring schedule and the scheduled time is the whole day, enable All Day. If the schedule is for specific times during the day, disable All Day. |
|
Start Date |
If you select a one-time schedule, select the year, month, and day that the schedule will start. The start date must be earlier than the stop date. |
|
Start Time |
If you select a recurring schedule and disable All Day of if you select a one-time schedule, select the start time for the schedule. |
|
End Date |
If you select a one-time schedule, select the year, month, and day that the schedule will stop. The end date must be later than the start date. |
|
Stop Time |
If you select a recurring schedule and disable All Day of if you select a one-time schedule, select the stop time for the schedule. If the stop time is set earlier than the start time, the stop time will be during the next day. If the start time is equal to the stop time, the schedule will run for 24 hours. |
|
Pre-expiration event log |
If you select a one-time schedule, enable this option to generate an event log before the schedule expires and then enter the number of days before the expiration that the event log will be generated, from 1 to 100. |
|
Number of days before |
If you select a one-time schedule, enter the number of days before the schedule expires to generate an event log. The range is 1-100 days). |
|
API Preview |
The API Preview allows you to view all REST API requests being used by the page. You can make changes on the page that are reflected in the API request preview. This feature is not available if the user is logged in as an administrator that has read-only GUI permissions. |
To use the API Preview:
- Click API Preview. The API Preview pane opens, and the values for the fields are visible (data). If a new object is being created, the POST request is shown.
- Enable Show modified changes only to show the modified changes instead of the full configuration in the preview.
- Click Copy to Clipboard to copy the JSON code shown on the preview screen to the clipboard.
- Click Close to leave the preview.