


Slack Notification action
To configure an automation stitch with a Slack Notification action, you first need to configure an incoming webhook in Slack. Then you can enter the webhook URL when you configure the Slack Notification action.
This example uses a Security Rating Summary trigger in the automation stitch with two Slack Notification actions with different notification messages. One message is a custom message, and the other is for the Security Rating Summary log with a 90 second delay.
To create an Incoming Webhook in Slack:
-
Go to the Slack website, and create a workspace.
-
Create a Slack application for the workspace.
-
Add an Incoming Webhook to a channel in the workspace (see Sending messages using Incoming Webhooks for more details).
-
Activate the Incoming Webhook, and copy the Webhook URL to the clipboard.
To configure an automation stitch with Slack Notification actions in the GUI:
-
Go to Security Fabric > Automation, select the Stitch tab, and click Create New.
-
Enter the stitch name.
-
Configure the Security Rating Summary trigger:
-
Click Add Trigger.
-
Click Create and select Security Rating Summary.
-
Name
auto-rating
Report
Security Posture
Enter the following:
-
Click OK.
-
Select the trigger in the list and click Apply.
-
-
Configure the first Slack Notification action:
-
Click Add Action.
-
Click Create and select Slack Notification.
-
Enter the following:
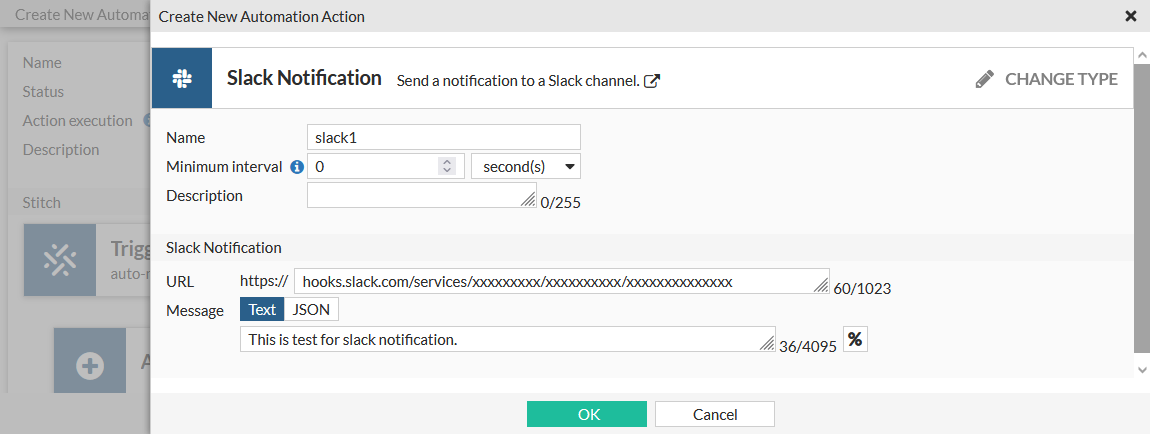
Name
slack1
URL
Paste the webhook URL from the clipboard
Message
Text
Message text
This is test for slack notification.
-
Click OK.
-
Select the action in the list and click Apply.
-
-
Configure the second Slack Notification action:
-
Click Add Action.
-
Click Create and select Slack Notification.
-
Enter the following:
Name
slack2
URL
Paste the webhook URL from the clipboard
Message
Text
Message text
%%log%%
-
Click OK.
-
Select the action in the list and click Apply.
-
Click the Add delay located between both actions. Enter 90 and click OK.

-
-
Click OK.
-
Trigger the automation stitch:
-
Right-click the automation stitch and select Test Automation Stitch.
After the Security Rating report is finished, the automation is triggered and an event log is created by the FortiProxy. The two notifications are sent to the Slack channel.
-
To configure an automation stitch with Slack Notification actions in the CLI:
-
Configure the automation trigger:
config system automation-trigger edit "auto-rating" set event-type security-rating-summary next end -
Configure the automation actions:
config system automation-action edit "slack1" set action-type slack-notification set message "This is test for slack notification." set uri "hooks.slack.com/services/xxxxxxxxx/xxxxxxxxx/xxxxxxxxxxxxxxxxxxxxxxxx" next edit "slack2" set action-type slack-notification set uri "hooks.slack.com/services/xxxxxxxxx/xxxxxxxxx/xxxxxxxxxxxxxxxxxxxxxxxx" next end -
Configure the automation stitch:
config system automation-stitch edit "auto_rating" set trigger "auto-rating" config actions edit 1 set action "slack1" set required enable next edit 2 set action "slack2" set delay 90 set required enable next end next end -
Verify that the automation action was triggered:
# diagnose test application autod 3
stitch: auto-rating
    local hit: 1 relayed to: 0 relayed from: 0
    last trigger:Tue Sep 13 11:34:56 2022
    last relay:
    actions:
        slack1:
            done: 1 relayed to: 0 relayed from: 0
            last trigger:Tue Sep 13 11:34:56 2022
            last relay:
        slack2:
            done: 1 relayed to: 0 relayed from: 0
            last trigger:Tue Sep 13 11:34:56 2022
            last relay: