


Create or edit an ICAP profile
Select Create New to open the New ICAP Profile window.
To open the Edit ICAP Profile window, select an ICAP profile and then click Edit.
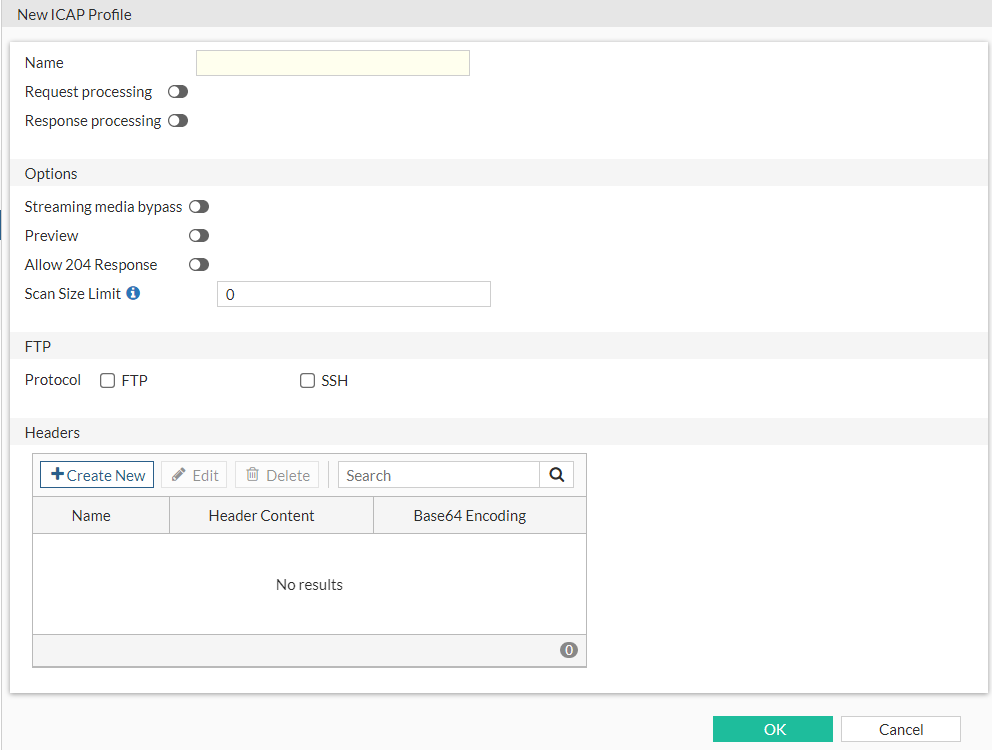
Configure the following settings in the New ICAP Profile window or Edit ICAP Profile window and then click OK:
|
Name |
Specify a name for the ICAP profile. After you create an ICAP profile, you cannot change the name. |
|
Request Processing |
Enable or disable request processing. When enabled, you can further configure the following options:
|
|
Response Processing |
Enable or disable response processing. When enabled, you can further configure the following options:
|
|
Streaming Media Bypass |
Specify whether to bypass offloading of streaming media to the ICAP server. When enabled, streaming media is not offloaded to the ICAP server. |
|
Preview |
Enable preview of data to the ICAP server. When enabled, you can further configure the Preview Data Length, which is the preview data length to be sent to the ICAP server. |
|
Allow 204 Response |
Specify whether to allow 204 response. When enabled, you can further configure the 204 Size Limit. |
|
Scan Size Limit 7.2.4 |
Specify the ICAP server scan size limit for a single request within the range of 0-4096 (MB). The default is 0 MB, which means unlimited. |
|
Protocol |
Select the FTP protocol: FTP or SSH. You can select both. When a protocol is enabled, you can further configure the following options:
|
|
Headers |
View existing ICAP headers or create a new ICAP header using the Create New button. When creating a new ICAP header, specify the following options in the Create Header window:
|
TCP connection pool for connections to ICAP server
A TCP connection pool can maintain local-out TCP connections to the external ICAP server due to a backend update in the FortiProxy unit. TCP connections will not be terminated once data has been exchanged with the ICAP server, but instead are reused in the next ICAP session to maximize efficiency.
Use case
In this scenario, an ICAP profile is used as a UTM profile in an explicit web proxy policy, and a client visits web servers through this proxy policy.
After the WAD is initialized, when a HTTP request is sent from the client to the server through the FortiProxy unit with an ICAP profile applied to the matched proxy policy, a TCP connection is established between the FortiProxy unit and the ICAP server to exchange data.
When an ICAP session is finished, the TCP connection is kept in the WAD connection pool. When another ICAP session needs to be established, the WAD will check if there are any idle connections available in the connection pool. If an idle connection is available, it will be reused; otherwise, a new TCP connection is established for the ICAP session. This process can be checked in the WAD debug log.
ICAP server response extension headers
ICAP server responses can be configured to include X-Virus-ID, X-Infection-Found, and X-Violation-Found extension headers.
config icap local-server
    edit 1
        config icap-service
            edit 1
                set extension-headers {X-Virus-id X-Infection-Found X-Violation-Found}
            next
        end
    next
end
|
X-Virus-id |
Enable X-Virus-ID ICAP extension header. |
|
X-Infection-Found |
Enable X-Infection-Found ICAP extension header. |
|
X-Violation-Found |
Enable X-Violation-Found ICAP extension header. |
X-Scan-Progress-Interval header in the FortiProxy ICAP client
You can specify that the X-Scan-Progress-Interval header is used in the FortiProxy ICAP client and specify the scan progress interval value:
config icap profile
    edit <profile_name>
        set response {enable | disable}
        set response-server <name_of_ICAP_server>
        set response-path <HTTP_response_processing_service>
        set extension-feature scan-progress
        set scan-progress-interval <5-30 seconds (default = 10)>
    next
end
Timeout configuration for the FortiProxy ICAP client
You can configure the number of seconds that the ICAP client waits for a response from the ICAP server:
config icap profile
    edit <profile_name>
        set timeout <30-3600 seconds (default = 30)>
    next
end