


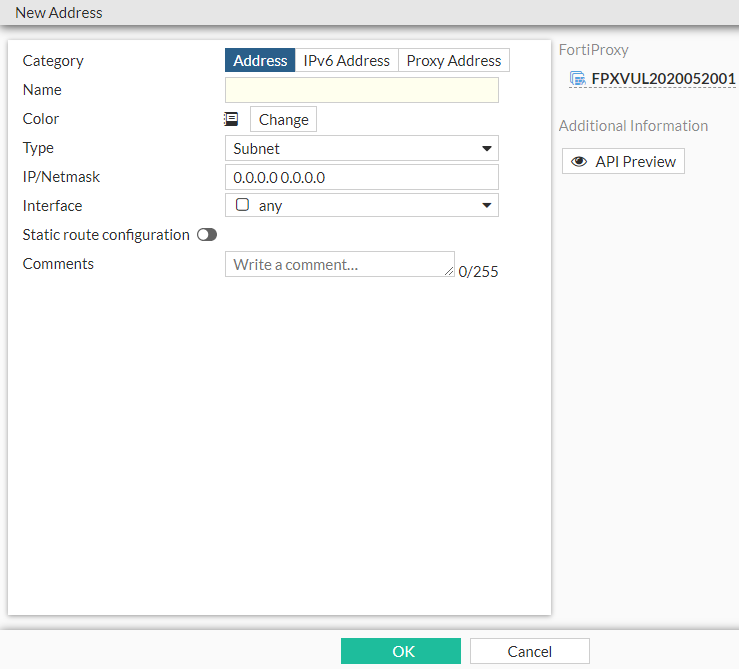
Create or edit an address
Select Create New > Address to open the New Address window.
To open the Edit Address window, select an address and then click Edit.
Configure the following settings in the New Address window or the Edit Address window and then click OK:
|
Category |
Select Address, IPv6 Address, or Proxy Address. |
|
Name |
Enter a name for the IPv4 address, IPv6 address, or proxy address. Addresses must have unique names. |
|
Color |
Select Change to choose a color for the icon. |
|
Type |
If you selected Address for the category, select one of the following:
If you selected IPv6 Address for the category, select one of the following:
If you selected Proxy Address for the category, select one of the following. Refer to Proxy address for more information about each proxy address type.
|
|
IP/Netmask |
If you selected Subnet as the IPv4 address type, enter the IP address and netmask. |
|
IP Range |
If you selected IP Range as the IPv4 address type or you selected IPv6 Range as the IPv6 address type, enter an IP address range separated by a hyphen. See Web cache policy address formats. |
|
FQDN |
If you selected FQDN as the IPv4 address type or IPv6 FQDN as the IPv6 address type, enter the fully qualified domain name. |
|
Country/Region |
If you selected Geography as the IPv4 address type or IPv6 Geography as the IPv6 address type, select the country or region. |
|
Sub Type |
If you selected Dynamic as the IPv4 address type, select ClearPass, Fabric Connector Address, FortiNAC Tag, FortiVoice Tag, Fortinet Single Sign-On (FSSO), or Switch Controller NAC Policy Tag. |
|
SPT (System Posture Token) |
If you selected ClearPass as the Sub Type, select Checkup, Healthy, Infected, Quarantine, Transient, or Unknown. |
|
SDN Connector |
If you selected Fabric Connector Address as the Sub Type or IPv6 Fabric Connector Address as the IPv6 address type, select an existing SDN connector or create a new one. See External Connectors. |
|
FSSO Group |
If you selected Fortinet Single Sign-On (FSSO) as the Sub Type, select an existing FSSO group or create a new one. See Create or edit a user group. |
|
MAC address |
If you selected Device (MAC Address) as the Sub Type or Type, enter the MAC address or range of MAC addresses. |
|
IPv6 Address |
If you selected IPv6 Subnet as the IPv6 address type, enter the IPv6 address. |
|
IPv6 Address Template |
If you selected IPv6 Template as the IPv6 address type, select an existing IPv6 address template or create one. See Create or edit an IPv6 address template. |
|
Host Type |
If you selected IPv6 Template as the IPv6 address type, select any or specific. If you select specific, enter the host name. |
|
Interface |
Select the interface to which you want to bind the IPv4 address. Select any if you want to bind the IP address with the interface when you create a policy. |
|
Host |
Enter or select the host name. |
|
Host Regex Pattern |
If you selected Host Regex Match as the proxy address type, enter the appropriate string. |
|
URL Path Regex |
If you selected URL Pattern or Advanced (Destination) as the proxy address type, enter the appropriate string. |
|
URL Category |
If you selected URL Category or Advanced (Destination) as the proxy address type, select the FortiGuard web filter category or categories. |
|
URL List |
If you selected URL List as the proxy address type, select a URL list from the list. |
|
Request Method |
If you selected HTTP Method or Advanced (Source) as the proxy address type, select CONNECT, DELETE, GET, HEAD, OPTIONS, POST, PUT, or TRACE. |
|
User Agent |
If you selected User Agent or Advanced (Source) as the proxy address type, select a browser or browsers. |
|
Header Name |
If you selected HTTP Header as the proxy address type, enter the header name. |
|
Header Regex |
If you selected HTTP Header as the proxy address type, enter the appropriate string value. |
|
Request Method |
If you selected Advanced (Source) as the proxy address type, select CONNECT, DELETE, GET, HEAD, OPTIONS, POST, PUT, or TRACE. |
|
HTTP Header |
If you selected Advanced (Source) as the proxy address type, enter the name and value of the header. |
|
Static Route Configuration |
Enabling this feature includes the address in the listing of named addresses when setting up a static route. This option is available only when the Type is FQDN, IP Range, or Subnet. |
|
Comments |
Optionally, enter a description of the address. |
|
API Preview |
The API Preview allows you to view all REST API requests being used by the page. You can make changes on the page that are reflected in the API request preview. This feature is not available if the user is logged in as an administrator that has read-only GUI permissions. |
To use the API Preview:
-
Click API Preview. The API Preview pane opens, and the values for the fields are visible (data). If a new object is being created, the POST request is shown.
-
Enable Show modified changes only to show the modified changes instead of the full configuration in the preview.
-
Click Copy to Clipboard to copy the JSON code shown on the preview screen to the clipboard.
-
Click Close to leave the preview.