
Whatʼs new
The following sections describe new features and enhancements:
-
Forward traffic logs and HTTP transaction logs include the forwardedfor field
-
Display the correct information when doing NTLM authentication
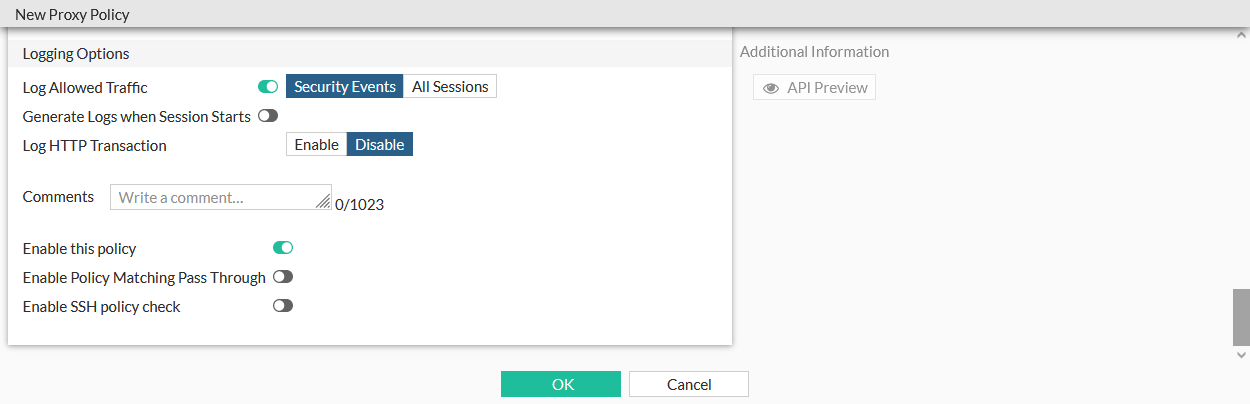
SSH policy matching
When configuring a firewall policy, the ssh-policy-check command has replaced the ssh-policy-redirect command.
SSH policy check is disabled by default, and can be enabled in transparent and explicit-web policies. When it is enabled, SSH policy matching will only match the SSH policy.
To configure SSH policy check in the CLI:
config firewall policy
    edit <policy>
        set ssh-policy-check {disable | enable}
    next
end
To configure SSH policy check in the CLI:
-
Go to Policy & Objects > Policy.
-
Edit a transparent or explicit policy, or create a new policy and set Type to Transparent or Explicit.
-
Enable or disable Enable SSH policy check.
-
Click OK.
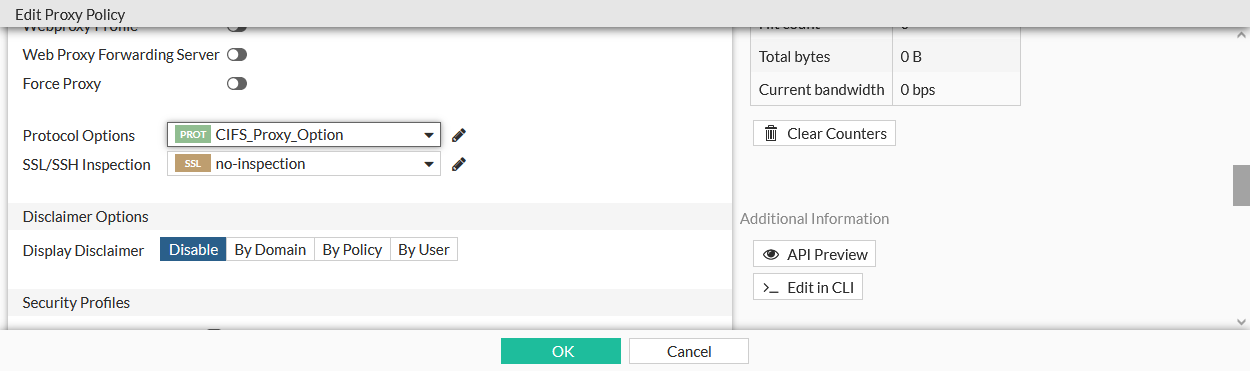
Set CIFS profile in a policy removed
The cifs-profile command is removed from the firewall policy options.
CIFS can be configure in the GUI by creating or editing a proxy option under Proxy Settings > Proxy Options, and in the CLI using the config firewall profile-protocol-options command:
config firewall profile-protocol-options
    edit <option>
        config cifs
            set ports <port>
            set status {enable | disable}
            set options <string>
            set oversize-limit <integer>
            set uncompressed-oversize-limit <integer>
            set uncompressed-nest-limit <integer>
            set scan-bzip2 {enable | disable}
            set tcp-window-type {auto-tuning | system | static | dynamic}
            set server-credential-type {none | credential-replication | credential-keytab}
        end
    next
end
The proxy option can be then be used in a policy:
-
In the CLI, select the option using the set
profile-protocol-options <option>command:config firewall policy edit 1 set profile-protocol-options <option> next end -
In the GUI, select the option in the Protocol Options field when editing a policy.
External threat feed through forwarding server
FortiProxy can download external threat feeds as a downstream-proxy in an isolated environment, where the upstream-proxy only has internet access. All SWG functions, including SSL deep-inspection, are performed by the downstream proxy. FDS updates and management is done on the FortiManager.
To configure the external proxy:
config system external-resource
    edit <resource>
        set proxy <proxy_server>
        set proxy-port <port>
        set proxy-username <username>
        set proxy-password <password>
    next
end
|
proxy <proxy_server> |
Proxy server host (IP or domain name). |
|
proxy-port <port> |
Port number that the proxy server expects to receive HTTP sessions on (1 - 65535, default = 8080). |
|
proxy-username <username> |
HTTP proxy basic authentication user name. |
|
proxy-password <password> |
HTTP proxy basic authentication password. |
Device ownership CLI command
When device ownership is enabled, ownership enforcement is done at policy level. It is disabled by default.
To enable device ownership:
config firewall policy
    edit 2
        set ztna-status enable
        set ztna-ems-tag "FCTEMS_ALL_FORTICLOUD_SERVERS"
        set device-ownership enable
        ...
    next
end
Custom virtual host replacement message
Custom messages can be configured for each ZTNA virtual host, to be shown when verification fails. The ZTNA detail tag (%%ZTNA_DETAIL_TAG%%) can be included to show the reason for the verification failure.
To use a custom replacement message:
-
Configure a replacement message that includes the ZTNA detail tag in the message:
config system replacemsg-group edit "test-vhost" set comment '' set group-type utm config webproxy edit "ztna-block" set buffer "This is a test message: %%ZTNA_DETAIL_TAG%%" set header http set format html next end next end -
Apply the replacement message to a virtual host:
config firewall access-proxy-virtual-host
    edit "test"
        set host "10.1.200.102"
        set replacemsg-group "test-vhost"
    next
end
Proxy policy FTPS handling improvements
To improve FTPS handling in proxy policies:
-
When
explicit-ftp-tlsis enabled in the FTP protocol options, FTP is always redirected, regardless of the FTPS status, and deep inspection is done for the explicit FTPS session.config firewall profile-protocol-options edit "test" config ftp set ports 21 set status enable set explicit-ftp-tls {disable | enable} end next end -
When deep inspection is enabled, FTPS is always redirected.
SSL options can be configured in SSL/SSH profiles when the protocol is disabled:
config firewall ssl-ssh-profile
    edit "no-inspection"
        config ftps
            set status disable
            set client-certificate bypass
            set unsupported-ssl-version allow
            set unsupported-ssl-cipher allow
            set unsupported-ssl-negotiation allow
            set expired-server-cert block
            set revoked-server-cert block
            set untrusted-server-cert allow
            set cert-validation-timeout allow
            set cert-validation-failure block
            set min-allowed-ssl-version tls-1.1
        end
    next
end
Forward traffic logs and HTTP transaction logs include the forwardedfor field
The HTTP transaction and Forward session logs include the ClientIP column, that records the client IP address based on the learn-client-ip configuration. By default, the original-source-ip is recorded.
config web-proxy global
    set learn-client-ip {enable | disable}
    set learn-client-ip-from-header {true-client-ip x-real-ip x-forwarded-for}
    set learn-client-ip-srcaddr <address>
    set learn-client-ip-srcaddr6 <address>
end
|
learn-client-ip {enable | disable} |
Enable/disable learning the client's IP address from headers (default = disable). |
|
learn-client-ip-from-header {true-client-ip | x-real-ip | x-forwarded-for} |
Learn client IP address from the specified headers: True-Client-IP, X-Real-IP, and X-Forwarded-For. |
|
learn-client-ip-srcaddr(6) <address> |
Source address name (srcaddr or srcaddr6 must be set). |
Display the correct information when doing NTLM authentication
When doing NTLM authentication, the domain is extracted based on the following:
-
If the domain controller has a domain name configured, it is used.
-
Otherwise, if the NTLM type 3 message, from the user, is configured, it is used.
-
Otherwise, if the domain name from the NTLM type 2 message, from the DC, is configured, it is used.
To configure the domain name source, if it is not set:
config user domain-controller
    edit "adfs-dc"
        set ip-address 192.168.130.200
        unset domain-name
        set domain-name-src {server | client}
        set ldap-server "adfsldap"
    next
end
The domain name can be extracted from either the server's (DC) data, or from the client's data.