


Creating a ZTNA server
|
|
It is not suggested to create a new ZTNA server on GUI. |
To configure a ZTNA server, define the access proxy VIP and the real servers that clients will connect to. The access proxy VIP is the FortiPAM ZTNA gateway that clients make HTTPS connections to. The service/server mappings define the virtual host matching rules and the real server mappings of the HTTPS requests.
To configure a ZTNA server:
- Go to System > ZTNA and select the ZTNA Servers tab.
- Select +Create New.
The New ZTNA Server window opens.
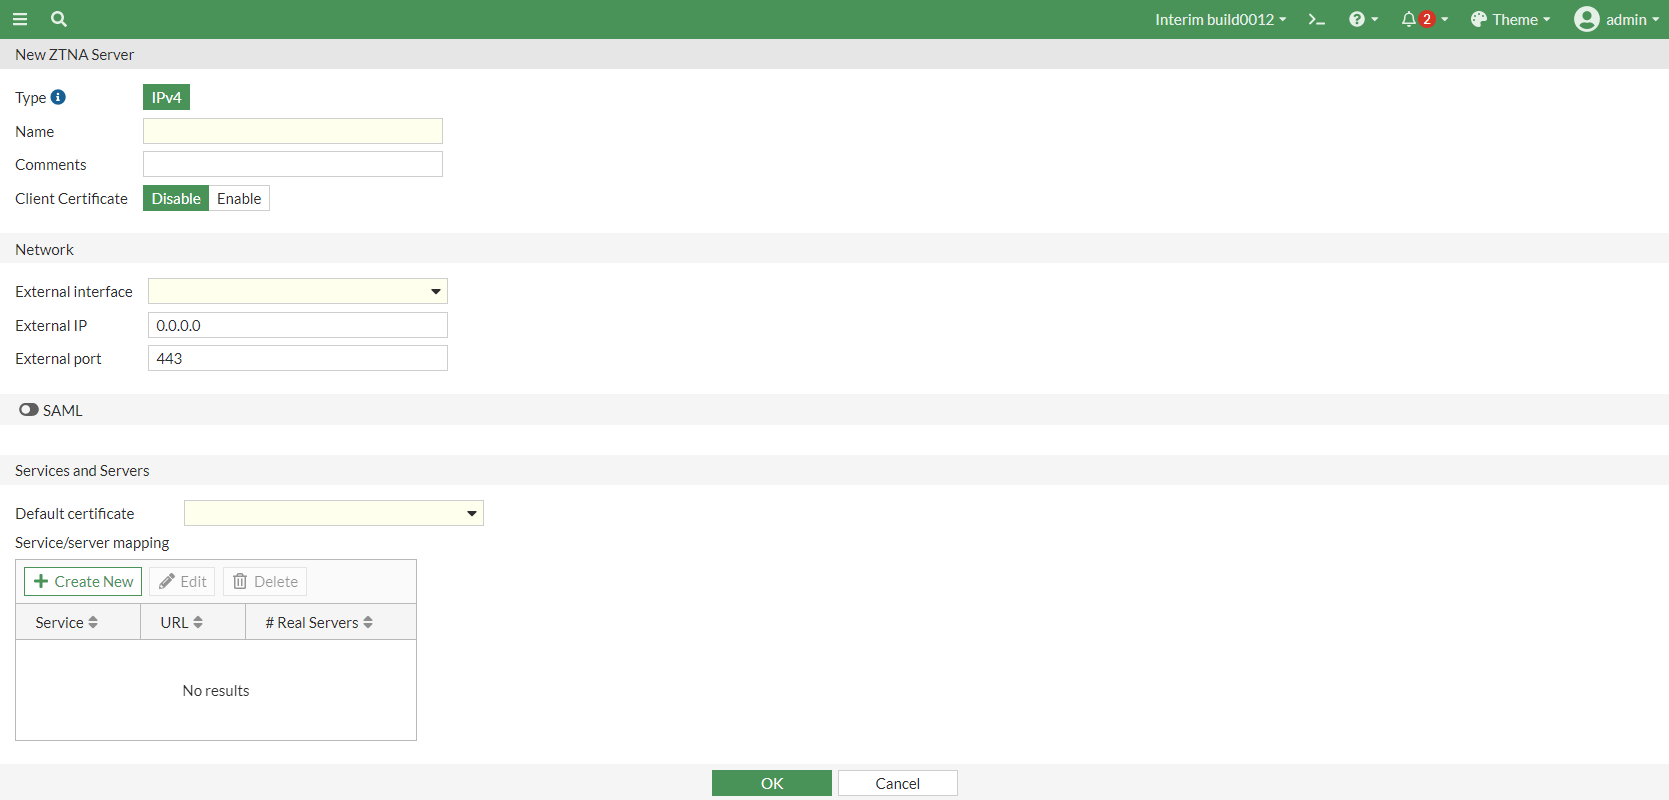
- Enter the following information:
Type
IPv4 address type used to access the ZTNA server.
Note: The option is non-editable.
Name
The name of the server.
Comments
Optionally, enter comments about the server.
Client Certificate
Enable/disable client certificate.
Note: The option is disabled by default.
Network
External interface
From the dropdown, select an external interface or create a new interface.

Use the search bar to look for an interface.
Use the pen icon next to the interface to edit it.
Note: The option is only available when the Type is IPv4.
External IP
The external IP address.
External port
The external port number the clients will connect to (default = 443).
SAML
Note: The option is disabled by default.
SAML SSO server
From the dropdown, select a SAML SSO server.
Use the search bar to look for a SAML SSO server.
Note: The option is only available when SAML is enabled.
Services and Servers
Default certificate
From the dropdown, select or create a default certificate.
Clients will be presented with this certificate when they connect to the access proxy VIP.
Use the search bar to look for a default certificate.
Service/servermapping
Select +Create New to create a new service/server mapping. See Creating a service/server mapping.
To edit or delete a service/server mapping, select a service/server mapping and then select Edit or Delete.
- Click OK.
Creating a service/server mapping
To create a service/server mapping:
-
In step 3 when Creating a ZTNA server, select +Create New in Service/server mapping.
The New Service/Server Mapping window opens.

- Enter the following information:
Type
IPv4 is the IP address type.
Note: The option is non-editable.
Service
Select from the following three services:
HTTP
HTTPS (default)
TCP Forwarding
Virtual Host
Select from the following two options:
Any Host : Any request that resolves to the access proxy VIP will be mapped to your real servers.
For example, if both
www.example1.comandwww.example2.comresolve to the VIP, then both requests are mapped to your real servers.Specify: Enter the name or IP address of the host that the request must match in Host.
For example, if
www.example1.comis entered as the host, then only requests towww.example1.comwill match.
Note: The option is not available when the Service is set as TCP Forwarding.
Match by
Select either Substring or Wildcard based match.
Note: The option is only available when the Virtual Host is Specify.
Use certificate
From the dropdown, select a certificate or create a new certificate.
Use the search bar to look for a certificate.
Note: The option is only available when the Virtual Host is Specify.
Match path by
The path can be matched by one of the following three options:
Substring
Wildcard
Regular Expression
Note: The option is not available when the Service is set as TCP Forwarding.
Path
The path.
For example, if the virtual host is specified as
www.example1.com, and the path substring ismap1, thenwww.example1/map1will be matched.Note: The option is not available when the Service is set as TCP Forwarding.
Servers
Select +Create New to create a new server. See Creating a server.
To edit or delete a server, select a server and then click Edit or Delete.
Load balancing
Enable and select one of the following load balancing methods:
Round Robin: Distribute to server based round robin order.
Weighted: Distribute to server based on weight.
First Alive: Distribute to the first server that is alive.
HTTP Host: Distribute to server based on the host field in the HTTP header.

The option is only effective when there are multiple servers. Note: The option disabled by default.
Note: The option is not available when the Service is set as TCP Forwarding.
- Click OK.
Creating a server
To create a server:
-
In step 2 when Creating a service/server mapping, select +Create New.
The New Server window opens.
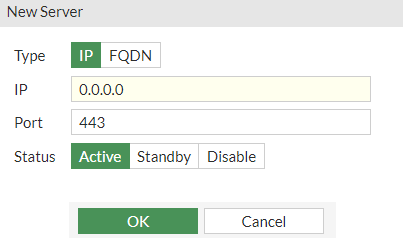
- In Type, select either IP or FQDN.
- If the Type is IP, in IP, enter the server IP address.
If the Type is set as FQDN, from the Address dropdown, select an address or create an address.
Use the search bar to look for an address.
Use the pen icon next to the address to edit the address.
- In Port, enter the server port number (default = 443, 1 - 65535).
- In Status, set the status of the server from the following three options:
Active (default)
Standby
Disable
- Click OK.