


Appendix B: Installation on VMware
Once you have downloaded the out.ovf.zip file and extracted the package contents to a folder
on your management computer, you can deploy it into your VMware environment.
To deploy the FortiPAM-VM OVF template:
- Connect to your VMware ESXi server by visiting its URL in your browser. Enter your username and password, and click Log in.
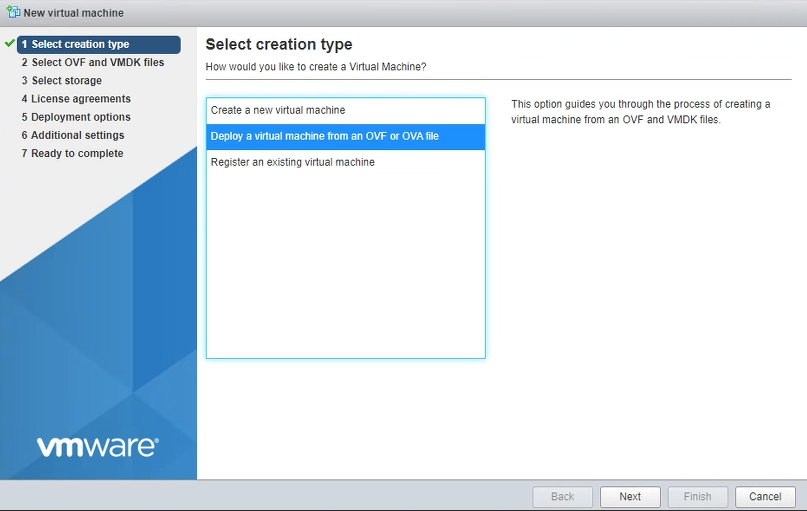
- Select Create/Register VM.
The VM creation wizard opens.
- Select Deploy a virtual machine from an OVF or OVA file, and click Next.
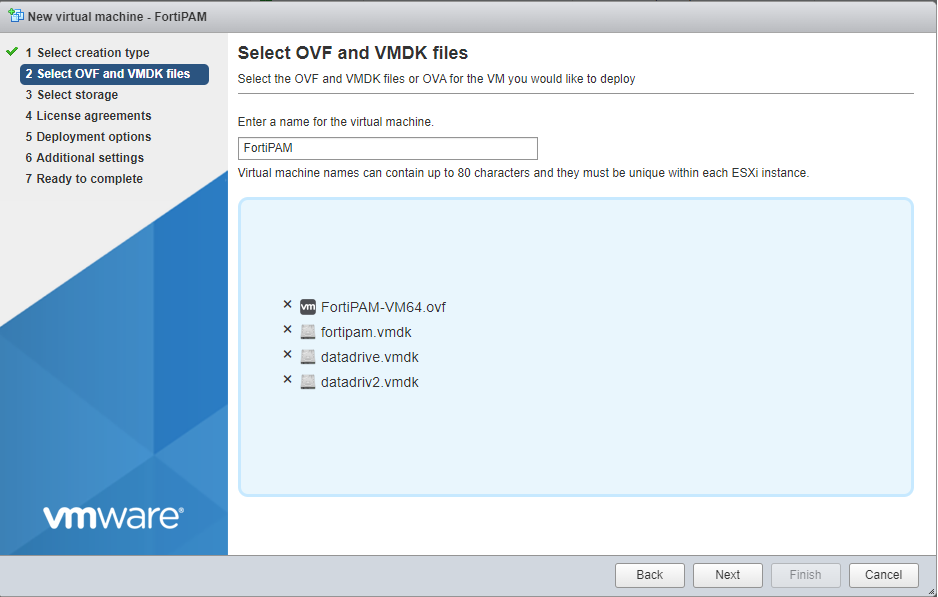
- Enter a name for your VM and select the files (FortiPAM-VM64.ovf, fortipam.vmdk, datadrive.vmdk, and datadriv2.vmdk) previously extracted to your management computer, and click Next.
- Select which ESXi server's datastore to use for the deployment of FortiPAM-VM, and click Next.

- Read the licensing terms and click I agree and Next.

- Select the appropriate network mappings, disk provisioning, and power on options for your deployment, and click Next.
- Thin Provision: This option optimizes storage use at the cost of sub-optimal disk I/O rates. It allocates disk space only when a write occurs to a block, but the total volume size is reported by VMFS to the OS. Other volumes can take the remaining space. This allows you to float between your servers and expand storage when your size monitoring indicates there is a problem. Once a Thin Provisioned block is allocated, it remains in the volume regardless of whether you have deleted data, etc.
- Thick Provision: This option has higher storage requirements, but benefits from optimal disk I/O rates. It allocates the disk space statically. No other volumes can take the allocated space.

By default, the log disk and video disk size are 30 GB. If you want to change the size, unselect Power on automatically to ensure that any disk size change is made before first powering on the VM.
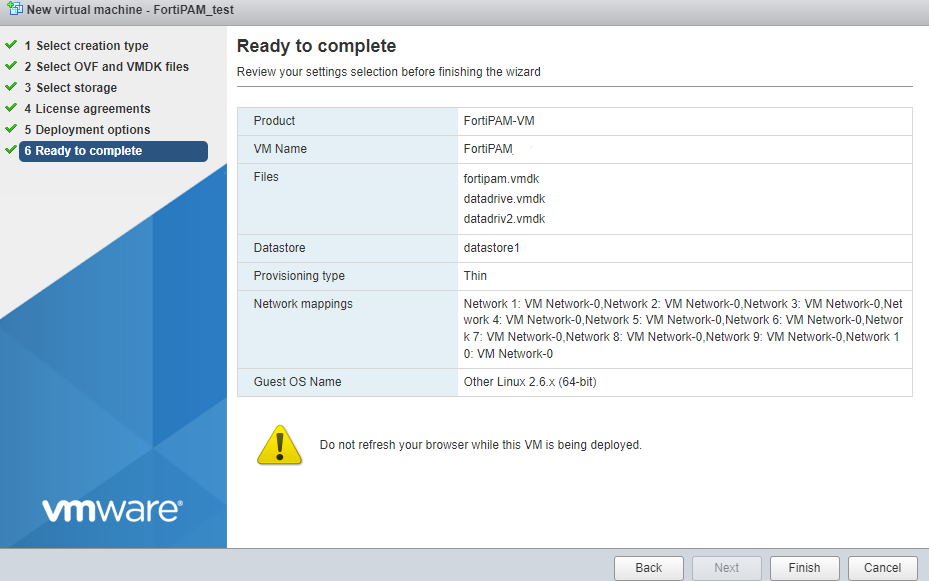
- Review the summary of your VM settings, and click Finish.
- Select your newly created VM and launch it.
The VM console will be displayed where you can monitor the booting progress of your FortiPAM-VM.
See FortiPAM appliance setup for CLI related settings to verify the disk usage type and set up FortiPAM.
- The default size for the log and the video disk is 30 GB. If the size does not meet your requirement, see Log and video disk size guidelines in System requirements in the VMware ESXi Admin Guide.
To adjust the log or video disk size:

Disk size tuning results in the loss of existing logs and videos.
- Shutdown your VM.
- In the VMware vSphere Client, right-click the name of the virtual appliance, and select Edit settings.
The Edit settings page is displayed.
- Ensure that you are in the Virtual Hardware tab.
- Adjust Hard disk 2 for log disk size and adjust Hard disk 3 for video disk size.

- Click Save to save the changes.
You can now power on the VM.
- If Power on automatically is unselected in step 7 and the VM has never been powered on, any disk size change automatically takes effect after the VM is powered on the first time.
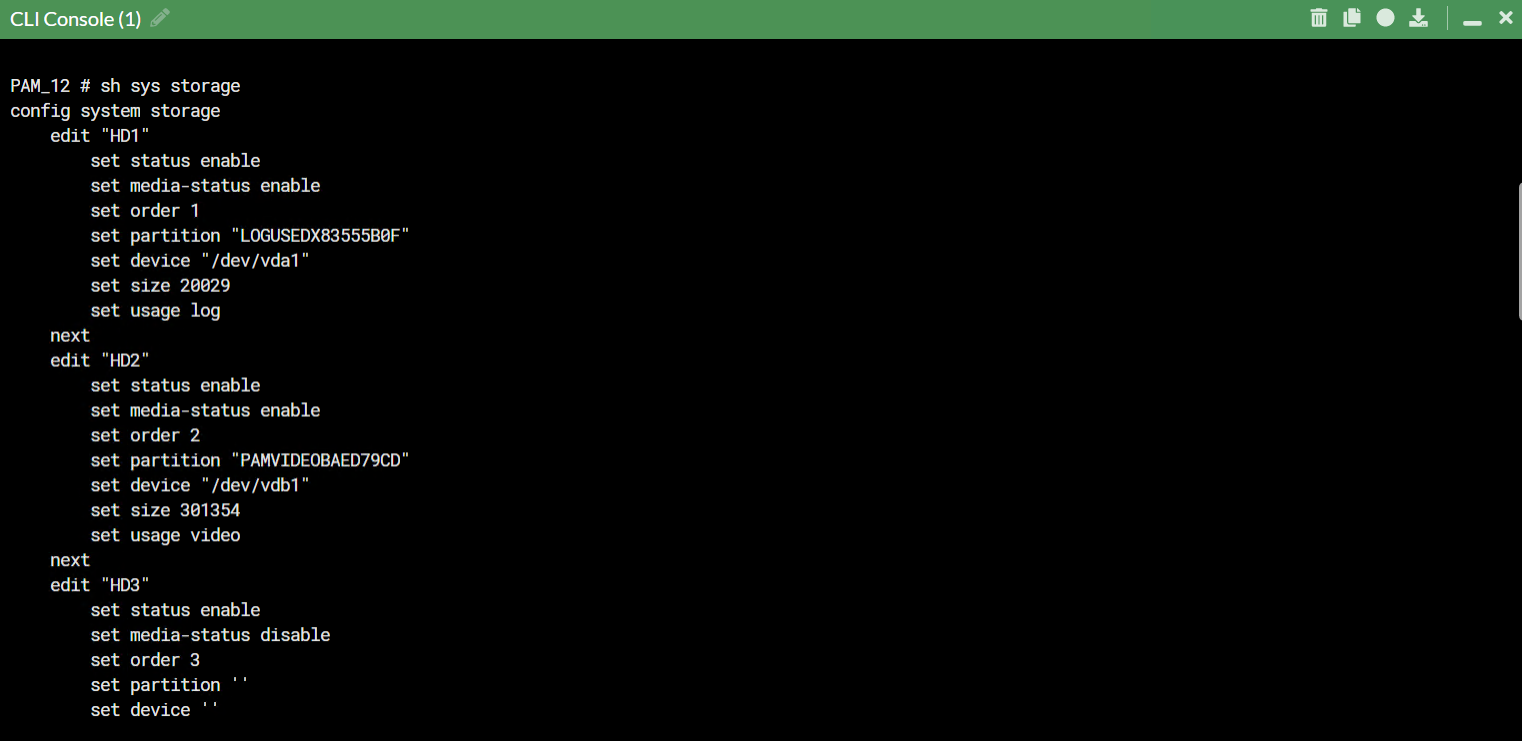
If the disk sizes are tuned after powering on the VM for the first time, enter
sh sys storageCLI command to verify that the disk size change was successful:config system storage
edit "HD1"
set status enable
set media-status enable
set order 1
set partition "LOGUSEDX83555B0F"
set device "/dev/vda1"
set size 20029
set usage log
next
edit "HD2"
set status enable
set media-status enable
set order 2
set partition "PAMVIDEOBAED79CD"
set device "/dev/vdb1"
set size 301354
set usage video
next
edit "HD3"
set status enable
set media-status disable
set order 3
set partition ''
set device ''
If the displayed disk size is not what you had configured, enter the following command to format the log and the video disk:
execute disk format <disk_ref>
Note:
<disk_ref>can be checked using the command execute disk list.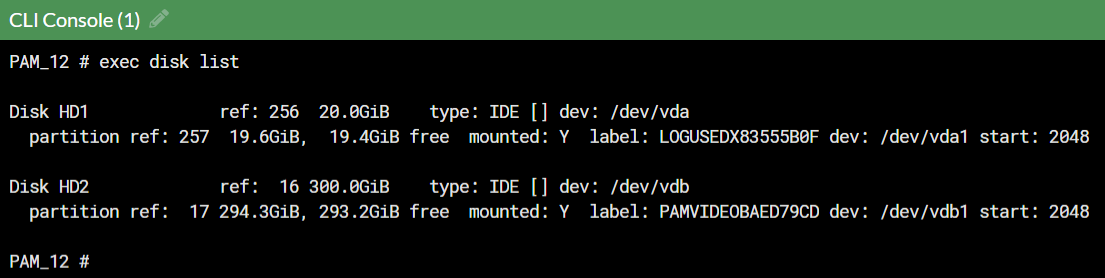
HD1 is used for the log disk and the
disk_refis 256.HD2 is used for the video disk and the
disk_refis 16.In the above example, disks can be formatted by entering the following commands:
execute disk format 256 #HD1
execute disk format 16 #HD2
Disk formatting results in the loss of all existing logs and videos.